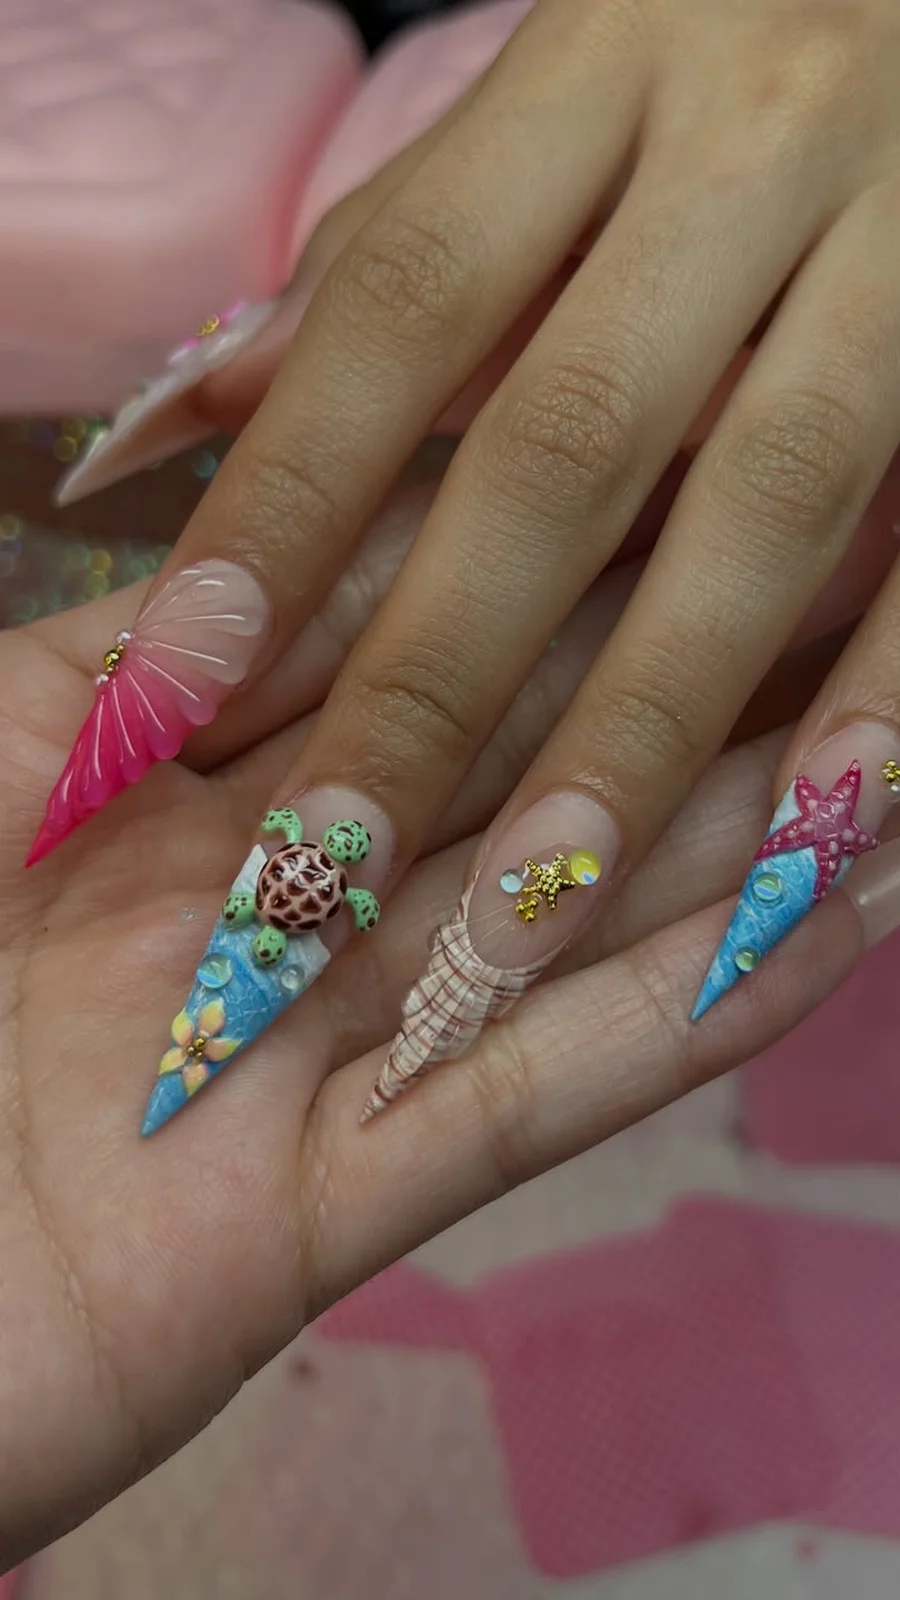
The Day I Stopped Thinking of Turtles as a Novelty
I will be honest: the first time someone showed me turtle nails, I laughed. A tiny painted turtle on a fingernail sounded like the kind of thing you get once, on holiday, and never again. Then I saw the set in person — a glossy amber tortoiseshell on almond nails, with one small sea turtle swimming across a turquoise accent nail — and I understood immediately. This is not a joke manicure. It is one of the prettiest ideas in nail art, because it gives you two looks in one: the rich, grown-up warmth of tortoiseshell, and the pure, uncomplicated charm of a little sea creature.
That is the whole trick of turtle nails. The tortoiseshell pattern does the elegant work. Amber, honey, chocolate and black swirled together in a translucent gloss looks expensive on any hand, goes with everything from denim to a linen dress, and never really goes out of fashion. The turtle art does the joyful work. One small painted turtle, a shell pattern on a single nail, a wave in turquoise — and suddenly the manicure has a personality.
This guide is a walk along the shore. We start on the sand, where the tortoiseshell classics live. Then we wade into the shallows for the cute turtle art, swim out to the reef for the bright ocean colours, and finish in the deep water, where the designs get bolder and more dramatic. Eighteen ideas in total, and every one of them is wearable — no design here needs a holiday to justify it, though a holiday certainly helps.
Before we start, two practical things. First, tortoiseshell is a layering technique, not a single polish: your technician builds it up from a sheer amber base with blobs of brown and black, so ask to see their tortoiseshell work before you book. A good tortoiseshell looks like stained glass. A rushed one looks like a spill. Second, tiny turtle faces need a steady hand and a fine brush. If hand-painted animals are not your technician’s thing, say so early and choose one of the pattern-only designs — the tortoiseshell sets in this guide need no drawing at all.
How to Pick Your Turtle — Shape, Length and Colour
Turtle nails are forgiving, but a little planning makes them better. The shape matters more than people think. Almond and oval shapes suit tortoiseshell best, because the long, soft curve gives the amber pattern room to swirl, the way it does on a real shell. Square and squoval shapes suit the cute turtle art, because the flat, wide nail is a better canvas for a little face and flippers. Short nails are not a problem at all — in fact, the neatest turtle sets I have seen were on short nails, where one accent turtle and nine tortoiseshell nails looked intentional rather than crowded.
Length is a trade-off. Long nails show off the tortoiseshell pattern beautifully, and they give a painted turtle room to breathe. Short nails are easier to live with, and they make the cute designs feel even cuter — there is something about a tiny turtle on a tiny nail that is hard to resist. If you are choosing between the two, ask yourself how you use your hands. Gardeners, typists, parents of small children: go short, and put the turtle on one accent nail. Everyone else: almond, medium length, and let the pattern do the talking.
Colour is the third decision, and it is the one people get wrong most often. Tortoiseshell is warm — amber, honey, caramel, chocolate — so it pairs naturally with warm skin tones, gold jewellery and earthy clothes. The ocean designs are cool — turquoise, teal, seafoam — and they pair with silver, white linen and denim. You can mix warm and cool in one set, and several designs below do exactly that, but keep one of them in charge. A set that is mostly warm with one cool accent nail looks deliberate. A set that is half warm and half cool looks like two manicures arguing.
On the Sand: Tortoiseshell Classics
The sand is where tortoiseshell belongs. These are the designs that made the pattern famous: warm amber, deep chocolate, glossy as sea glass. They are the most wearable designs in this guide, the ones you can wear to work, to a wedding, or to the beach without changing a thing. If you have never tried tortoiseshell before, start here. If you have tried it and loved it, these are the variations worth knowing.
1. Classic Amber Tortoiseshell on Almond
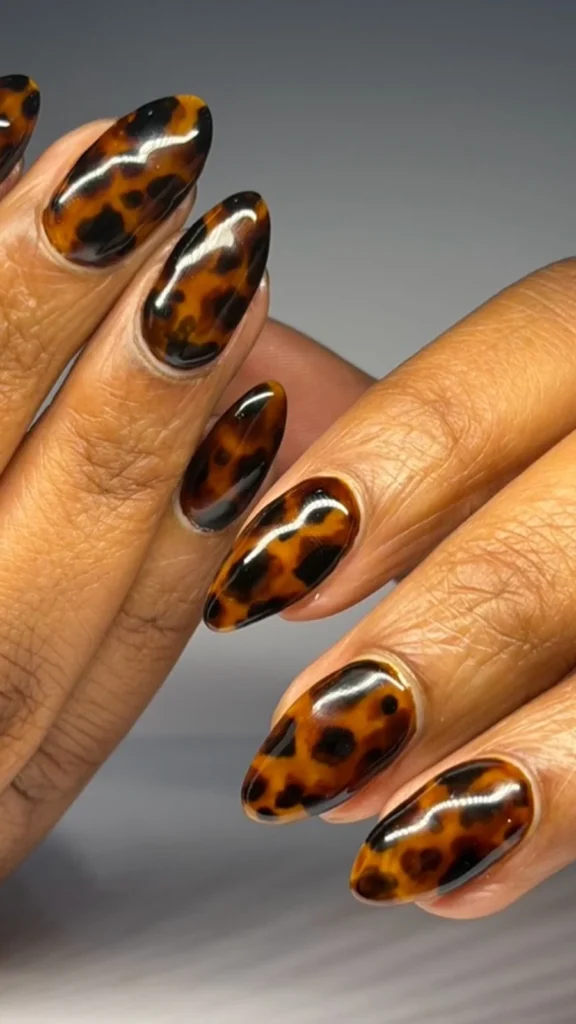
This is the design that converts people. Every nail is tortoiseshell — a sheer amber base with swirls of honey, caramel and deep brown, sealed under a high-gloss top coat so the whole set looks like polished stone. There is no accent nail, no extra art, nothing to distract from the pattern itself, and that is exactly the point. When the pattern is this good, it does not need help.
What makes it work is the translucency. Real tortoiseshell is not opaque; light passes through it, and the colours sit in layers. A good technician recreates that by building the pattern in thin coats — amber first, then blobs of brown and black while the base is still wet, so the edges bleed softly into each other. The result has depth. You can look into it, the way you can look into a piece of amber held up to the sun. Cheap tortoiseshell looks flat because it is painted in one layer. Good tortoiseshell looks like it goes all the way down.
Additional Information: Ask for a sheer amber jelly base with brown and black blooming gel or polish blobs, layered in thin coats, on medium almond nails. Finish with two coats of glossy top coat for the glassy depth. This design suits every skin tone and pairs beautifully with gold rings. Book a fill at two to three weeks, as the amber base shows regrowth.
2. Milky Tortoiseshell with a Sheer Base
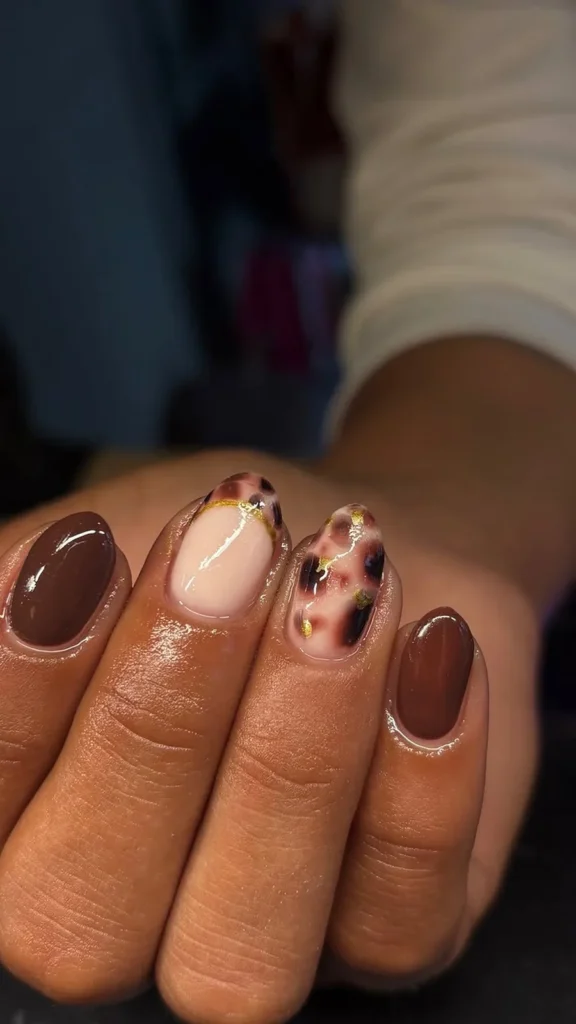
If classic tortoiseshell feels a little too rich for you, this is its softer sister. The base is a sheer, milky nude — the colour of sand mixed with a little cream — and the tortoiseshell pattern floats in it in pale honey and soft toffee, barely there, like a watercolour. It is the most delicate design in this guide, and the one most likely to be mistaken for your natural nails by someone glancing at your hands.
The trick is restraint. The pattern should cover perhaps half of each nail, drifting in from the edges rather than filling the whole surface, so the milky base stays visible and the whole set looks light. It suits short nails beautifully, and it is the best tortoiseshell option if you work somewhere conservative, because from a normal distance it reads as a very pretty nude manicure. Only up close does the shell pattern reveal itself.
Additional Information: Ask for a sheer milky nude base with soft honey and toffee tortoiseshell patches, kept light and translucent, on short to medium oval nails. One coat of glossy top coat is enough — too much gloss makes the milky base look heavy. It grows out gracefully, so it is a good choice if you stretch your manicures to three weeks.
3. Tortoiseshell French Tips
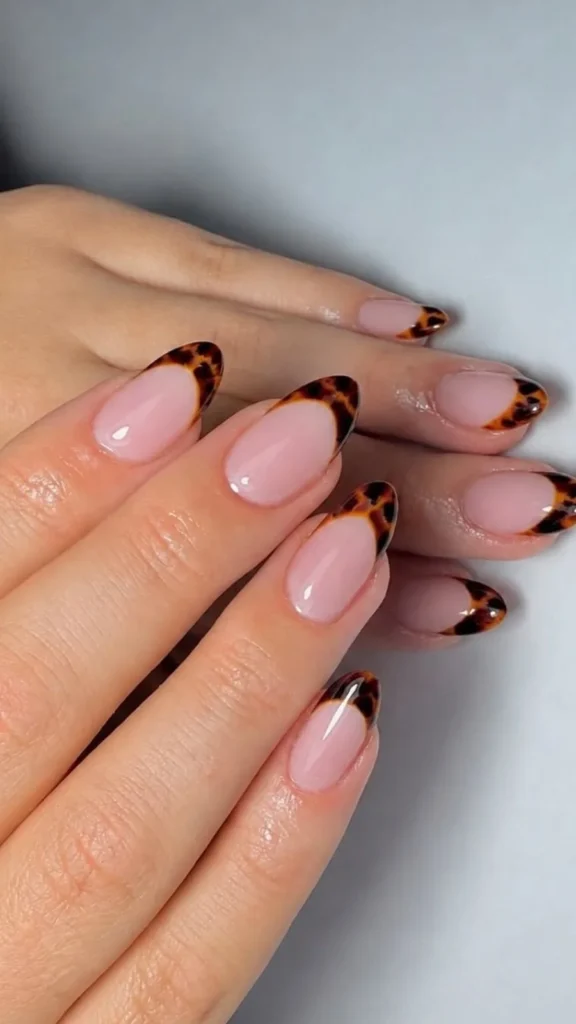
The French manicure and tortoiseshell should have met years ago. The base is a sheer, healthy-looking nude, and instead of a white tip, the smile line is drawn in tortoiseshell — amber, brown and black swirling along the very edge of the nail. It is the cleverest design in this guide, because it gives you two classics at once, and because it is so easy to wear.
The smile line needs to be neat. A wobbly tortoiseshell tip looks like a mistake, while a clean one looks like the most expensive manicure in the room. Ask your technician to draw the smile line first in a thin amber, then add the brown and black blobs inside it, keeping everything above the line. The thinner the tip, the more elegant it looks; a thick tip eats up the nude base and the whole set gets heavy.
Additional Information: Ask for a sheer nude base with a tortoiseshell French smile line on each nail, drawn with a fine brush, on short to medium squoval nails. Seal with a glossy top coat and ask the technician to cap the free edge, because the tip is the first place a French manicure wears. It is a lovely choice for a wedding guest or for the office.
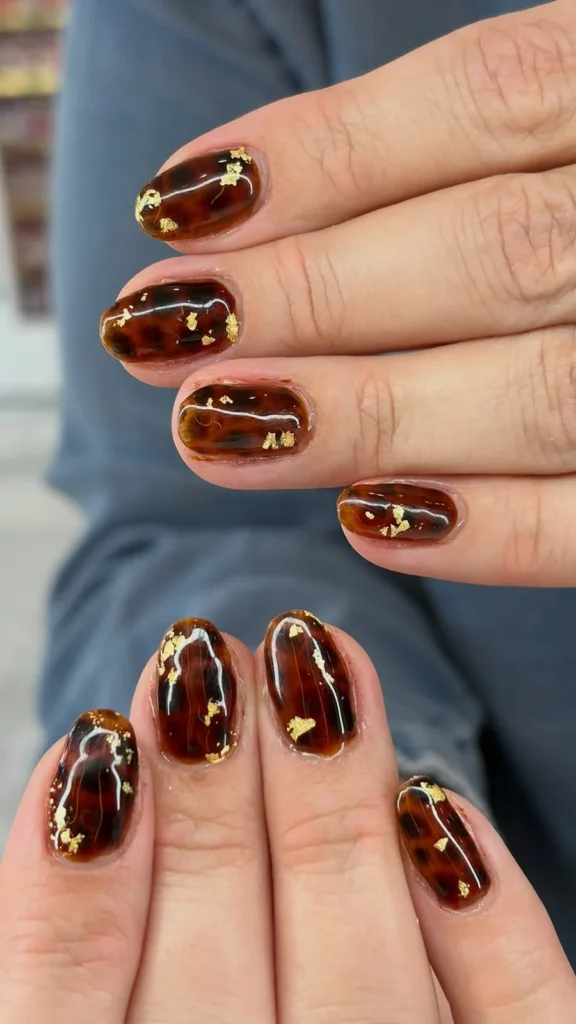
4. Tortoiseshell with Gold Foil
Gold and tortoiseshell were made for each other. The base is a classic amber tortoiseshell, and over it — on two or three accent nails, or scattered lightly across all ten — are flakes of gold foil, pressed into the top coat while it is still tacky. The foil catches the light when your hand moves, and against the warm amber it looks like sunlight on water.
The placement matters. Gold foil scattered everywhere can look messy, like glitter that escaped. The prettiest version keeps the foil to the edges of the nails, or to one corner of each accent nail, so it reads as a deliberate detail rather than an accident. And it needs a thick top coat over it, because foil lifts if it is not sealed properly, and nothing ruins a manicure faster than a flake peeling off on day three.
Additional Information: Ask for classic amber tortoiseshell with gold foil flakes placed near the cuticle or along one edge of two or three accent nails, sealed under two coats of glossy top coat. This design looks best on medium to long almond nails and pairs with gold jewellery. Avoid heavy hand cream on the first day so the seal sets properly.
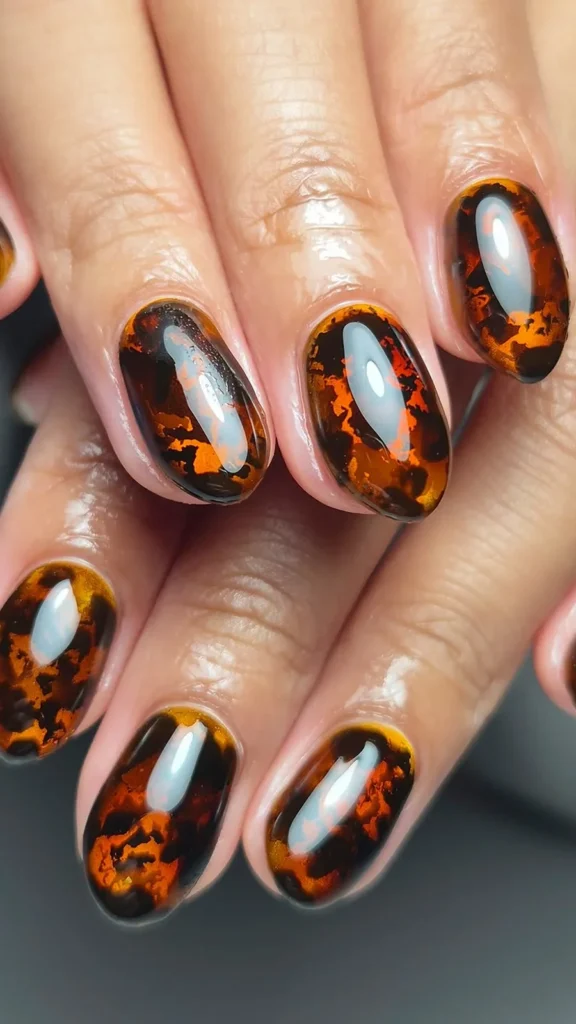
5. Black and Amber Tortoiseshell
This is the boldest of the classics, and the one with the most contrast. The pattern is the same amber tortoiseshell, but the dark tones are pushed further — deep, almost-black brown and true black, in bigger patches — so the amber glows against them like embers. It is dramatic without being loud, and it is the tortoiseshell for people who usually wear dark colours and do not want their nails to be the palest thing about them.
The balance is everything. Too much black and the set looks like a dark manicure with amber stains. Too little and it is just classic tortoiseshell again. The sweet spot is roughly a third dark, two-thirds amber, with the black sitting mostly at the edges and corners of the nails, framing the honey in the middle. On long nails the effect is genuinely striking. On short nails it reads as a rich, dark manicure with a secret.
Additional Information: Ask for amber tortoiseshell with larger, deeper black-brown patches, roughly a third of each nail, on medium to long almond or coffin nails. Two coats of glossy top coat deepen the contrast. This design suits cool and deep skin tones particularly well and looks wonderful with silver as well as gold.
In the Shallows: Cute Turtle Art
Now we meet the turtles. These are the designs that make people smile — small hand-painted sea turtles, tiny faces, little flippers, the whole charming business. They are best as accent nails, one or two per hand, with the rest of the set kept simple so the turtle gets the attention it deserves. A whole hand of turtles is a lot of turtles. One turtle, done well, is perfect.
6. Sea Turtle Accent on a Sandy Nude Set
This is the design to show someone who says they want cute turtle nails but does not want anything too much. Nine nails are a warm sandy nude — the colour of dry sand, soft and plain — and one accent nail on each hand carries a small painted sea turtle, swimming across a pale turquoise patch of water. The turtle is simple: a green shell, four flippers, a little head, maybe a smile if your technician is feeling generous.
What makes it work is the contrast between the plain nails and the one painted one. The sandy nude is calm and quiet, so when your eye lands on the turtle it feels like a discovery, not a shout. It is also the most practical cute design in this guide. The plain nails are easy to maintain, the turtle is small enough to survive two weeks of wear, and if the accent nail chips you can fix it without redoing the whole set.
Additional Information: Ask for a warm sandy nude on nine nails and a hand-painted sea turtle on one accent nail per hand, painted with a fine brush over a pale turquoise base. This design suits short to medium nails of any shape. Seal the accent nail with two coats of top coat so the painting is protected. It pairs with anything, which is the point.
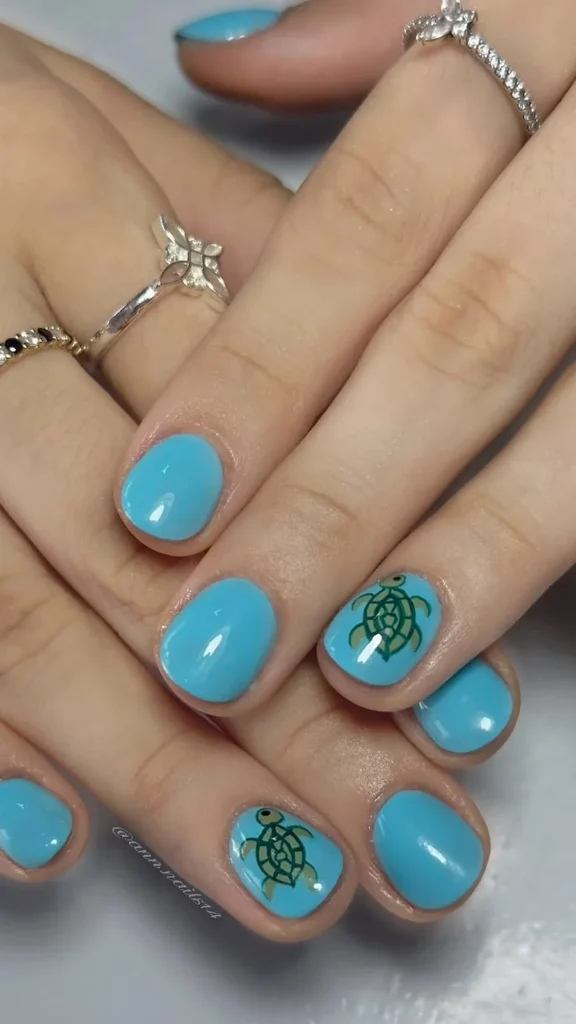
7. Baby Turtle on a Turquoise Sea
If the previous design is a turtle you discover, this one is a turtle you cannot miss. Every accent nail is a little scene: a turquoise sea, painted in two shades so it looks like shallow water over sand, and a baby turtle swimming across it, smaller and rounder than a grown turtle, with big eyes and a shell in soft green. The remaining nails are a solid turquoise or a soft seafoam, so the whole set feels like the ocean.
The baby turtle is the hardest thing to paint in this guide, because cute lives or dies on proportion. A turtle with a head too big looks like a cartoon. A turtle with flippers too small looks like a blob. Ask your technician to show you their animal work before you commit, and if they hesitate, choose the simpler sea turtle accent above. A good baby turtle is worth waiting for. A bad one is not worth wearing for two weeks.
Additional Information: Ask for a turquoise sea scene with a hand-painted baby turtle on two accent nails and solid turquoise or seafoam on the rest, on medium oval or almond nails. The turtle should be painted after the sea base is fully dry, so the lines stay crisp. This is a holiday design, but it works just as well as a cheerful everyday set.
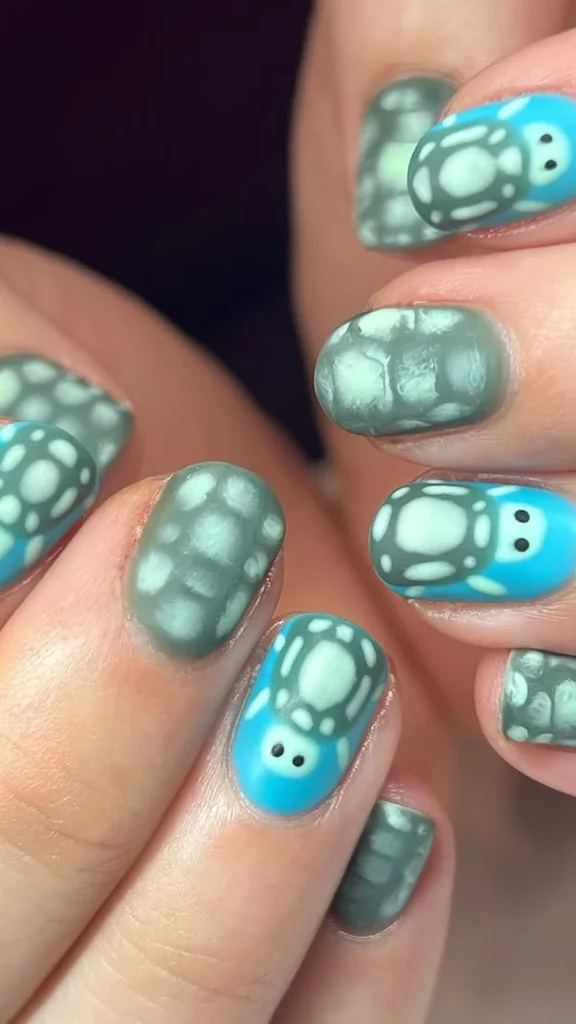
8. Tiny Turtle Faces on Short Nails
Short nails deserve cute art too, and this design is built for them. The base is a soft, pale aqua — barely blue, more like the colour of shallow water — and on two or three nails per hand there is just a turtle’s face: a small green head peeking up from the bottom edge of the nail, two tiny eyes, nothing else. It is the most minimal turtle in this guide, and somehow the most charming, because the turtle looks like it is peeking at you.
The faces need to be small and neat, and they need to be in the same place on each nail — the bottom edge, just above the cuticle — or the set looks scattered. The rest of the nails stay plain aqua, which is what makes the faces land. It is a lovely design for anyone who has never had nail art before, because it is cute without being a commitment, and it grows out without looking strange.
Additional Information: Ask for a pale aqua base with tiny painted turtle faces peeking from the bottom edge of two or three nails per hand, painted with a fine detail brush, on short oval or squoval nails. One coat of glossy top coat is enough. It suits every skin tone and is an excellent first nail-art design.
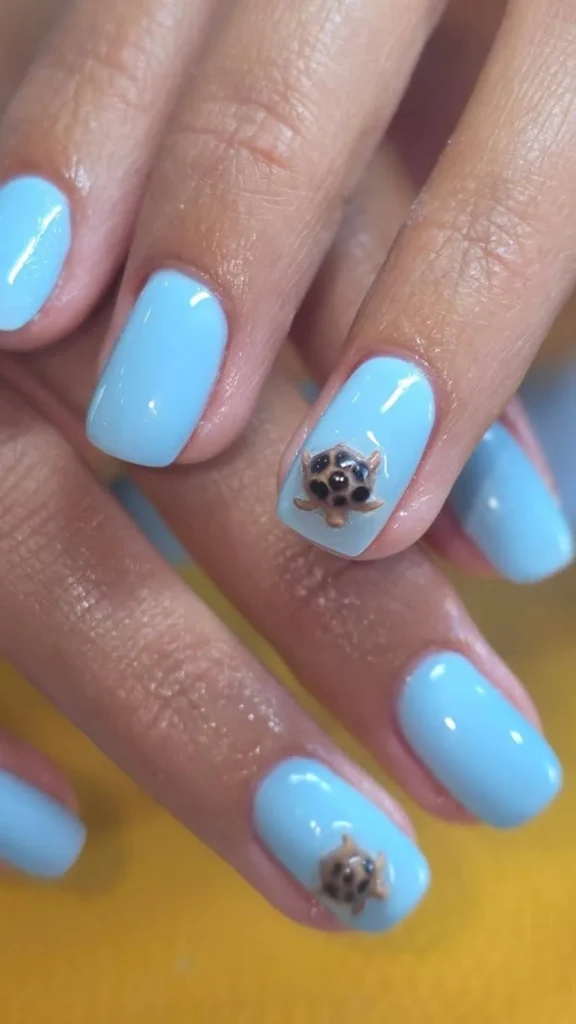
9. Turtle Shell Ombré
This design takes the turtle’s shell and turns it into a gradient. The colour starts as a soft sandy beige at the cuticle and melts into a warm olive green at the tip, and over the gradient — on two accent nails — is the shell pattern, a few dark hexagonal lines drawn like the plates of a real turtle shell. It is abstract enough to be elegant, and literal enough that people will ask what it is.
The ombré is the hard part. It is usually done with a sponge, dabbing the colours on in thin layers until they melt into each other, and it needs a technician who is comfortable with gradients. The shell lines go on last, thin and neat, and they should follow the curve of the nail rather than running straight across. If the lines are too thick the design looks like a football. Thin lines, soft gradient, and the whole thing looks like sunlight through shallow water.
Additional Information: Ask for a sandy beige to olive green ombré, sponged in thin layers, with fine dark shell-plate lines on two accent nails, on medium almond nails. Seal with a glossy top coat. This design looks particularly good on warm skin tones and pairs with earthy, natural jewellery.
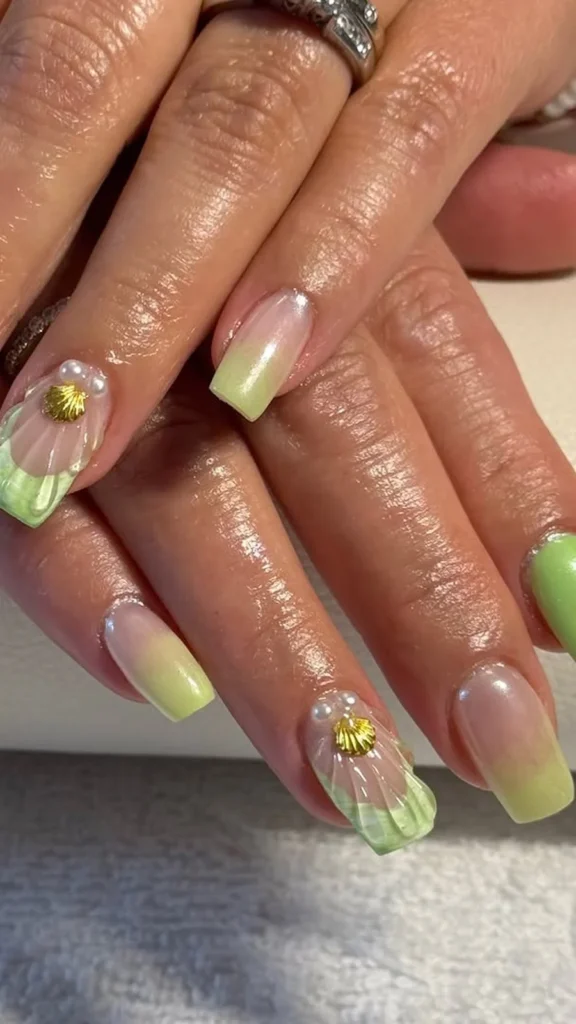
Out on the Reef: Ocean Colour
The reef is where turtle nails get their colour. Turquoise, coral, seafoam, deep teal — the colours of the water turtles actually swim in. These designs mix tortoiseshell with ocean shades, and they are the brightest, most summery ideas in this guide. If the sand section was about elegance, this one is about joy. Wear them on holiday, or wear them in February to remind yourself that the sea is still out there.
10. Ocean Wave Tortoiseshell Mix
This is the set that mixes everything, and it works because it is organised. The nails alternate: tortoiseshell, turquoise, tortoiseshell, turquoise, with one accent nail carrying a small white wave curling across a turquoise base. The alternation is what keeps it from feeling chaotic — your eye reads the pattern as a rhythm, tortoiseshell, blue, tortoiseshell, blue, the way waves come in sets.
The wave is the detail that makes it special, and it should be painted on the ring finger, where it gets noticed. A thin white curl, maybe with a little foam at the crest, drawn with a fine brush over the turquoise. It is simple, but it changes the whole set from a colour combination into a scene. The rest of the nails stay plain, which is what gives the wave room to breathe.
Additional Information: Ask for alternating amber tortoiseshell and solid turquoise nails, with a small white wave painted on one ring finger, on medium almond nails. Keep the turquoise in a mid-tone, not too pale, or it washes out next to the amber. Seal with a glossy top coat. It is a cheerful set that works from late spring through early autumn.
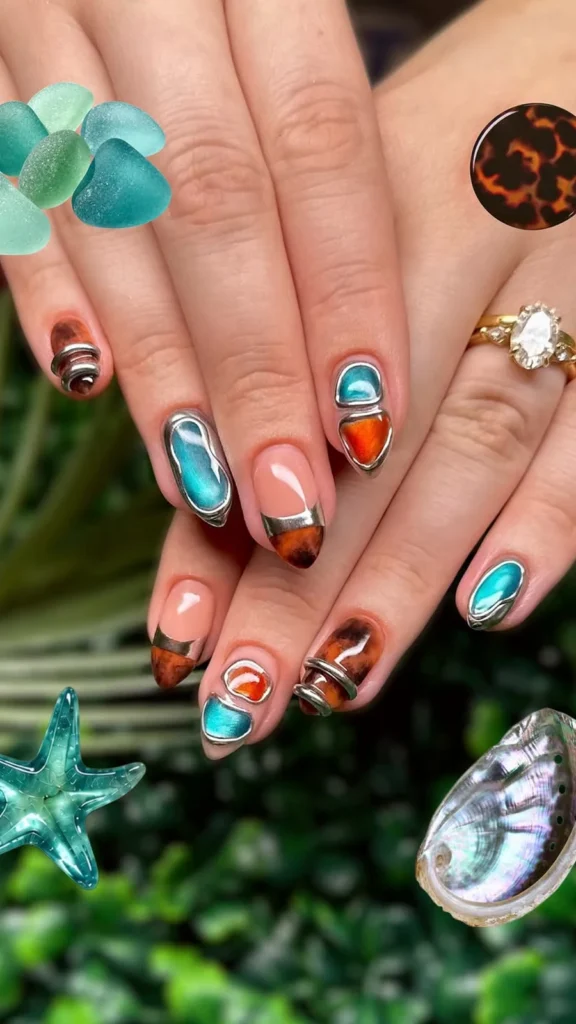
11. Green Sea Glass and Tortoiseshell
Sea glass is the quiet luxury of the beach — frosted, soft, worn smooth by the water — and this design borrows its colour. The base is a frosted sea green, matte rather than glossy, and two accent nails are tortoiseshell in the same green family: olive, sage and deep forest, instead of the usual amber. The result is a set that feels like something the sea made, not something a salon did.
The matte finish is the whole point, so do not let anyone talk you into gloss. Matte sea green has a soft, powdery look that glossy polish cannot copy, and it makes the tortoiseshell accents look like polished stones next to frosted glass. The downside is that matte shows wear faster, especially at the tips, so ask for the free edge to be capped and carry a matte top coat for touch-ups if you have one.
Additional Information: Ask for frosted sea green with a matte top coat on most nails and green-toned tortoiseshell on two accent nails, on short to medium oval nails. Avoid cuticle oil on the first day, as it can shine up a matte finish. This design suits cool skin tones and looks wonderful with silver jewellery.
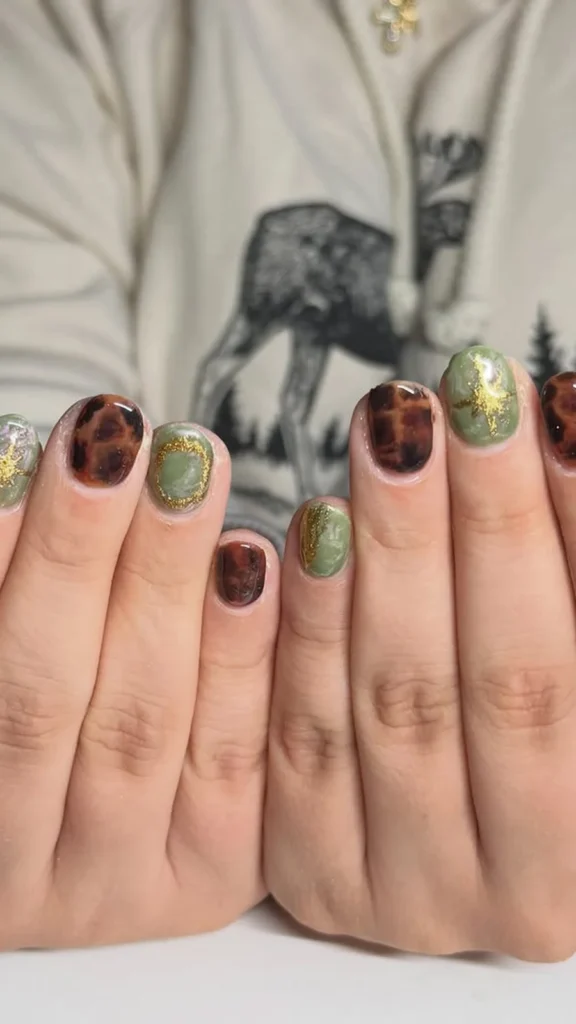
12. Coral Reef Tortoiseshell
Coral is the colour that makes tortoiseshell feel summery. The set is mostly coral — a warm, bright coral pink, glossy and confident — with two tortoiseshell accent nails that pick up the warmth, their amber tones echoing the coral without matching it exactly. It is a loud set, in the best way, and it is the one in this guide most likely to get a compliment from a stranger.
Coral is a colour that needs confidence, because it is not shy. But it is also one of the most flattering colours there is — it warms up every skin tone, it looks wonderful against a tan, and it makes your hands look sun-kissed even when they are not. The tortoiseshell accents keep it from being a plain colour manicure, and they give the set a story: coral reef, turtle shell, the whole warm-water world.
Additional Information: Ask for a warm coral pink on eight nails and amber tortoiseshell on the two ring fingers, on medium to long almond nails. Two thin coats of coral and a glossy top coat give the brightest result. This design is at its best in summer, and it pairs with gold jewellery and white or denim clothes.
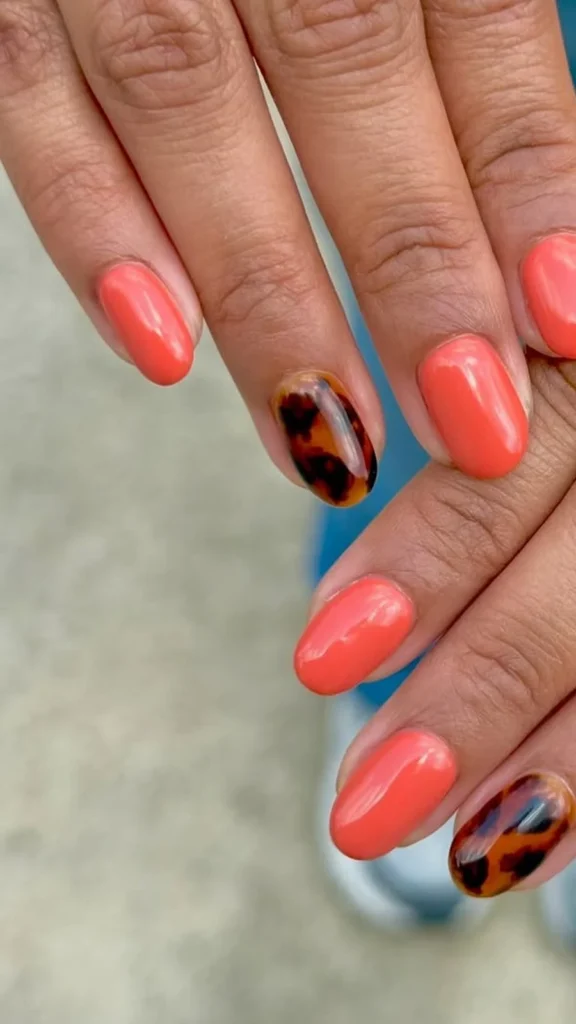
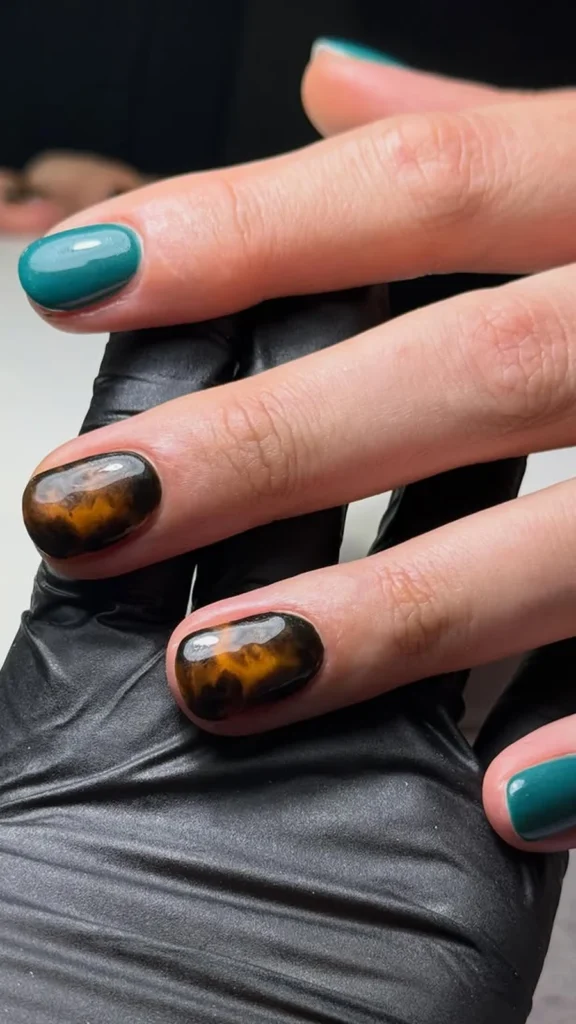
13. Deep Teal and Tortoiseshell
If coral is the reef at noon, deep teal is the reef at dusk. The base is a dark, rich teal — the colour of deep water — glossy and almost black in some lights, clearly green-blue in others. The tortoiseshell accents are kept warm and amber, and against the dark teal they glow like lanterns. It is the most sophisticated design in this section, and the one that works best outside summer.
The contrast is what does the work, so the teal needs to be genuinely deep. A mid-tone teal next to amber tortoiseshell looks pleasant. A deep teal next to amber looks dramatic. Ask for two coats of a dark teal and check it in natural light before the top coat goes on, because teal is a colour that changes dramatically between salon lighting and daylight, and you want to love it in both.
Additional Information: Ask for deep teal on eight nails and amber tortoiseshell on the two ring fingers, on medium almond or coffin nails. Two coats of glossy top coat deepen the teal further. This design suits every skin tone and works year-round, which is rare for an ocean design. It pairs with both gold and silver.
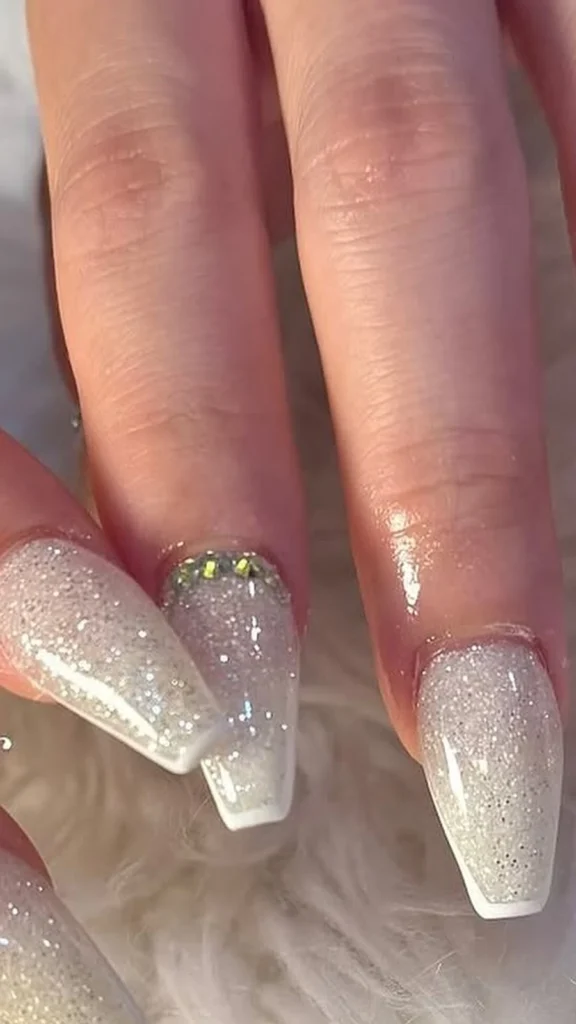
14. Sand and Shell Glitter
This is the most delicate design in the reef section, and the easiest to wear. The base is a soft sandy beige, and over it — on every nail, or just the tips — is a fine glitter in shell white and pale gold, like sand sparkling in the sun. Two accent nails carry a tiny shell, or a small starfish, painted in white. It is pretty without being precious, and it is the design in this guide most likely to survive two weeks of real life.
The glitter is the thing to get right. Fine glitter, not chunky, and pressed into the polish rather than sitting on top of it, so the surface stays smooth. Chunky glitter catches on clothes and peels off in sheets. Fine glitter wears like a normal manicure and catches the light every time your hand moves, which is the whole point. The little shells are a bonus, not the main event — keep them small and white, and let the glitter do the talking.
Additional Information: Ask for a sandy beige base with fine shell-white and pale gold glitter, pressed into the top coat, and a tiny white shell or starfish painted on two accent nails, on short to medium oval nails. Seal with two coats of top coat so the glitter sits flat. It is a lovely choice for a beach wedding guest or a summer holiday.
In Deep Water: Bold and Playful
The last stretch of the shore is where the designs get bolder. Deeper colours, bigger patterns, more personality. These are the sets for people who have already tried tortoiseshell, loved it, and want to see how far it can go. They are still wearable — nothing here needs a costume — but they are not shy about it.
15. Pastel Turtle Pond
This is the softest design in the deep-water section, and the sweetest. The nails are painted in pastel pond colours — mint, lilac, baby blue and pale yellow, one colour per nail — and on two accent nails there is a small turtle swimming in a little pond, painted in soft green with a tiny lily pad. It is a watercolour of a design, gentle and dreamy, and it looks like spring.
Pastel sets need a white base underneath, or the colours look washed out. Ask your technician to lay down a thin white base coat first, then the pastels, and the colours will stay true. The turtle and the lily pad should be small and simple — a few green strokes, a little head, a pad like a green circle with a notch — because the pastels are doing most of the work, and too much drawing would make the set busy.
Additional Information: Ask for pastel pond colours (mint, lilac, baby blue, pale yellow) over a thin white base, one colour per nail, with a small painted turtle and lily pad on two accent nails, on short to medium oval nails. Seal with a glossy top coat. It is a lovely spring design and a good choice for Easter or a garden party.
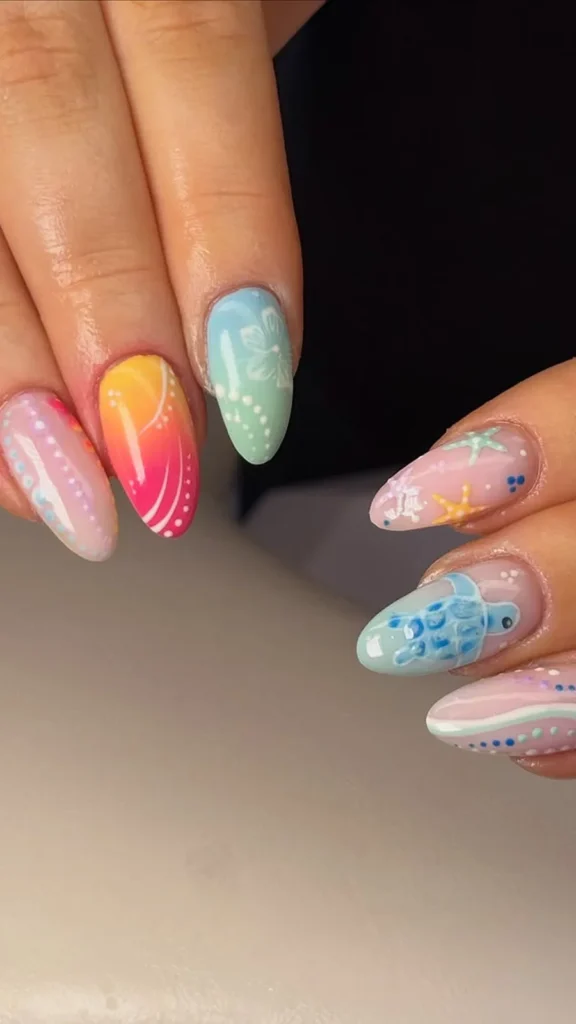
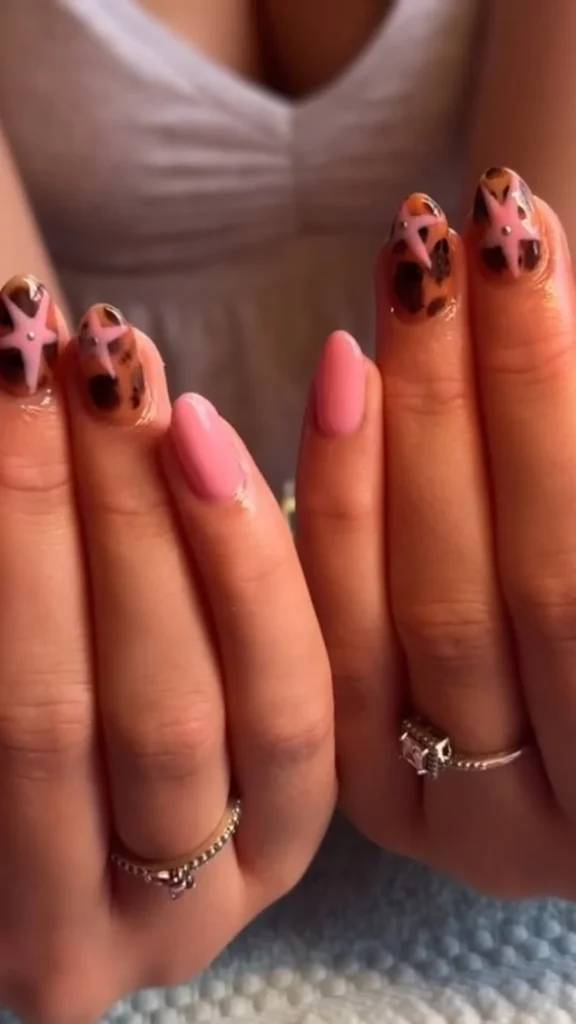
16. Tortoiseshell with Starfish Accent
Starfish and turtles share the same water, and they share a manicure very happily. The set is a classic amber tortoiseshell on every nail except the ring fingers, where the base is a soft sandy beige and a small starfish is painted in coral or soft orange, with five neat arms and a slightly textured centre. It is a beach in miniature, and it is the design in this guide that most feels like a holiday.
The starfish needs to be small — no bigger than the width of the nail — and it needs to sit in the centre of the nail, or it looks like it is falling off. The arms should be slightly uneven, the way a real starfish is, rather than perfectly symmetrical, because perfect symmetry looks like a sticker. A little texture in the centre, a few dots or a slight colour variation, makes it look hand-painted in the best way.
Additional Information: Ask for amber tortoiseshell on eight nails and a sandy beige base with a small hand-painted coral starfish on the two ring fingers, on medium almond nails. The starfish is painted after the base is dry, with a fine brush. Seal with a glossy top coat. It pairs with beachy, natural jewellery — shells, woven bracelets, bare feet optional.
17. Matte Tortoiseshell
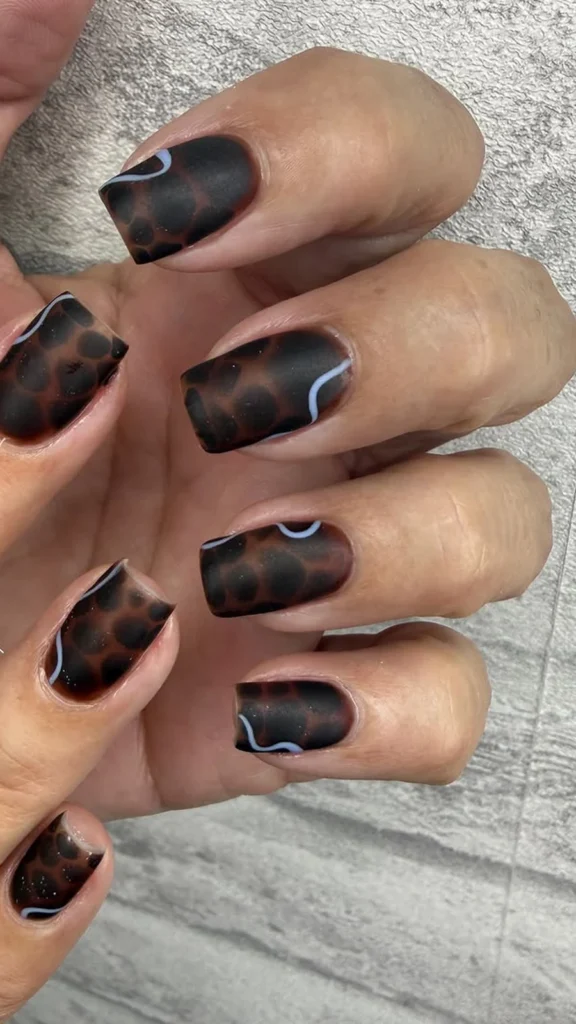
Matte tortoiseshell is a different animal from glossy tortoiseshell, and it is worth trying at least once. The pattern is the same — amber, honey, chocolate — but under a matte top coat it looks like brushed stone, soft and velvety, with none of the shine. It is the most modern design in this guide, and the one that photographs most strikingly, because the matte surface shows the pattern without any glare.
The trade-off is wear. Matte top coats show scuffs and chips sooner than glossy ones, especially at the tips, and they can go shiny in patches if you use hand cream or oil. Ask for the free edge to be capped, keep the oil away for the first day, and accept that a matte set is a two-week manicure rather than a three-week one. In exchange, you get the most unusual tortoiseshell in this guide, and the one people will ask about.
Additional Information: Ask for classic amber tortoiseshell finished with a matte top coat, on medium almond or coffin nails. Avoid cuticle oil and heavy hand cream on the first day. Carry a matte top coat for touch-ups if you have one. This design suits every skin tone and looks particularly striking with minimalist jewellery.
18. Golden Hour Tortoiseshell
We finish where the day finishes: golden hour, the last light on the water. The set is a sunset gradient — warm gold at the cuticle melting into soft coral and then a dusty rose at the tip — and over the gradient, on two accent nails, is a tortoiseshell pattern in the same warm tones, so the shell seems to be part of the sunset. It is the most romantic design in this guide, and the one that feels most like a photograph.
The gradient is the hard part, and it is usually done with a sponge, in thin layers, so the colours melt into each other without hard edges. The tortoiseshell goes on top of the gradient, not instead of it, and it should be kept light — a few honey and brown blobs, not a full pattern — so the sunset stays visible underneath. It is a lot of work for a manicure, and it is worth every minute, because the result looks like the sky at the end of a beach day.
Additional Information: Ask for a gold to coral to dusty rose gradient, sponged in thin layers, with a light tortoiseshell pattern over two accent nails, on medium to long almond nails. Seal with two coats of glossy top coat. This design is at its best in summer and early autumn, and it pairs with warm gold jewellery and linen or silk clothes.
How to Make Tortoiseshell Last
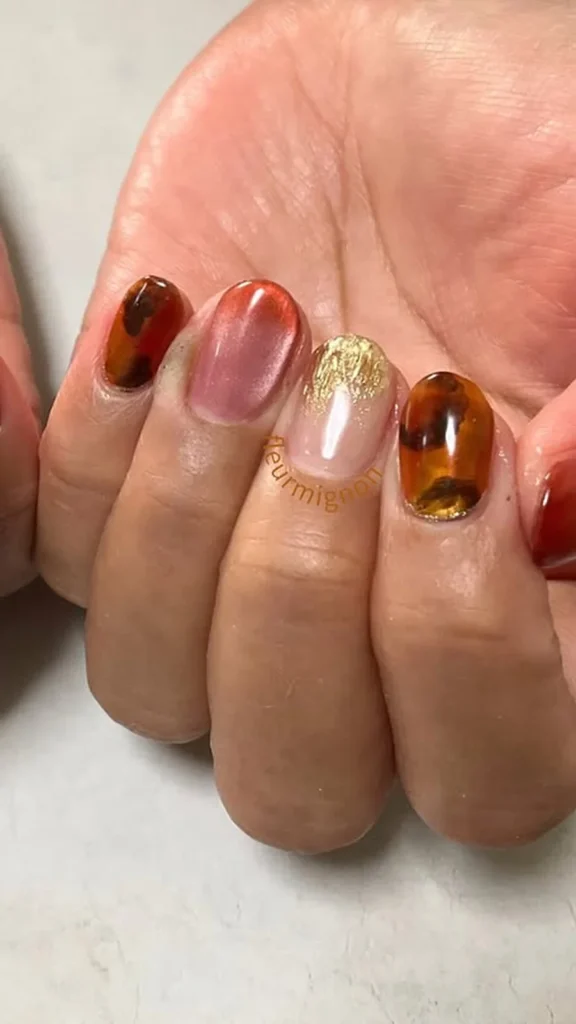
Tortoiseshell is a layered design, which means it is also a design that shows wear sooner than a single colour. The amber base is sheer, so regrowth is visible, and the pattern sits in layers that can lift if the top coat wears thin. A few habits make a real difference. Wear gloves for washing up — hot water and detergent are the fastest way to dull a glossy top coat. Oil your cuticles every night, but keep the oil off the nail surface for the first day after your appointment. And book your fill at two weeks rather than three, because tortoiseshell grows out more visibly than a solid colour.
If a small chip appears on one nail, do not pick at it. A good technician can patch a tortoiseshell nail in minutes by dabbing a little amber and brown into the chip and sealing it, and the patch will be invisible because the pattern is irregular by nature. That is the hidden advantage of tortoiseshell: it is the easiest pattern in the world to repair, because nobody can tell where the original pattern ended and the repair began.
For the painted turtles, the rule is simpler: protect the accent nails. Two coats of top coat at the salon, and a fresh coat at home after a week, will keep the painting crisp. And if the turtle does start to fade, that is your sign to book the next set — preferably a different turtle, because there are eighteen here and you have only tried one.
Frequently Asked Questions
Are turtle nails only for summer?
No, and that is one of the best things about them. The ocean-coloured designs are summery, but classic tortoiseshell is a year-round pattern — it is warm, rich and elegant, and it looks just as good with a wool coat in November as it does with a sundress in July. If you want turtle nails in winter, choose the tortoiseshell designs and skip the bright turquoise.
Is tortoiseshell hard to do at home?
It is one of the more forgiving patterns to try at home, because it is supposed to look irregular. A sheer amber base, a few blobs of brown and black while the base is still wet, and a glossy top coat will get you surprisingly close. The painted turtles are a different story — they need a fine brush and a steady hand, and they are best left to a technician, or to stickers and decals if you want the cute look without the drawing.
How long do turtle nails last?
A gel tortoiseshell set lasts two to three weeks, the same as any gel manicure. The painted accent nails may show wear a little sooner, especially if the painting is detailed, so ask for two coats of top coat on those nails. Matte tortoiseshell wears faster, usually around two weeks, because the matte surface shows scuffs.
What nail shape suits turtle nails best?
Almond and oval suit tortoiseshell, because the soft curve gives the pattern room to swirl. Square and squoval suit the painted turtles, because the flat nail is a better canvas for a little face. Short nails work beautifully — one accent turtle and nine simple nails is one of the neatest sets in this guide.
Can I mix tortoiseshell with other designs?
Yes, and this guide does it in several places. Tortoiseshell pairs well with French tips, gold foil, solid colours and ocean shades. The rule is to keep one element in charge: if tortoiseshell is the star, keep everything else simple. If the turtle art is the star, keep the tortoiseshell to one or two nails.
The Shore Is Yours
Turtle nails work because they are two ideas at once: the tortoiseshell pattern, which is elegant and timeless, and the little sea turtle, which is joyful and impossible not to smile at. You do not have to choose between them. The best sets in this guide have both — a rich, glossy shell pattern and one small turtle, swimming across a turquoise accent nail, reminding you that the prettiest manicures are the ones with a personality.
So pick your stretch of shore. Start on the sand with a classic amber tortoiseshell if you are new to the pattern. Wade into the shallows for a baby turtle if you want something cute. Swim out to the reef for coral and teal if you want colour. And if you are feeling bold, finish the day in deep water, where the sunsets are golden and the tortoiseshell glows. Whichever you choose, save the picture, show your technician, and ask for the tortoiseshell to be built in thin layers — because the difference between a good turtle set and a great one is never the idea. It is the light shining through the amber.
Leave a Reply