A Manicure That Works as Hard as You Do
There is a particular kind of tired that only teachers know. It is the tired of a whiteboard marker that runs dry halfway through a sentence, of a stack of essays that reproduces overnight, of a glue stick that has somehow ended up on your sleeve. And somewhere in the middle of all of that, your nails are doing their own quiet work: holding a book open, tapping a keyboard, pointing at a diagram, wiping a smudge off a desk, opening a hundred lunchboxes that were definitely not designed to be opened by human hands.
So teacher nails are not really about nail art. They are about a manicure that survives the school day and still looks like you cared. Short enough to type without clicking. Neat enough for a parent-teacher evening. Pretty enough that a student notices and says so — because they will, usually mid-lesson, usually about the one nail you forgot was chipped. And durable enough that you are not repainting on a Sunday night when you should be resting.
That is what these nineteen ideas are built around. They are organised the way a school year actually feels: first-day polish, when you want to look like you have everything under control (even if the seating plan says otherwise); everyday classroom designs, built for typing, grading and general survival; parent-teacher evening looks, for the nights when you want to look polished under fluorescent lights; spirit week and holiday fun, because teachers are allowed to be playful too; and end-of-term celebration nails, for the last day before the break, when you have earned something sparkly. Every design is short to medium length, dress-code friendly, and chosen because it looks good on a real hand doing real work — not just on a photo.
The Three Classroom Rules
Before the designs, three rules that every teacher manicure lives or dies by. They are not about taste. They are about physics, school policy, and the simple fact that your hands are tools before they are a canvas.
Rule one: short beats long, every time. Long nails look lovely in a photo and then betray you the moment you try to open a stapler. For classroom life, short oval, short square or a soft squoval shape is the sweet spot — long enough to look finished, short enough to type at full speed, pick up a pencil, and fasten a child’s coat without snagging anything. If you love length, keep it to a medium almond at most, and expect to file it down by week two. There is no shame in that. Short nails are not a compromise; they are the professional choice, and half the designs in this guide are built specifically for them.
Rule two: the colour should be able to grow out gracefully. You will not always get to the salon on schedule — parents’ evening runs late, reports pile up, and suddenly it is three weeks since your appointment. A sheer nude, a soft blush or a milky white grows out invisibly. A dark burgundy or a bright red shows a gap at the cuticle within days. That does not mean you cannot wear dark colours; it means you should wear them when you know a fill or a repaint is coming soon, and choose the forgiving shades for the long stretches between appointments. Several designs below are picked precisely because they hide grow-out.
Rule three: one statement per hand. A classroom is a busy visual environment already. One accent nail, one thin line of gold, one tiny motif — that is a statement. Five nails of competing art is a distraction, and it is the first thing a strict dress code will flag. Keep the rest of the hand calm and let one detail do the talking. Your students will notice the one detail far more than they would ever notice ten.
Pick Your Length First, Your Colour Second
Most people choose a colour and then try to make it work on whatever length they have. Teachers should do it the other way round, because length decides everything else: how long the manicure lasts, how it chips, and how much art will actually fit on the nail.
Short nails — the nail barely past the fingertip — are the workhorse. They suit solid colours, French tips, single dots, and tiny motifs best, because there is not much canvas and the design has to be simple to read. They chip the least, they grow out the most gracefully, and they are the easiest to maintain at home with a bottle of polish and five minutes. If you are new to teacher nails, start here. Designs 1, 4, 5, 6, 8, 9, 13 and 15 in this guide are built for short nails.
Medium nails — a few millimetres past the fingertip, usually almond or oval — give you room for a French tip, an ombré fade, a small floral, or a half-moon. They still type comfortably, but they need a stronger base: gel polish or a good strengthening base coat, because a medium nail that bends will crack its polish at the stress point. Designs 2, 3, 7, 10, 11, 12, 16, 17, 18 and 19 work best at this length.
Long nails are not in this guide, and that is deliberate. They are beautiful and they are a liability in a classroom — they click on keyboards, they catch on paper, they snap when you least expect it, and they read as a statement in schools where the dress code is strict. If you love long nails, save them for the summer holidays. For the school year, medium is your ceiling.
One more practical note: whatever length you choose, a gel top coat or a good quick-dry top coat is not optional. It is the difference between a manicure that lasts two days and one that lasts two weeks. And keep a bottle of your base colour in your desk drawer. A five-minute touch-up between lessons beats a chipped nail in front of thirty teenagers.
First-Day Polish — Looking Like You Have It All Together
The first day of term is a performance, and your nails are part of the costume. You want to look calm, confident and put-together, even if you spent the morning hunting for the key to the stationery cupboard. These four designs are the first-day four: classic, neat, and quietly confident. Nothing loud, nothing that needs explaining, nothing that will chip before lunch.
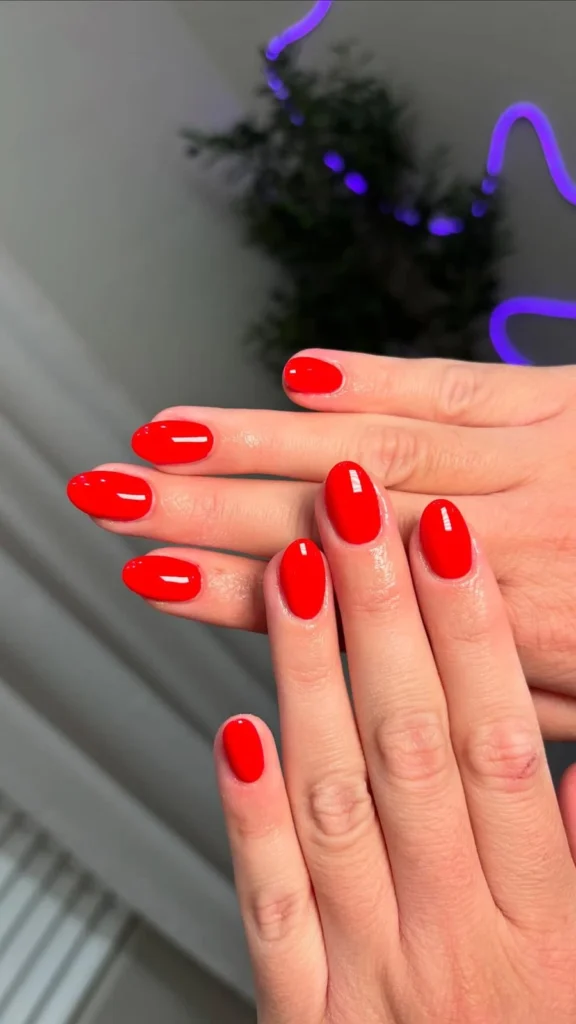
1. Glossy Apple-Red Short Oval
There is a reason red is the first design in this guide and not the last. A glossy apple-red on short oval nails is the most confident thing you can wear on the first day of term, and it is also the most forgiving red there is. The oval shape softens the colour so it reads as classic rather than dramatic, and the short length keeps it firmly on the professional side of the line. It is the manicure equivalent of a good blazer: it makes everything else you are wearing look more deliberate.
The shade matters more than the brand. You want a true apple red — bright, clean, with no orange and no blue undertone pulling it toward burgundy. On the nail it should look like a polished apple, not like wine and not like coral. Two thin coats over a ridge-filling base will give you an even, glossy finish, and a gel top coat will keep the shine for a full school week. Red shows chips faster than any other colour, so the top coat is doing real work here — seal the free edge by running the brush along the tip of the nail, and the colour will hold.
Additional Information: This is the design to choose when you want one manicure to carry you through the first week of term. It suits every skin tone because a true red is a neutral in disguise, and it looks best on short to medium oval nails, where the colour has room to breathe without the nail looking long. At home it is a very achievable project — red is one of the easiest colours to apply evenly — but do it the night before, not the morning of, so it has time to harden fully before you start handling paper. Pair it with a nude lip and a simple ring and the whole look reads as intentional. The maintenance note is simple: carry the bottle. A red chip is visible from across the room, and a thirty-second touch-up saves the day.
2. Sheer Nude with a Fine White French Line
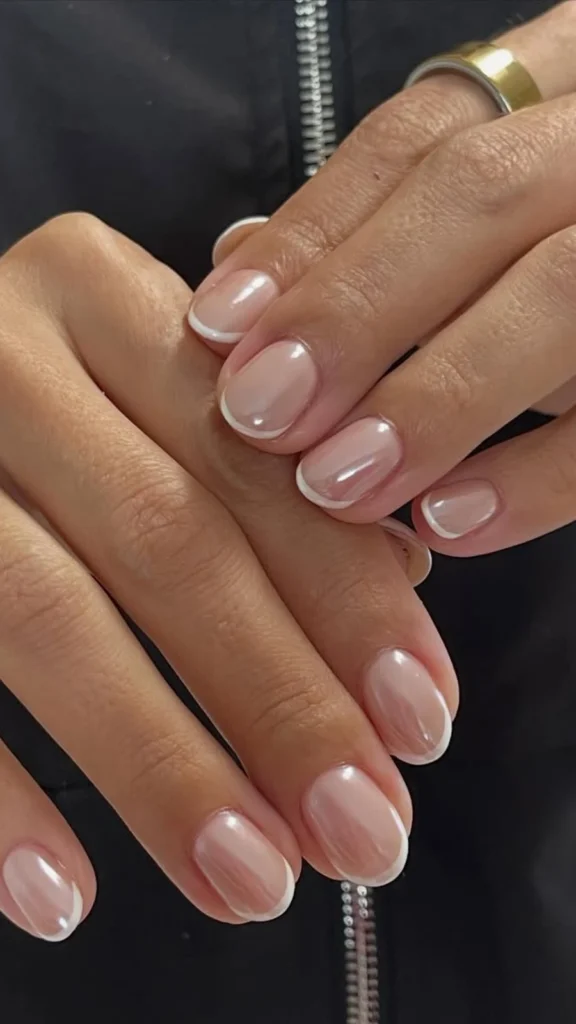
If red is the confident choice, this is the quiet one — and for many teachers it is the better first-day choice. A sheer nude base, the colour of a healthy nail only slightly more even, with a fine white line painted along the very tip instead of a full French tip. Not a thick white band, just a hairline of white, like an underline. It reads as immaculate from any distance, and it is the single most dress-code-proof design in this guide, because it barely reads as polish at all.
The trick is the nude. It has to match your skin closely enough to look like a better version of your own nail, not like a different colour sitting on top of it. Try it on one nail in daylight before committing — the shade in the bottle lies, and the shade on your nail is the truth. The white line should be painted with a striping brush or a fine liner, and it should follow the natural curve of the tip. If your freehand line wobbles, a thin strip of nail tape as a guide will give you a perfectly straight edge, and nobody will ever know.
Additional Information: This design is the best grow-out hider in the guide, because the base is sheer and the white line is so fine that three weeks of growth barely shows. It suits every nail length but looks most elegant on medium almond or oval nails, where the line has room to curve. It suits every skin tone, because a well-matched sheer nude is invisible by design. At home, this is a patient person’s project — the line takes a steady hand — but it is also the easiest design to maintain, because a chip in a sheer nude is almost invisible and a touch-up takes seconds. Wear it when you want your nails to look done without anyone being able to say quite what you did to them.
3. Blush Pink with a Tiny Gold Dot
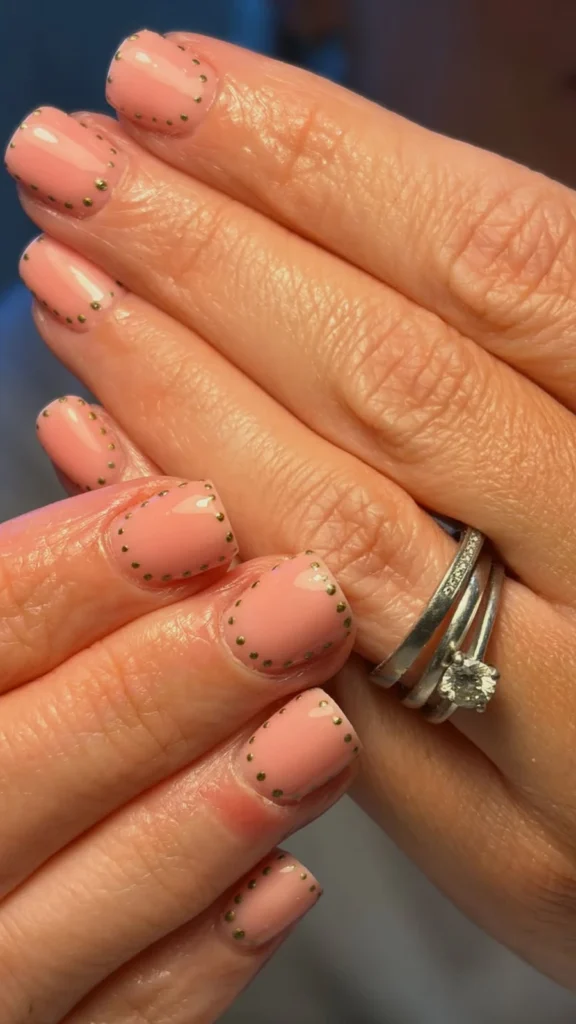
Blush pink is the colour teachers reach for when they want to look soft without looking pale, and this design adds exactly one detail: a tiny gold dot, no bigger than a pinhead, placed just above the cuticle on the ring finger. One dot, one nail, the rest plain. It is the smallest statement in this guide and one of the most effective, because the eye goes straight to it and then relaxes — the whole hand looks finished, and the dot looks like jewellery.
The blush should be a soft, warm pink — the colour of the inside of a shell, not bubblegum and not beige. Two coats will give you a clean, even colour that still lets a little of the nail show through, which is what keeps it looking like a real nail rather than a painted one. The gold dot goes on with a dotting tool or the blunt end of a toothpick, dipped in metallic gold polish, pressed once and lifted straight up so it stays round. Seal it under two top coats, because a raised dot is the first thing to catch on paper and lift.
Additional Information: This is the design to choose for a first day when you want something pretty but you do not want to think about your nails again for two weeks. It suits short to medium nails in any shape, and it suits every skin tone because blush and gold are both neutrals. At home it is a five-minute project once the base is dry — the dot is the only skill involved, and a slightly imperfect dot still looks charming. Wear it with a gold ring on the same hand and the dot reads as part of your jewellery. The only caution is placement: keep the dot above the cuticle, not on it, or it will lift as the nail grows.
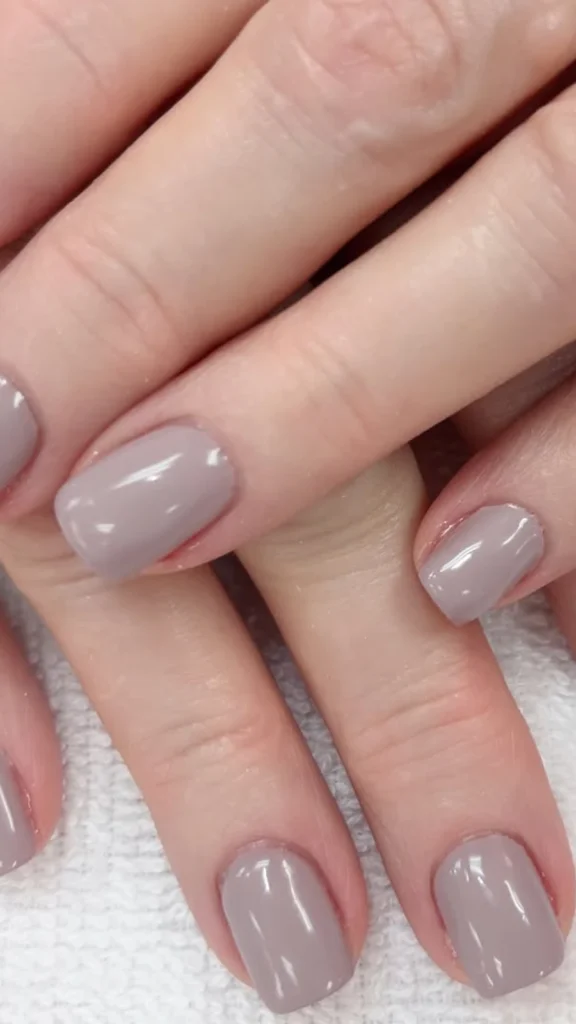
4. Soft Taupe Short Square
Taupe is the colour nobody thinks of first and everybody ends up loving. It is warm, greyish-brown, the colour of milky coffee, and on short square nails it looks like the most expensive neutral you own. It is also the most practical colour in this guide for a first day, because it hides everything: chips are invisible, grow-out is invisible, and a slightly imperfect application is invisible too. It is the manicure for a teacher who has a hundred other things to think about on the first morning of term.
The square shape matters here. Taupe on a round nail can look a little washed out; on a short square it looks deliberate and architectural, like a well-cut jacket. Keep the corners slightly softened — a true sharp square catches on everything and chips at the corners, while a soft square (sometimes called a squoval) holds its polish far longer. Two coats of a warm taupe, not a grey one, will give you the colour — if it looks grey on your nail, it is the wrong taupe for your skin tone, and a warmer one will fix it.
Additional Information: This is the design for the teacher who wants their nails to look expensive without anyone noticing them at all, which is a real and valid goal. It suits short square nails best, and it suits warm and neutral skin tones especially well — on very cool skin, choose a taupe with a hint of mauve rather than a hint of yellow. At home it is the easiest design in the guide to apply well, because a neutral forgives a wobbly edge. It pairs with everything you own, from a navy blazer to a cream jumper, and it is the best choice in this guide if your school has a strict dress code, because it reads as groomed rather than decorated. Reapply the top coat on day five and it will carry you to the end of the second week.
Everyday Classroom — Built for Typing, Grading and Survival
Once the first week is over, the manicure has a different job. It is no longer about first impressions; it is about surviving. Typing, whiteboard markers, glue, paint, playground duty, a hundred sheets of paper a day — paper is quietly brutal on polish, and it will wear down a manicure from the tips inward. These four designs are chosen for durability first and prettiness second, though they manage both. They are the ones to wear for the long middle stretch of term, when you need a manicure you can forget about.
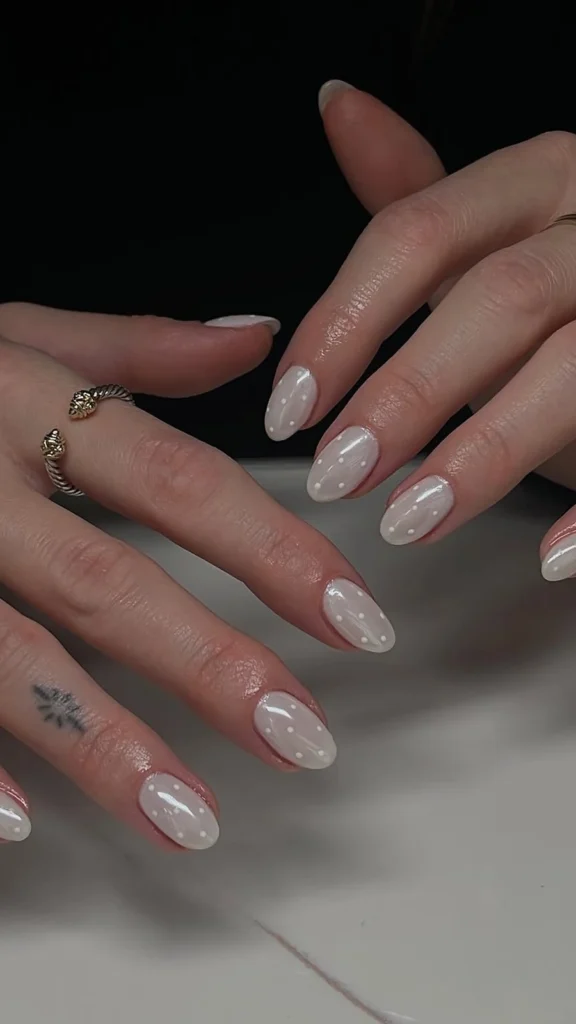
5. Milky White Almond with Micro Dots
Milky white is the cleanest colour in this guide, and the micro dots are what stop it from looking plain. A soft, semi-sheer white — the colour of skimmed milk, not correction fluid — on short almond nails, with three tiny dots in a soft grey or pale nude on the ring finger only. The dots are small enough to read as texture rather than art, and they give the eye something to land on without making the design feel decorated.
The milky base is the hard part, because white shows every streak. Use a ridge-filling base coat, then two thin coats rather than one thick one, and let each coat dry fully before the next — white that is rushed will drag and streak, and there is no hiding it. The dots go on with a dotting tool in a pale grey or a soft nude, three of them in a loose triangle near the cuticle of the ring finger. Keep them small. A big dot on a short nail looks like a mistake; a tiny one looks deliberate.
Additional Information: This design suits short almond nails best, where the milky colour looks soft rather than stark, and it suits fair to medium skin tones especially well — on deeper skin, a milky white is striking and beautiful, but choose a slightly warmer white so it does not read as chalky. It is a salon-friendly design but very doable at home if you are patient with the drying time. The maintenance note is that white shows dirt faster than any other colour, so keep a nail brush by the sink and give your nails a quick scrub at the end of the school day. It is worth it: nothing looks cleaner against a stack of white paper than a milky white manicure.
6. Sage Green Short Oval
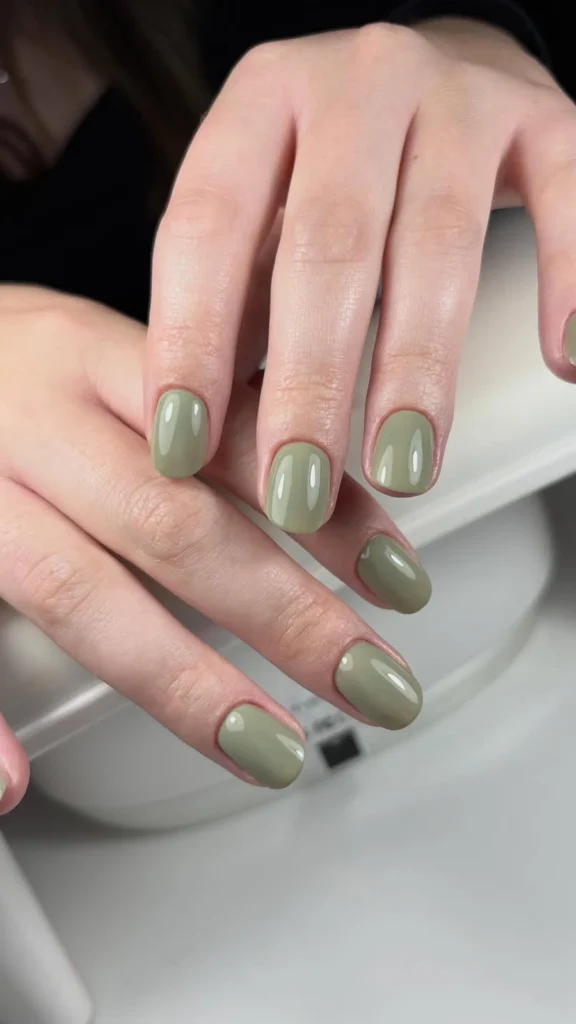
Sage green is the calmest colour in this guide, and calm is a classroom asset. It is a soft, grey-green — the colour of dried herbs, not the colour of a highlighter — and on short oval nails it looks thoughtful and a little bit unusual without ever looking loud. It is the design for the teacher who is tired of pink and nude and wants something with a personality that still passes a dress code without a second glance.
The shade is everything here. You want a muted sage with a grey undertone, not a bright mint and not a dark forest green. On the nail it should look like a colour you found in nature, not one you found in a craft box. Two coats over a base coat will give you an even, opaque finish, and a glossy top coat keeps it from looking flat — sage can look chalky under a matte finish, so gloss is the safer choice. It pairs beautifully with a gold ring or a cream jumper, and it is one of the few colours in this guide that looks just as good on the tenth day as it does on the first, because chips in a muted green are barely visible.
Additional Information: This design suits short oval nails best, and it suits every skin tone — sage is one of those rare colours that flatters warm, cool and deep skin alike, because its grey undertone keeps it neutral. At home it is an easy project: sage is a forgiving colour to apply, and it does not streak the way white does or show chips the way red does. Wear it in the middle of term, when the novelty of the new school year has worn off and you want a colour that feels like a deep breath. It is also the best choice in this guide if you teach art or science, because it looks at home next to plants, paint and practical work without ever looking messy.
7. Dusty Blue French Tips
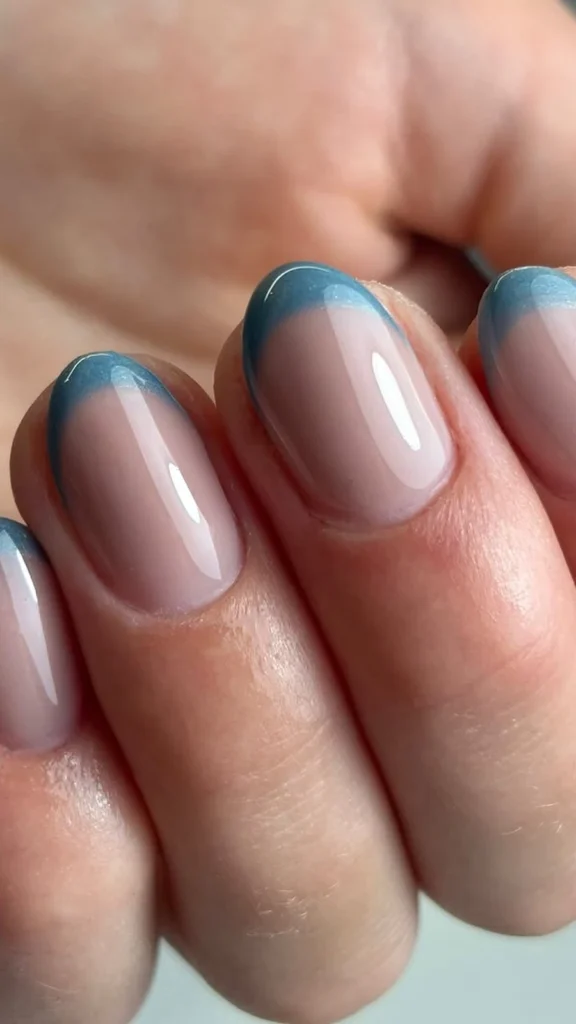
A French manicure, but the white tips are dusty blue — a soft, greyed-out blue, the colour of a faded denim shirt or a cloudy sky. The base is sheer nude, the tips are blue, and the whole effect is a French that feels like a person rather than a template. It is a gentle way to wear colour in a classroom, because the blue is only on the tips and the rest of the nail is barely there.
The tips should be medium width — thick enough to read as blue from across a desk, thin enough that the design still looks like a French. Paint the sheer nude base first and let it dry completely, then paint the tips freehand with the brush, following the natural curve of the nail, or use French tip guides for a cleaner edge. The dusty blue should be opaque in one or two coats; if it is streaky, it is the wrong formula, and a different brand will fix it. A glossy top coat over the whole nail blends the line between base and tip and makes the design look professional rather than homemade.
Additional Information: This design suits medium almond or oval nails best, where the tip has enough width to show the colour, and it suits every skin tone because dusty blue is a muted, greyed colour that behaves like a neutral. It is a salon design unless you are confident with a freehand tip — the guides help, but a wobbly smile line is the one thing that gives a home French away. Wear it when you want a little colour without committing to a full coloured nail, and wear it with silver jewellery rather than gold, because dusty blue and silver are a natural pairing. It grows out gracefully, because the base is sheer, and it is the best choice in this guide for a teacher who loves French manicures but is bored of white.
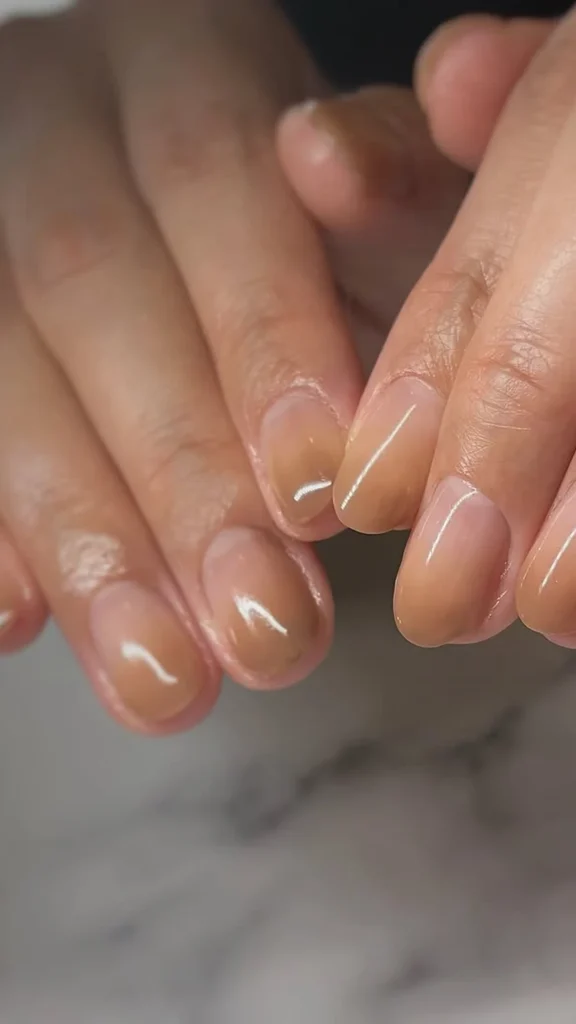
8. Warm Nude Ombré
An ombré that fades from a warm nude at the cuticle to a slightly deeper nude at the tip — no glitter, no colour change, just one nude melting into another. It is the most invisible design in this guide in the best possible way: from a distance it looks like a plain nude manicure, and up close it has a soft gradient that makes the nails look longer and more finished than they are. And it is the single best grow-out hider you can wear, because there is no hard line anywhere for the eye to catch.
The ombré is built with a sponge, not a brush. Paint the lighter nude over the whole nail, let it dry, then dab the deeper nude onto the tip with a makeup sponge, pressing lightly and further down the nail with less and less pressure, so the colour fades instead of stopping. Two or three light passes, letting each one dry in between, will give you a smooth gradient. The trick is patience: a rushed ombré has a visible line where the darker colour stops, and a patient one does not. A glossy top coat is essential, because it smooths the sponge texture and makes the gradient look like it was airbrushed.
Additional Information: This design suits short to medium nails in any shape, and it suits every skin tone — the only rule is to choose two nudes that are close to your own skin, one slightly lighter and one slightly deeper, so the gradient reads as a shadow rather than a colour change. At home it is a very achievable project with a sponge and two nude polishes, and it is forgiving in a way most ombrés are not, because the colours are so close that a mistake barely shows. Wear it for the longest stretch of term, when you know you will not get to the salon for three weeks, because it will still look neat on day twenty-one. It is the manicure equivalent of a good pair of flat shoes: nobody comments on it, and you would not survive without it.
Parent-Teacher Evenings — Polished Under Fluorescent Lights
Parents’ evening is the one night of term when your hands are on display. You are pointing at work, shaking hands, holding a pen while a parent watches you write a note about their child — and the school hall lighting is never flattering. These four designs are made for that room: deeper colours, cleaner lines, a little more polish than the everyday designs, but still nothing that would raise an eyebrow. They are the manicures that say you take your work seriously and you take yourself seriously too.
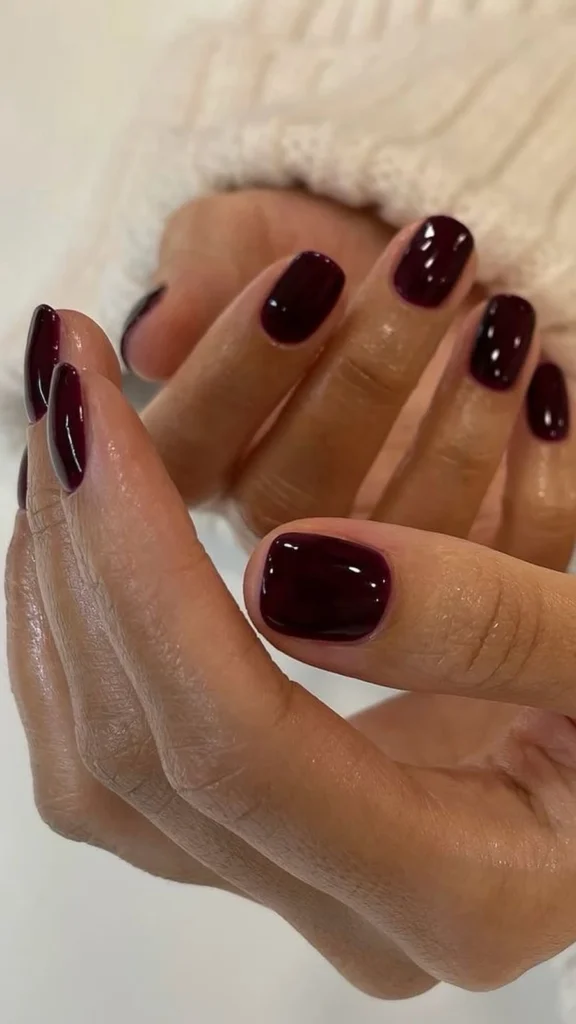
9. Deep Burgundy Short Square
Burgundy is the evening colour, and on short square nails it is the most grown-up design in this guide. It is deep, warm, wine-coloured — not purple, not brown, but that rich red that looks almost black in dim light and glows in warm light. On a short square nail it looks like a decision: neat, deliberate, and completely unbothered by fluorescent lighting, which is more than can be said for most colours.
The application has to be careful, because a dark colour shows every flaw. Use a ridge-filling base coat, then two thin coats, painting a fraction of a millimetre away from the cuticle so the colour does not flood onto the skin — dark polish on skin is the one mistake that is visible from across the room. Clean up the edges with a small brush dipped in remover before the top coat, and seal the free edge. A glossy top coat is non-negotiable here: burgundy under a matte finish can look flat and tired, while under gloss it looks like wine in a glass.
Additional Information: This is the design to choose for parents’ evening, a school concert, or any night when you want to look polished without trying too hard. It suits short square nails best, where the shape gives the dark colour structure, and it suits every skin tone — on fair skin it is dramatic, on deep skin it is rich and warm. At home it is a careful person’s project, because dark polish punishes a shaky hand, but it is also the design that gets the most compliments in this guide. The maintenance note is that burgundy shows grow-out fast, so wear it when a repaint is only a week away, not three. Pair it with a simple gold band and a dark outfit and the whole look ties together.
10. Classic French with a Thin Gold Smile Line
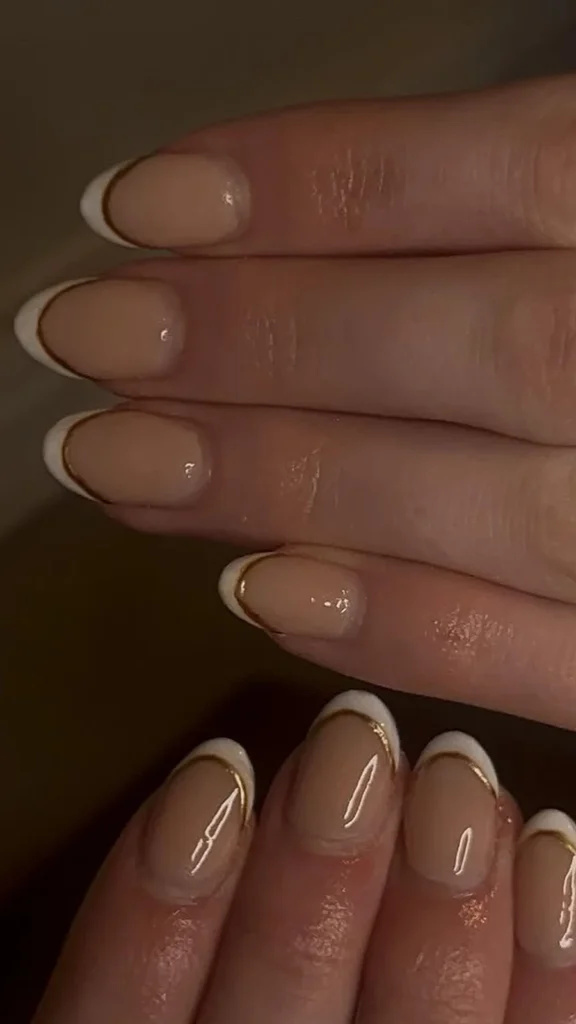
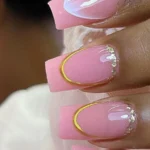
A classic French manicure — sheer pink base, white tips — with one change: the smile line, the curve where the white tip meets the pink base, is traced with a fine line of metallic gold. It is the kind of detail people notice on the second look, and it changes the whole set from a pretty French to something that looks like it was designed, not just applied. For parents’ evening it is ideal, because it is unmistakably a French — the most professional manicure there is — with just enough gold to look like you made an effort.
The gold line has to be thin. A thick gold band looks like a mistake; a fine line looks like jewellery. Your technician should paint the white tip first, let it set, then draw the gold line with a striping brush or a fine liner, following the curve exactly. If you are doing it yourself, a gold metallic polish applied with the very tip of the brush works, but wipe most of the polish off the brush first — you want a line, not a flood. The white tips should be medium width and even across all ten nails, because an uneven French is the first thing a careful eye catches.
Additional Information: This design suits medium almond or oval nails best, where the smile line has room to curve gracefully, and it suits every skin tone because sheer pink, white and gold are all neutrals. It is a salon design unless you are confident with a liner brush — the gold line is the whole design, and a wobbly line is the whole design gone wrong. Wear it to parents’ evening, a job interview, or any occasion when you want your hands to look like they belong to someone who has everything under control. It ages gracefully: as the manicure grows out, the gold line is the last thing to look tired. The only caution is top coat — metallic polish can look streaky under a single coat, so ask for two.
11. Soft Grey with a Single Pearl Accent
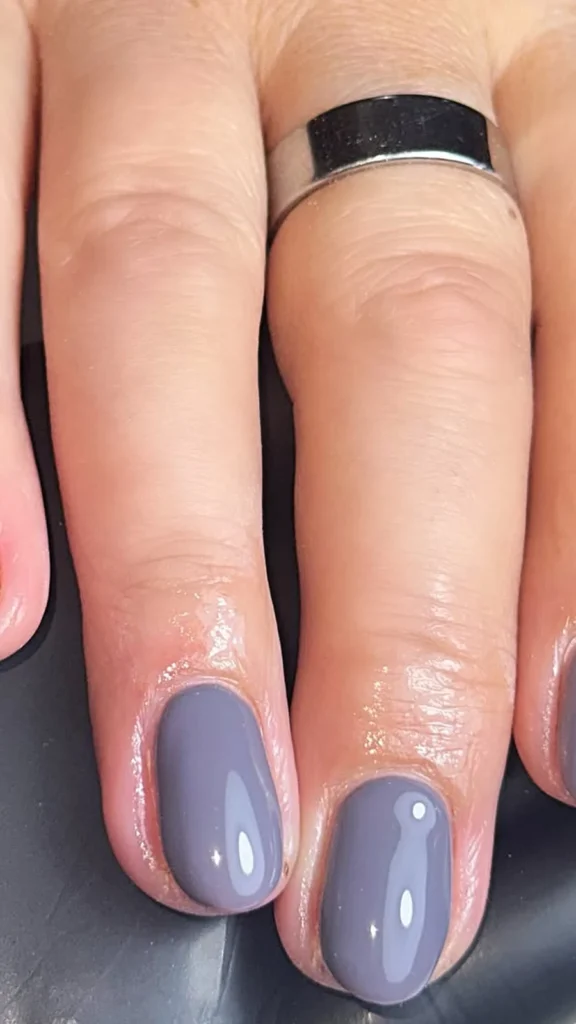
Soft grey is the most understated colour in this guide, and the pearl is what makes it feel special. A pale, warm grey — the colour of a dove’s wing, not the colour of concrete — on short to medium nails, with a single tiny pearl glued to the ring finger of each hand. The pearl is small, flat-backed, and the same soft white as the grey is cool, so the whole design reads as quiet luxury: nothing shiny, nothing loud, just a beautiful neutral with one perfect detail.
The grey has to be warm, not cold. A cold grey on the nail can look like you forgot to finish the manicure; a warm grey, with a hint of lilac or beige in it, looks deliberate and expensive. Two coats will give you an even, opaque finish. The pearl goes on with a dot of nail glue, placed just above the centre of the ring finger nail, and sealed around its base with top coat — not over the top of it, or the pearl will look cloudy. One pearl per hand is enough. Two pearls per hand is a pattern, and a pattern is a different design.
Additional Information: This design suits short to medium nails in any shape, and it suits cool and neutral skin tones especially well — on warm skin, choose a grey with a beige undertone rather than a blue one. It is a salon design if you want the pearl placed perfectly, but very doable at home with a pair of tweezers and a steady hand. Wear it to parents’ evening or a formal school event, when you want your nails to look like they belong to someone who reads the room carefully. The maintenance note is the pearl: check it daily, because a loose pearl will catch on fabric, and if it comes off, a dot of glue will put it back in thirty seconds. Carry the glue in your bag on the day.
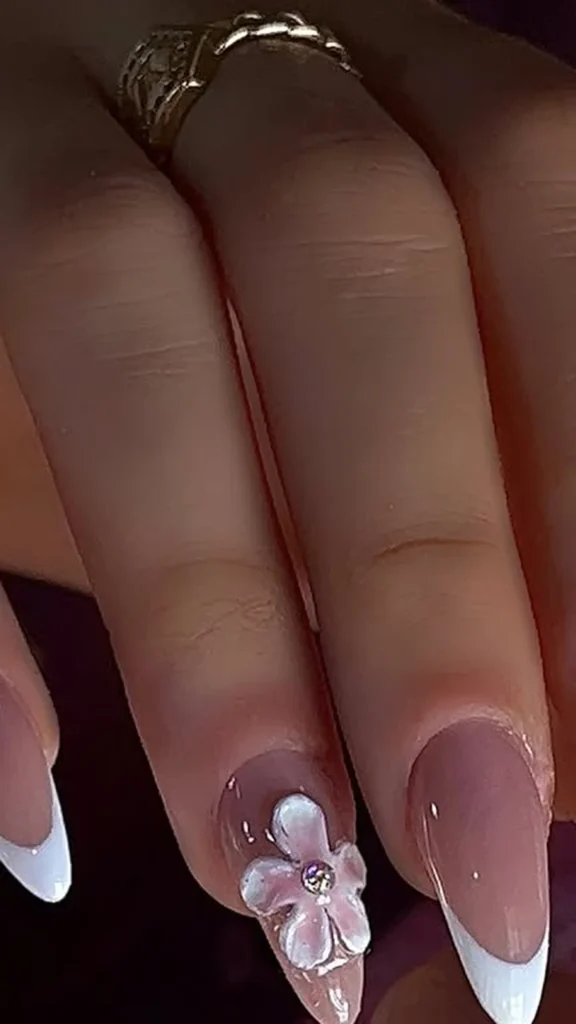
12. Rose Pink with Fine White Floral
Rose pink is the middle of the pink spectrum — pink enough to read as pink, neutral enough to go with everything — and this design adds the finest white floral you can imagine: a single tiny five-petalled flower, hand-painted in white, on the ring finger of each hand, with a dot of gold at its centre. The rest of the nails stay plain rose pink. It is romantic without being sweet, floral without being busy, and it is the prettiest design in this guide for a teacher who loves flowers but would never wear a full floral set to school.
The rose pink should be a true rose — a soft, slightly dusty pink, not a bright one and not a nude one. Two coats will give you a clean, even colour. The flower is painted with a fine detail brush: five small petals in white, arranged in a circle, with a tiny gold dot in the middle. It should be small — no bigger than the width of the nail — and it should sit slightly above the centre of the nail, not at the tip and not at the cuticle. If freehand flowers scare you, a white floral nail sticker, sealed under top coat, will give you the same effect, and nobody will know the difference.
Additional Information: This design suits medium almond or oval nails best, where the flower has room to sit without crowding, and it suits every skin tone because rose pink is the most versatile pink there is. It is a salon design unless you are confident with a detail brush — the flower is small and the petals need to be even. Wear it to parents’ evening, a spring concert, or a wedding you are attending as a guest, when you want your nails to look like you thought about them. It is also the best choice in this guide for a teacher who wants a floral design that will not raise an eyebrow in a staff meeting. The only caution is the gold centre dot: keep it tiny, or it will read as a stud rather than a flower.
Spirit Week and Holidays — Teachers Are Allowed to Have Fun Too
There is a particular joy in spirit week, and teachers who pretend they do not enjoy it are lying. The dress-up days, the themed assemblies, the classroom door competitions — and your nails can join in without breaking a single dress-code rule. These four designs are playful, but they are still classroom-appropriate: the fun is in one accent, one colour, one motif, and the rest of the hand stays neat. They are the designs your students will actually notice, and they will love you for them.
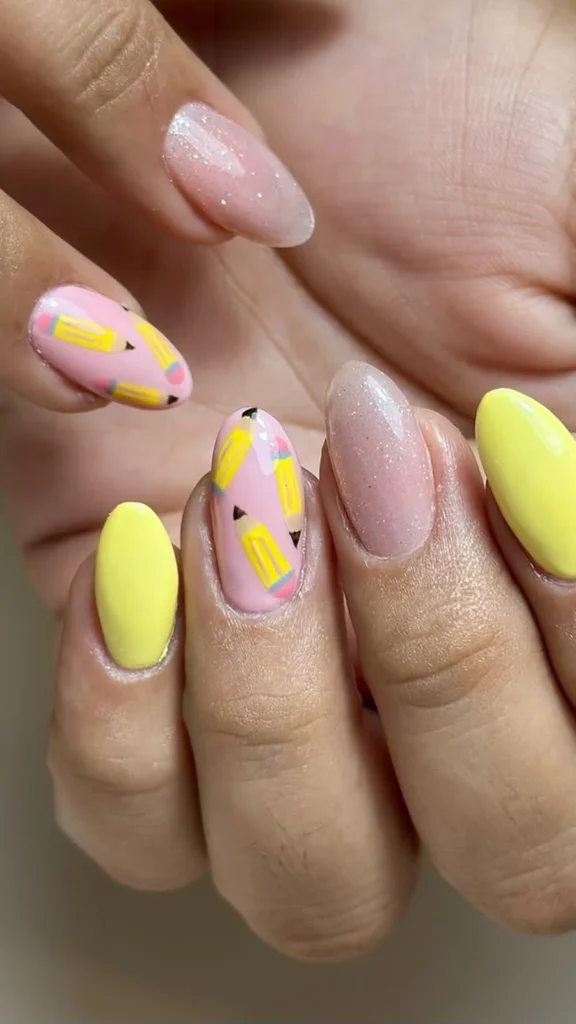
13. Pencil-Yellow Accent Nail
Every teacher knows the pencil. It is the symbol of the job, and this design wears it with a wink: nine nails in a sheer nude, and the ring finger in a bright, cheerful pencil yellow — the exact yellow of a freshly sharpened pencil, not a pastel and not a neon. One yellow nail, nine nude ones. It is the kind of design that makes a student grin when they spot it, and it is the kind that no dress code can object to, because it is a single coloured nail.
The nude base should be sheer and close to your skin tone, so the yellow is the only thing the eye registers. The yellow needs to be opaque — a yellow that is streaky or sheer will look like a mistake, so use two or three thin coats and let each one dry. If the yellow is too bright for your taste, a slightly softer school-bus yellow will give you the same effect with less shout. A glossy top coat over the whole hand ties the two colours together and makes the yellow look intentional rather than accidental.
Additional Information: This design suits short nails best, where a single coloured nail looks like a deliberate accent rather than a half-finished manicure, and it suits every skin tone because the nude base is invisible and the yellow is a single pop of colour. At home it is a very easy project — the only skill is painting one nail a different colour, which is the easiest nail art there is. Wear it during back-to-school week, on the first day of term, or any day when you want your nails to say something about the job without saying it out loud. It is also the best design in this guide to wear with a yellow top or a denim jacket, because the yellow picks up the outfit. The maintenance note is that yellow stains the nail if it is worn without a base coat, so never skip the base.
14. Red, White and Blue Micro Stripes
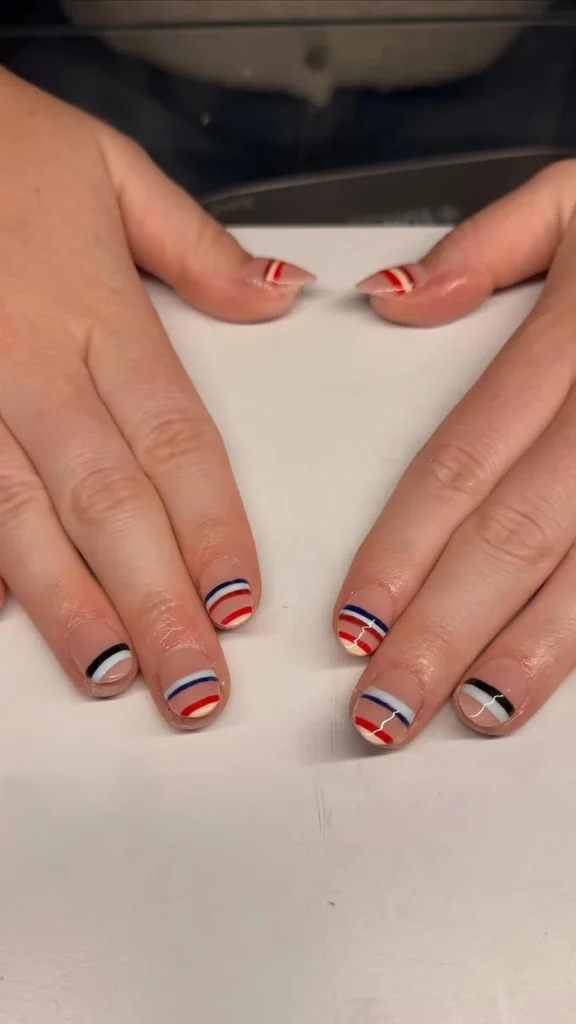
For spirit week, for a school sports day, for the week of a national holiday — a design that wears the colours without wearing a flag. A sheer nude base, and on the ring finger of each hand, three fine horizontal stripes in red, white and blue, painted across the middle of the nail like a tiny ribbon. The other eight nails stay plain nude. It is patriotic, it is sporty, it is cheerful, and it is so small that it reads as a detail rather than a statement.
The stripes need to be thin and even. Paint the nude base first and let it dry completely, then paint the stripes with a striping brush: a thin red line, a thin white line, a thin blue line, evenly spaced across the centre of the nail. The white stripe is the tricky one, because white over nude can look patchy — use an opaque white and paint it in one confident stroke rather than going back over it. A glossy top coat seals the stripes and makes them look like they were printed rather than painted.
Additional Information: This design suits short to medium nails in any shape, and it suits every skin tone because the base is sheer nude and the stripes are a small detail. It is a patient person’s home project — the stripes take a steady hand and a striping brush — but a nail art pen will do the same job with less skill, and striping tape will give you perfectly straight lines if freehand is not your strength. Wear it for spirit week, a sports day, or a school celebration, when you want your nails to join in without shouting. It is also the best design in this guide for a teacher who wants to try nail art for the first time, because the stripes are forgiving: if one is slightly wobbly, it still reads as handmade and charming.
15. Apple-Red with a Tiny White Heart
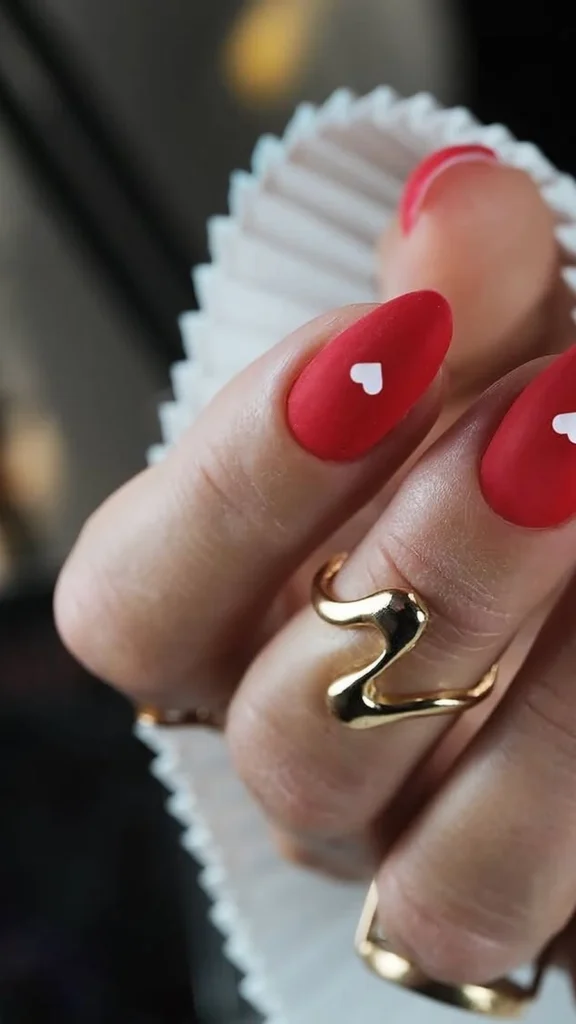
A tiny white heart, no bigger than a grain of rice, painted on the ring finger of each hand, over a glossy apple-red base. That is the whole design, and it is enough. It is sweet without being childish, romantic without being obvious, and it is the design your students will notice first — usually with a gasp, usually followed by a question about who the heart is for, which you will answer with a smile and a change of subject.
The red should be the same true apple red as design one, glossy and even, two thin coats over a base. The heart is painted with a dotting tool: two small white dots side by side, then a tiny triangle pulled down from beneath them with a detail brush, forming a heart. It should sit just above the centre of the ring finger nail, and it should be small — a big heart on a short nail looks like a cartoon, while a tiny one looks like a secret. Seal it under two top coats, because a raised white heart is the first thing to catch on paper.
Additional Information: This design suits short oval or short square nails best, where the heart has room to sit without crowding, and it suits every skin tone because apple red is a universal colour. At home it is a moderate project — the heart takes a little practice, so try it on a piece of paper first, or use a tiny heart sticker sealed under top coat, which gives you the same effect with no skill at all. Wear it in February, for a school Valentine’s event, on a wedding anniversary, or any day when you want a small private joy on your hands. It is also the best design in this guide to wear with a red top or a cream jumper, because the red picks up the outfit. The maintenance note is the same as any red: carry the bottle, because a red chip is visible from across the room.
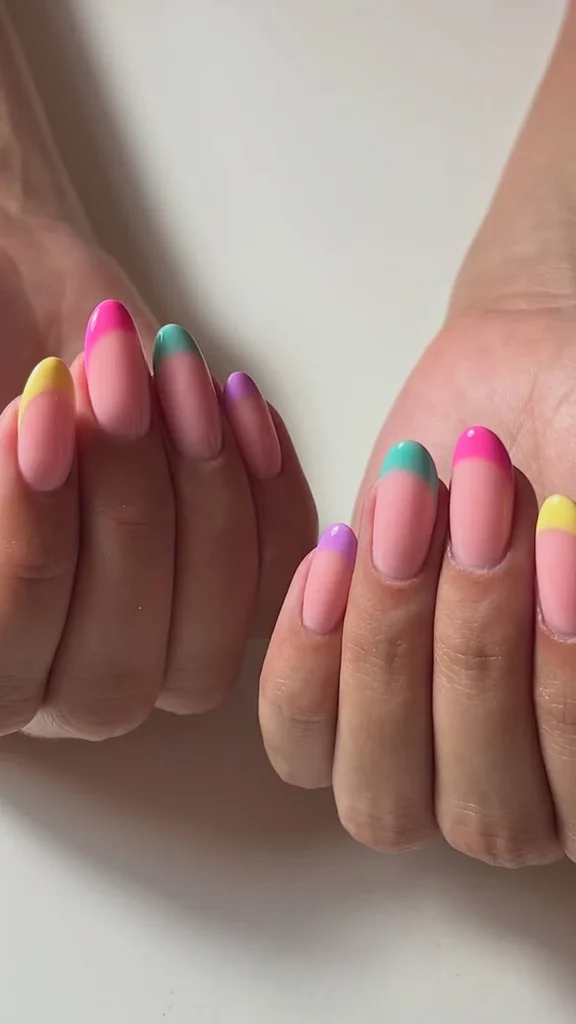
16. Pastel Rainbow French Tips
One pastel colour per nail: soft pink on the thumb, baby blue on the index, mint green on the middle, butter yellow on the ring, lilac on the pinky — each one as a French tip on a sheer nude base. It is the most cheerful design in this guide, and it is also the most classroom-appropriate way to wear five colours at once, because each colour is only on a tip and the rest of the nail is barely there. It looks like spring, it looks like a box of chalks, and it looks like a teacher who is having a good week.
The pastels should be soft and muted, not bright — think chalk, not highlighter. Paint the sheer nude base first and let it dry, then paint each tip in its pastel, freehand or with tip guides, keeping the smile line even across all ten nails. The trick is to keep the tips the same width on every nail, because a wide tip on one nail and a thin one on the next is the first thing the eye catches. A glossy top coat blends the line between base and tip and makes the whole set look professional.
Additional Information: This design suits medium almond or oval nails best, where the tips have enough width to show each pastel clearly, and it suits every skin tone because pastels are soft colours that behave like neutrals. It is a salon design unless you are confident with a freehand tip — five colours means five chances for a wobbly line, and the guides help. Wear it in spring, for the last week before a holiday, or on a Friday when the week has been long and you want your hands to look like a small celebration. It is also the best design in this guide for a teacher who cannot choose a colour, because it lets you wear five at once. The maintenance note is that pastels show chips faster than nudes, so seal the free edge and carry a top coat for mid-week touch-ups.
End of Term and Summer Send-Off — You Have Earned Something Sparkly
The last day of term is a particular kind of day. The classroom is half-empty, the displays are coming down, the students are already halfway out of the door in their minds, and you are standing in the middle of it all with a bin bag and a sense of relief so large it barely fits in the room. These three designs are for that day, and for the first week of the holidays after it — the designs with a little sparkle, a little warmth, a little glamour, because you have earned it and because nobody is grading you now. Wear them to the end-of-term party, to the staff lunch, to the first day of doing nothing at all.
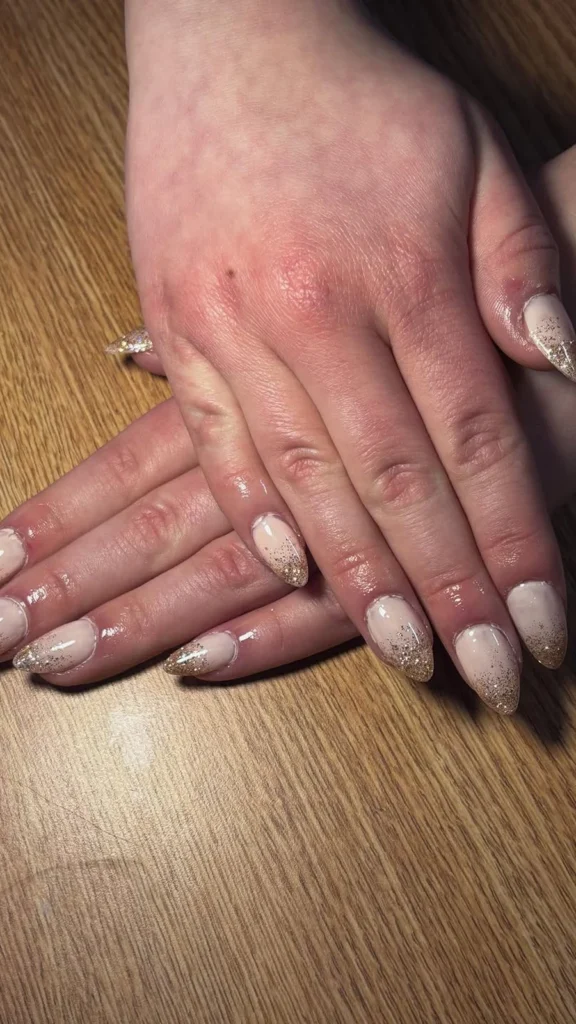
17. Glitter Gold Tips on Nude
A sheer nude base with glitter gold tips — not a French tip in gold, but a soft fade of gold glitter that is densest at the very edge of the nail and thins out as it moves down toward the cuticle, like the nails are dissolving into light. It is the most celebratory design in this guide that is still, just about, classroom-appropriate, and it is the one to wear on the last day of term, when the rules relax and the glitter comes out.
The glitter fade is built with a sponge, not a brush. Paint the nude base first and let it dry, then dab gold glitter polish onto the tip with a makeup sponge, pressing lightly and further down the nail with less and less pressure, so the glitter fades instead of stopping. Two or three light passes, letting each one dry in between, will give you a smooth gradient. The trick is patience: a rushed glitter fade has a visible line where the glitter stops, and a patient one does not. The maintenance note is top coat — glitter is rough, so ask for two coats to seal it smooth, and reapply on day five.
Additional Information: This design suits medium almond or oval nails best, where the fade has enough length to show, and it suits warm skin tones especially well, because gold glitter and warm skin are a classic pairing. At home it is a very achievable project with a sponge and a glitter polish, and it is forgiving in a way most glitter designs are not, because a slightly uneven fade still looks intentional. Wear it to the end-of-term party, a staff celebration, or the first day of the holidays, when you want your nails to look like a small fireworks display. It is also the best design in this guide to wear with a gold ring and a cream or champagne outfit, because the gold picks up the jewellery. The only caution is removal: glitter is stubborn, so soak it off with foil and remover rather than picking at it, or you will take the top layer of your nail with it.
18. Terracotta with Cream Half-Moons
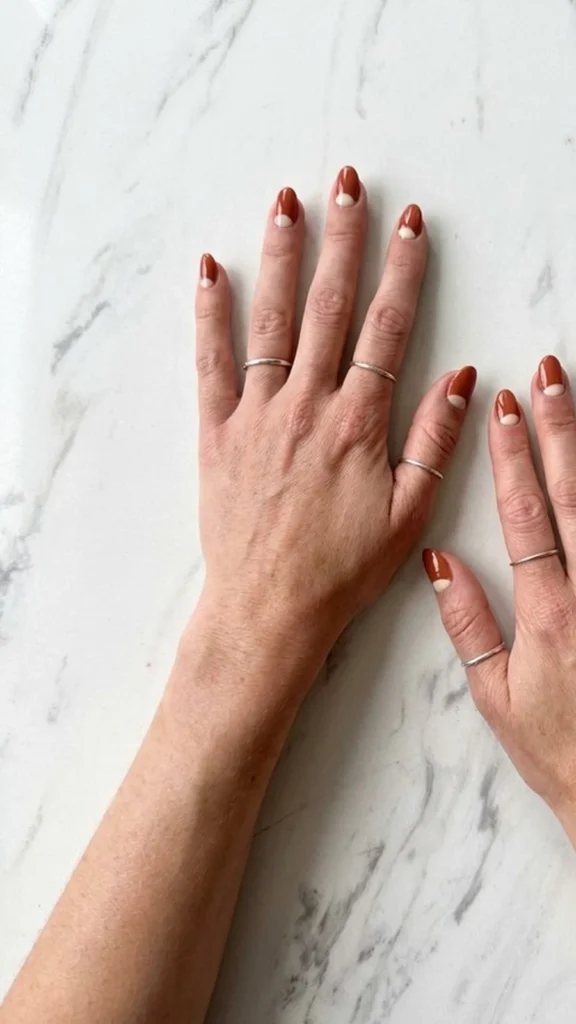
Terracotta is the warmest colour in this guide — a baked-clay orange-brown, the colour of a flowerpot in the sun — and this design pairs it with a cream half-moon at the cuticle of each nail, like a little rising sun. It is autumnal, it is warm, it is a little bit bohemian, and it is the design for the teacher who is ready for the holidays and already thinking about autumn leaves, chunky jumpers and hot drinks.
The terracotta should be a true terracotta — warm, earthy, with an orange undertone, not a brown and not a coral. Two coats will give you an even, opaque finish. The half-moon is painted with a small round brush or a hole-reinforcement sticker as a guide: a neat cream crescent at the base of each nail, following the curve of the cuticle. It should be small — a big half-moon swallows the nail, while a small one looks like a detail. A glossy top coat ties the two colours together and makes the crescent look like it was always part of the design.
Additional Information: This design suits medium oval or almond nails best, where the half-moon has room to curve, and it suits warm and deep skin tones especially well — terracotta and deep skin are a beautiful pairing, and the cream crescent adds a lovely contrast. At home it is a moderate project: the half-moon takes a steady hand, but a reinforcement sticker as a guide will give you a perfect crescent with no skill at all. Wear it in autumn, at the end of term, or on a holiday when you want a colour that feels like a warm room. It is also the best design in this guide for a teacher who loves earthy colours but finds brown too flat — terracotta has the warmth of brown with the life of orange. The maintenance note is that the cream crescent will show grow-out first, so this is a one-to-two-week design, not a three-week one.
19. Cream Nails with Gold Foil Flakes
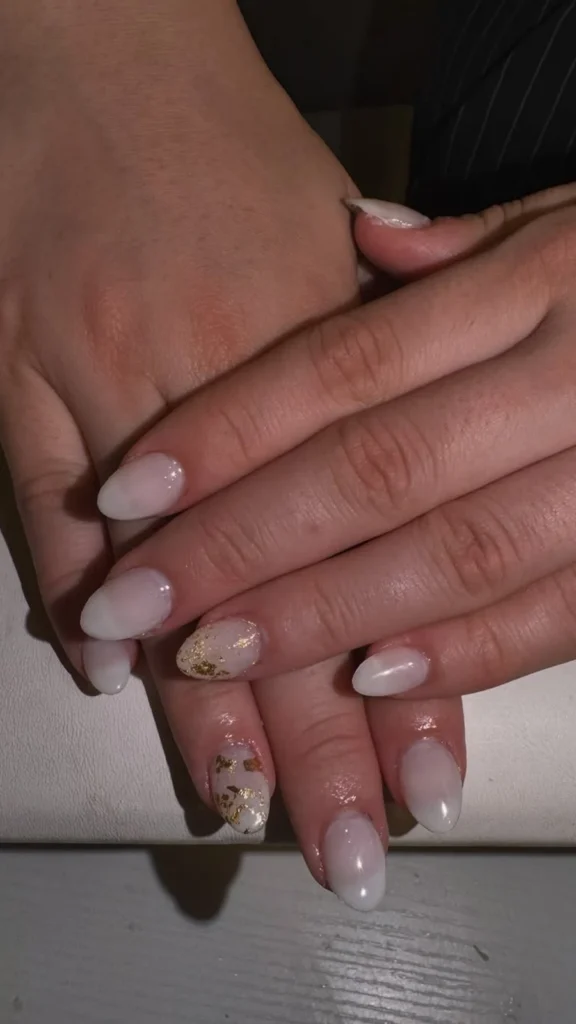
The last design in this guide is also the most luxurious: a warm cream base — the colour of fresh cream, not white and not beige — scattered with irregular pieces of gold foil, torn-edged and a little bit wild, like gold leaf on a painting. It is the manicure for the end-of-term party, the staff dinner, the first evening of the holidays when you are finally out of the classroom and into a restaurant. It is the design that says the term is over, and you look wonderful.
The cream base should be warm and opaque, two coats over a base coat, with a glossy finish. The foil goes onto a tacky layer — a top coat that is still slightly wet, or a foil glue — and it is pressed on with a silicone tool, not a brush, so it tears into organic shapes instead of lying flat like a sticker. Place the flakes unevenly: more on the ring finger, fewer on the others, one or two on each nail at most. Seal it under two thin top coats, because foil lifts at the edges if it is not sealed properly, and a lifted edge is the one thing that ruins this design.
Additional Information: This is the design to choose for the last day of term, a celebration dinner, or the first week of the holidays, when you want your nails to look like they belong to someone who is finally off duty. It suits medium almond or oval nails best, where the foil has room to sit without crowding, and it suits every skin tone because cream and gold are both neutrals. It is a salon design unless you are patient — placing foil takes a steady hand and the right timing — but it is also the most forgiving design in this guide, because the irregularity is the point and a mistake looks intentional. Wear it with a gold ring and a cream or black outfit and the whole look reads as quiet, expensive glamour. If a flake lifts at an edge, a dot of top coat pressed down with an orange stick will fix it.
How to Pick Yours
Nineteen designs is a lot to choose from, and the honest answer is that there is no wrong choice here — but there are choices that fit your life better than others, and three quick questions will narrow it down.
How strict is your school? If your dress code is strict, or your headteacher notices everything, start with designs 2, 4, 6 or 8 — the sheer nude, the taupe, the sage, the nude ombré. They are the four most invisible designs in this guide, and they are invisible in the best possible way: they look like grooming, not decoration. If your school is relaxed, anything in this guide will pass, including the pencil yellow and the pastel rainbow.
How long until your next appointment? If it is three weeks away, choose a design that hides grow-out: the sheer nude with a fine white line, the warm nude ombré, the taupe, or the sage. If you are going to the salon next week, wear the burgundy, the red, or the glitter gold tips — the colours that show grow-out fast but look spectacular while they last.
What kind of week is it? A first week of term calls for red or blush. A long middle stretch calls for sage or taupe. Parents’ evening calls for burgundy or the gold-lined French. Spirit week calls for the pencil or the micro stripes. The last day of term calls for gold foil and cream. Match the manicure to the week, and it will never feel like the wrong choice.
And one last thing, the most practical thing in this whole guide: keep a bottle of your base colour and a top coat in your desk drawer. A five-minute touch-up between lessons — one coat on the chipped nail, a top coat over the whole hand — is the difference between a manicure that looks tired by Wednesday and one that looks fresh on Friday. Your students will not notice the touch-up. They will notice the chip.
Conclusion
Teacher nails are not about keeping up with trends. They are about a manicure that respects the job: short enough to work in, neat enough for a parent to trust, pretty enough to make you smile when you catch your own hand mid-lesson. The nineteen designs in this guide are built around that idea, from the classic apple red of the first day to the gold foil of the last, and every one of them is designed to look good on a real hand doing real work.
So pick one. Pick the one that made you stop scrolling — the taupe, the sage, the pencil yellow, the burgundy, whichever it was. Book the appointment, or paint it yourself on a Sunday evening with a cup of tea and a podcast. And when a student notices, mid-lesson, and says your nails are pretty, say thank you and carry on with the lesson. You have earned the compliment. You have also earned the manicure.
FAQ
What nail length is best for teachers?
Short to medium — short oval, short square or a soft squoval shape. Short nails type comfortably, do not snag on paper or clothing, and are the easiest to maintain. Medium almond or oval works well for French tips and ombré designs. Long nails are not recommended for classroom work, because they click on keyboards, catch on paper and snap easily.
What nail colours are appropriate for teachers?
Sheer nudes, soft blush, taupe, sage green, milky white, dusty blue and classic red are all classroom-friendly. The key is the finish and the length, not just the colour: a short, neat red is more professional than a long, chipped nude. Avoid very long nails, heavy 3D art and anything that would distract in a classroom.
How can teachers make their manicure last longer?
Use a gel polish or a good strengthening base coat, seal the free edge with top coat, reapply top coat on day five, and keep your base colour in your desk drawer for quick touch-ups. Wear gloves for cleaning and washing up, and avoid using your nails as tools to open things. Sheer and nude shades hide chips and grow-out far better than dark colours.
Are French nails okay for teachers?
Yes — a classic French, or a French with a thin gold line or a pastel tip, is one of the most professional manicures a teacher can wear. Keep the tips medium width and even, the base sheer, and the length short to medium, and it will pass even a strict dress code.
Can teachers wear nail art to school?
Yes, as long as it follows the one-statement rule: one accent nail, one tiny motif, one thin line of gold, with the rest of the hand calm. A pencil-yellow accent nail, a tiny white heart, or micro stripes are all classroom-appropriate. Avoid large 3D charms, long stiletto shapes and heavy glitter on all ten nails.
What is the best low-maintenance teacher manicure?
A sheer nude with a fine white line, or a warm nude ombré. Both grow out almost invisibly, hide chips, need no special tools to maintain, and look neat for three weeks. Taupe and sage green are also excellent low-maintenance choices.
Leave a Reply