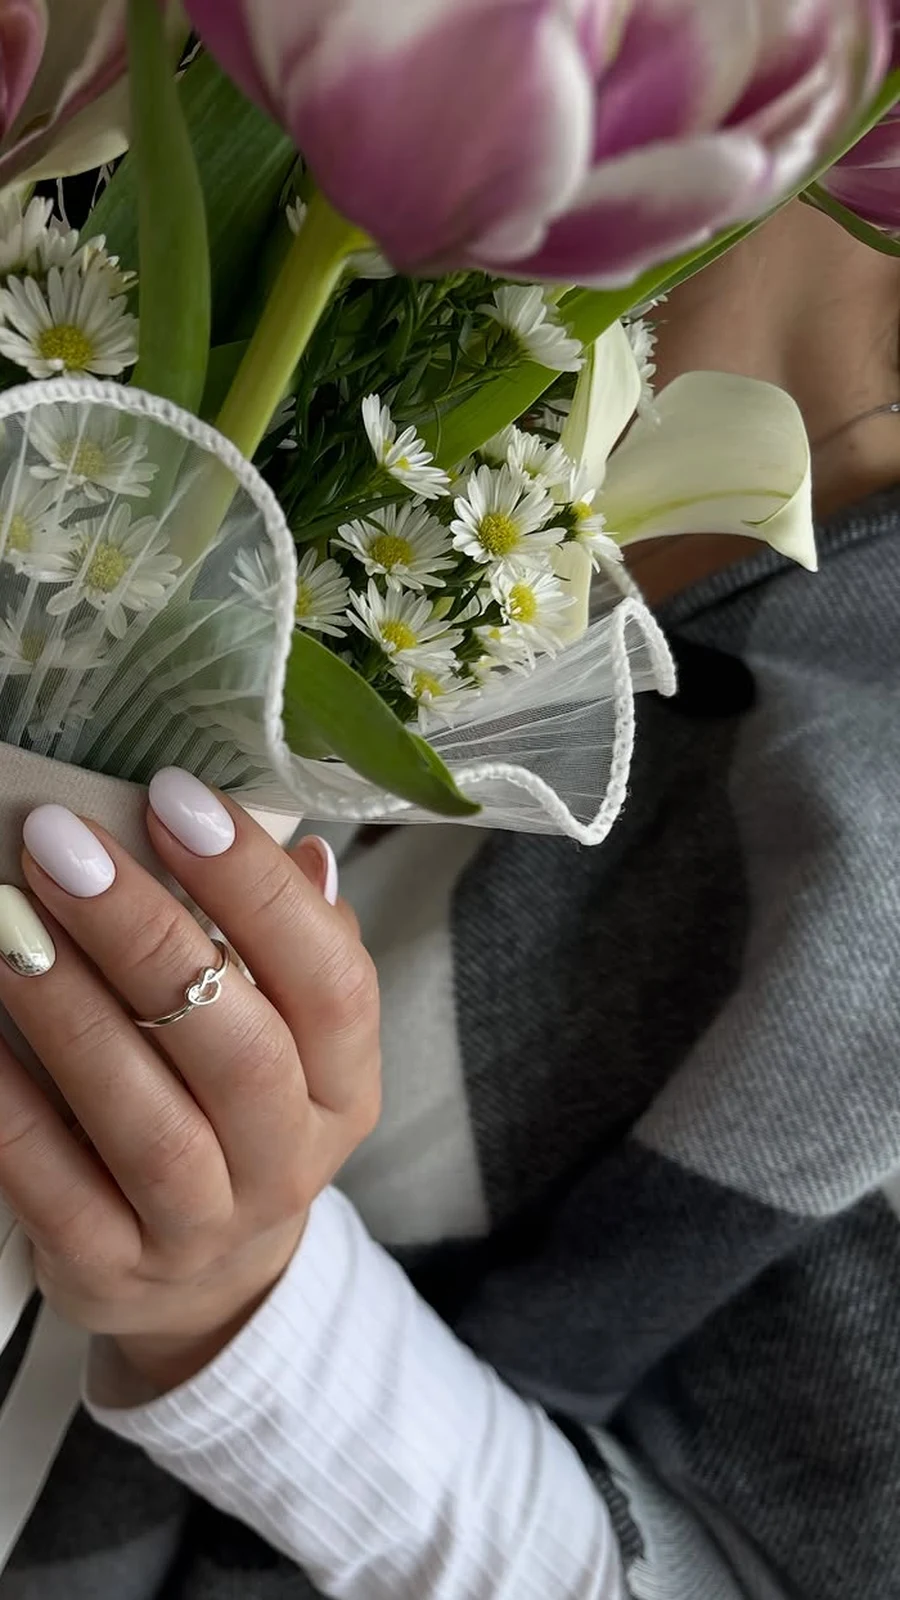
Your Nails Have Been Waiting All Winter for This
There is a specific day every spring when you look down at your hands and realise your nails still think it is January. Dark berry polish, chipped at the corners. Cuticles that gave up somewhere around the third cold snap. A shape you chose in November because it matched your coat, and now it matches nothing at all.
Spring is the season to fix that — not with a single dramatic salon visit, but with a plan. Think of your spring manicure the way you think of a spring wardrobe: you do not buy everything at once. You pick a palette, you pick a shape that fits your life, and then you rotate a few looks through the season, two weeks at a time, until you have tried everything that caught your eye.
That is what this guide does. It is organised in four acts, the way you would actually plan it. Act One is the colour — five palettes that defined spring 2024, and how to choose between them. Act Two is the shape — short, almond, or dramatic — because the same colour looks completely different on a different nail. Act Three is the looks themselves, eight of them, each with the steps to get it, so you can take the page to your technician or do it at your own kitchen table. And Act Four is the unglamorous part that makes all of it last: prep, top coat, and the two-week rotation that keeps your nails healthy while you play.
No single look here is the “right” one. Spring 2024 was a generous season — it had room for milky pastels and loud citrus, for a quiet sheer almond and a fuchsia leaf painted freehand. The trick is picking the one that feels like you on a Tuesday morning, not the one that photographs best on someone else’s hand.
Before You Pick a Colour, Read the Room
A trend only works if it survives your actual life, so before the palette, a quick honesty check. How long are your nails right now, really — not in the photo you saved, but on your hands? How much time will you spend on them this week? Do you type all day, garden, wash dishes without gloves, hold a toddler’s hand? The answers narrow the field fast, and that is a kindness: five palettes are easier to choose from than fifty, and a short natural nail with a beautiful colour beats a long stiletto you break on a car door.
The other thing to decide early is whether you want colour as the star or art as the star. Some spring looks are all about the shade — one beautiful green, worn plain, is a complete look. Others are about the drawing — a single daisy on an otherwise bare nail. Both are spring 2024. They just ask different things of you and your technician, and they photograph very differently. Keep that in mind as you read: every look below tells you which one it is.
Act One — The Colours of the Season
Spring 2024 did not have one colour. It had five moods, and the season’s best manicures picked one mood and committed to it. Here they are, in the order you will meet them in the wild — from the softest to the loudest.
1. Milked Pastels — the Soft Wash
If spring had a signature colour story in 2024, this was it: pastels with a drop of milk stirred in. Lavender gone cloudy, baby blue softened to the colour of skimmed milk, mint that looks like it was watered down with cream, blush pink so pale it is almost a nude. The effect is a nail that reads as colour from across the room and as calm from up close — no shouting, no hard edges, just a wash of something gentle.
The reason milky pastels worked so well is that they flatter almost every skin tone, because the white in the mix lifts the shade away from competing with your skin. On fair skin they look dreamy; on deep skin they look striking, like chalk on a blackboard. They also forgive a lot: a tiny chip on a milky pastel is far less visible than the same chip on a saturated red, which is why this is the palette to choose if you are stretching a manicure into its second week.
To wear it, keep the rest quiet. One milky shade on all ten nails is the whole look, and it needs nothing added — no glitter, no art, no accent nail. If you want a little more, put the same milky shade on nine nails and a slightly deeper version of it on the ring finger. The shape that suits it best is short and rounded, filed soft at the corners, because the palette is already doing the talking and a sharp shape would argue with it.
Additional Information: Milky pastels usually need three thin coats instead of two, because the white base can go streaky if you rush it. Ask for a ridge-filling base coat first — it evens out the nail surface so the pale colour sits smoothly. These shades also stain less than brights, so they are a good choice if you change colour often. Wear them with silver jewellery rather than gold; the cool milkiness sits better against silver.

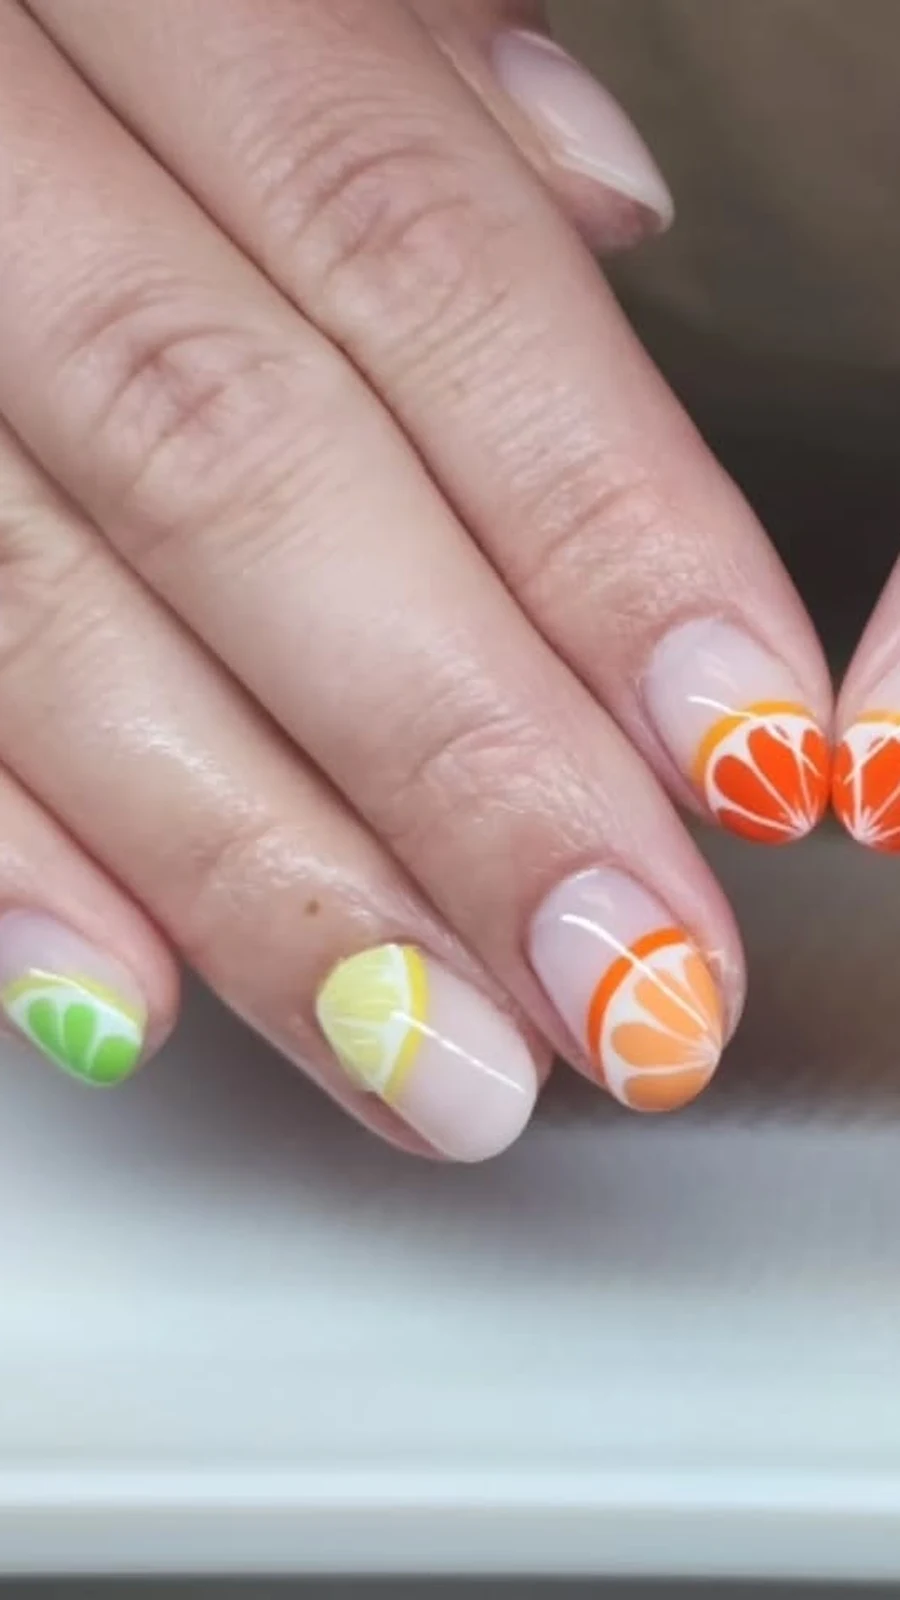
2. Citrus Zest — Lemon, Orange and Lime
At the other end of the season sat citrus: lemon yellow, juicy orange, lime green worn as loud as the fruit itself. This is the palette for the person who is done with winter and wants everyone to know it. A citrus manicure does not whisper spring — it announces it from the doorway, and in 2024 that was exactly the point. After months of dark, muted winter shades, the bright, zesty colours felt like a release.
Citrus works best as a single-colour statement, because the shade is the whole event. A lemon yellow on short nails looks fresh and modern; the same yellow on long nails can tip into costume, so length matters here more than with pastels. Orange is the most forgiving of the three — it warms up fair skin and glows on deep skin — while lime is the boldest and suits a confident, minimal outfit, something plain and white that lets the nails do the talking.
The practical side: bright yellows and oranges are the hardest colours to apply evenly, because the pigment is thin and shows every ridge. A good base coat is not optional, and two thin coats will always look better than one thick one. Citrus shades also stain the nail plate more than pastels, so never skip the base coat, and expect to need a little extra care at removal time.
Additional Information: If full citrus feels like too much, wear it on two accent nails — the ring fingers, or all five nails of one hand — and keep the rest in a sheer nude. That gives you the pop of colour without committing your whole manicure to it. Citrus pairs beautifully with white and denim, which is convenient, because that is what most of us are wearing by April anyway.
3. Botanical Green — Sage, Olive and Leaf
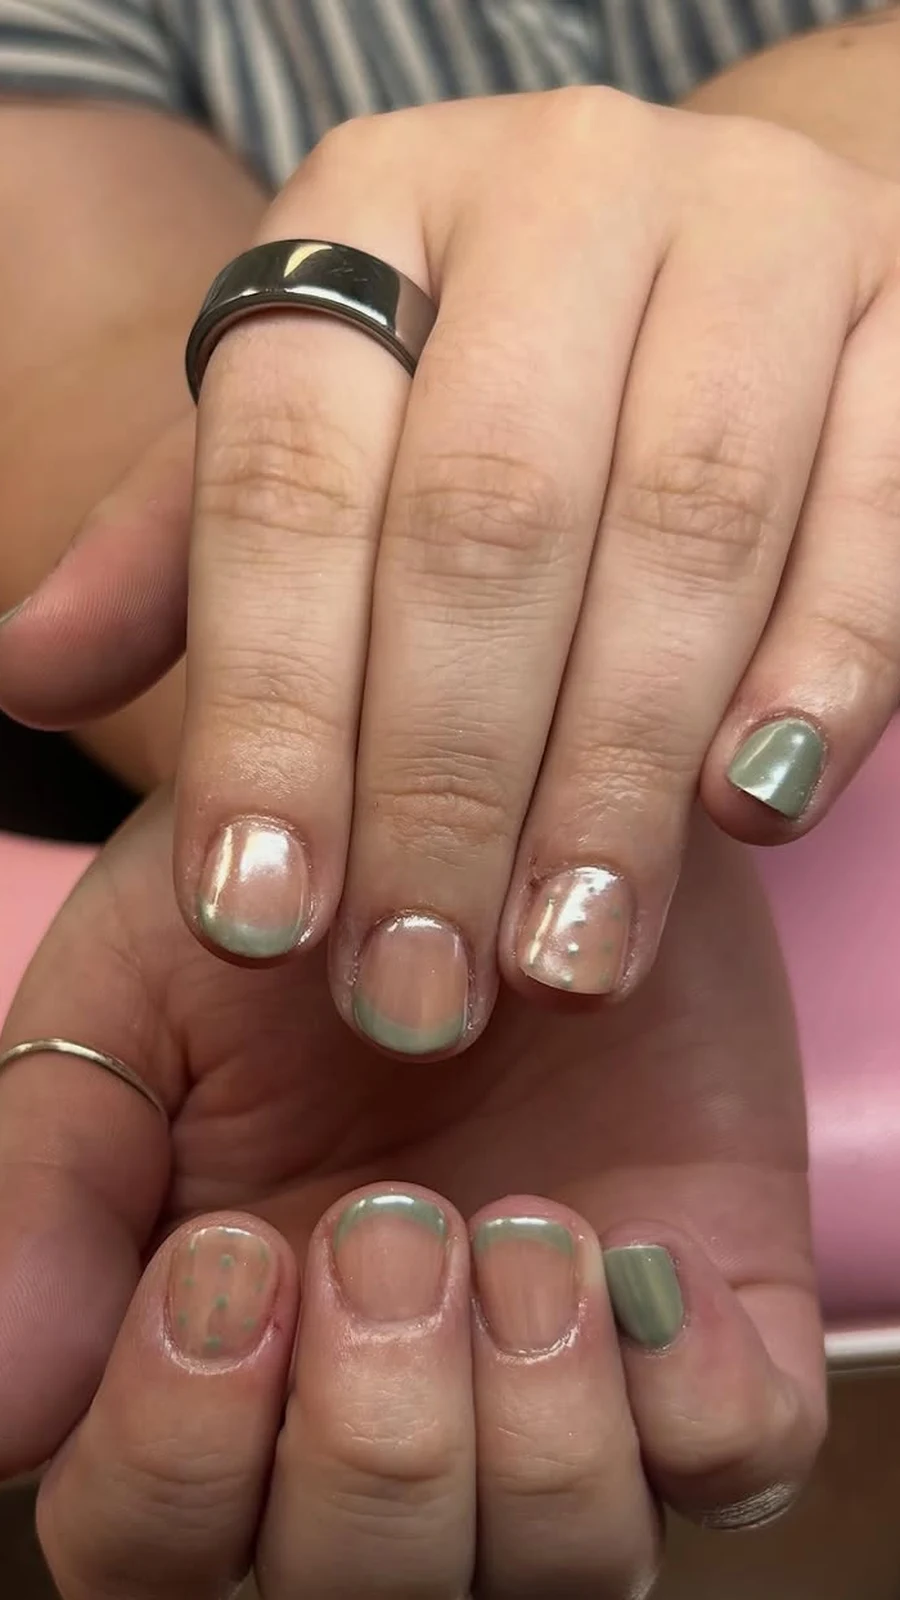
Green was spring 2024’s quiet surprise. Not the neon green of a decade ago, but the green of actual plants: sage, olive, eucalyptus, the deep green of a leaf held up to the light. It is a colour that feels grown rather than manufactured, and that is precisely why it worked. After a winter of burgundy and black, a sage green manicure reads as a breath of fresh air — calm, grounded, and a little bit clever.
The easiest way into botanical green is through the French manicure. A nude base with olive tips takes the most classic nail look there is and gives it a spring twist, and it suits short nails beautifully — the green tip draws the eye to the end of the nail and makes even a short nail look deliberate and finished. Worn as a full colour, sage is softer and more wearable than most people expect; it behaves almost like a neutral, pairing with denim, white, cream, and even the soft browns of a spring wardrobe.
Olive and sage also have a practical advantage: they hide regrowth and small chips better than pale colours do, and they do not stain the nail the way citrus shades can. If you are trying green for the first time, start with sage — it is the most forgiving of the family — and save the deeper olive for when you want something with more presence.
Additional Information: Botanical greens look best with a glossy top coat, which brings out the depth in the colour; a matte finish can make sage look chalky. If your skin has warm undertones, lean olive; if it is cool, lean sage. And keep the cuticles neat — green draws attention to the whole nail bed, so a quick oil rub before you leave the house makes the colour look twice as expensive.
4. Ocean Blue — From Sky to Deep Sea
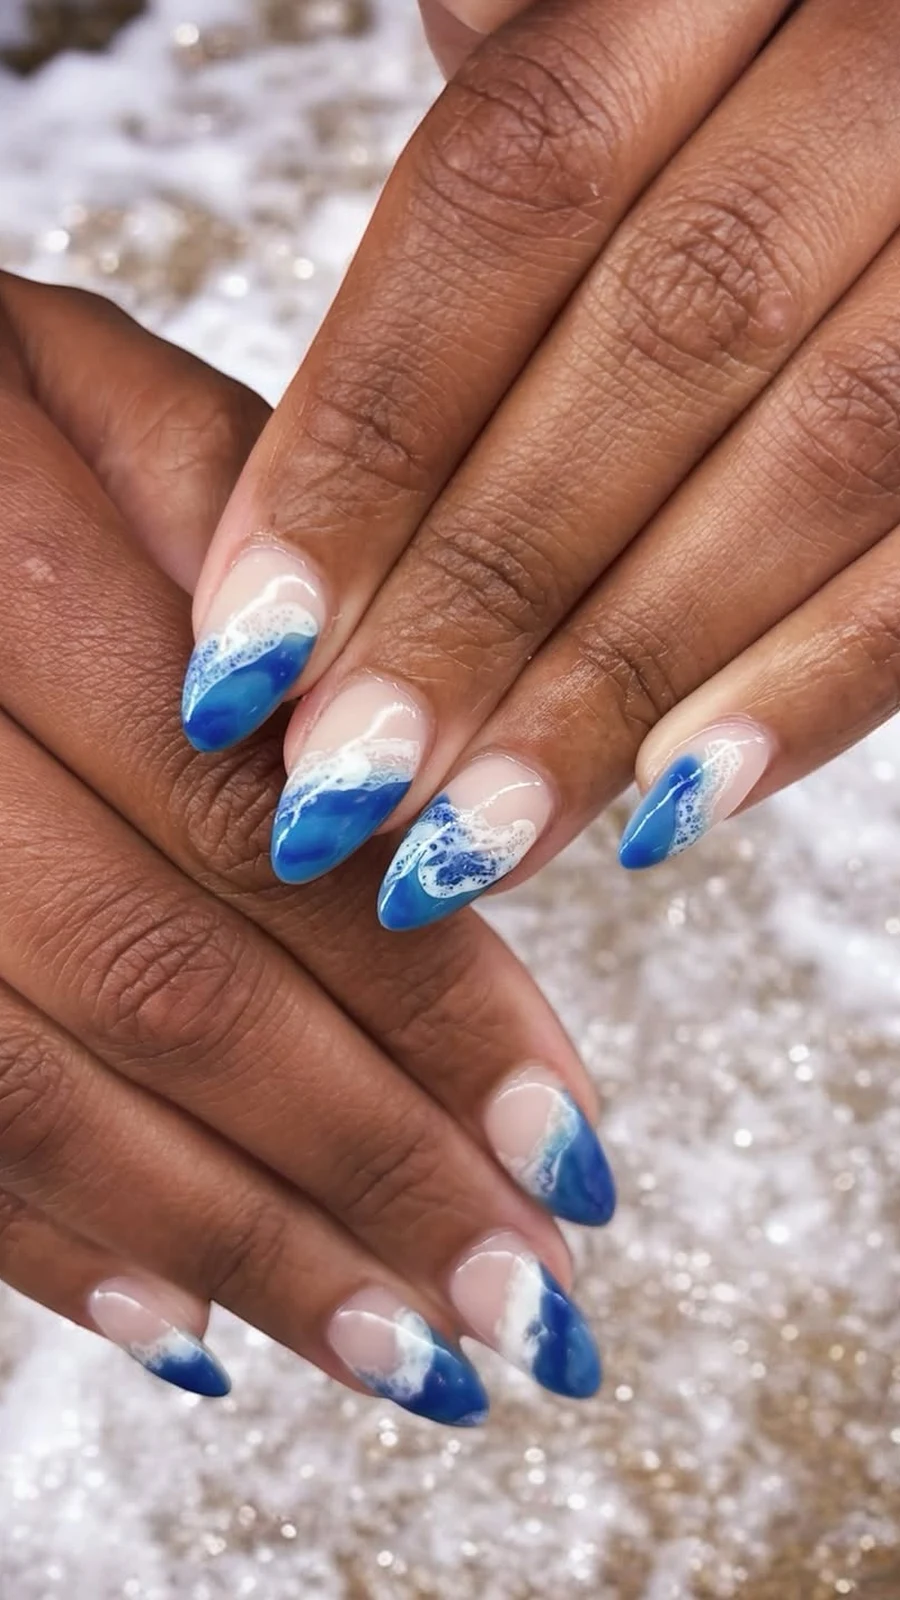
Blue in spring 2024 ran the whole range from a pale sky wash to a deep, inky ocean, and the season used both ends of it. The pale end — a sheer, watery blue, sometimes with a dusting of glitter — felt like the first clear sky after rain. The deep end — a rich navy-blue with a hand-painted white wave — felt like a small piece of art on your hands. Both are spring, just different weather.
The pale sky blue is the easier wear. It reads as a pastel, so it shares the milky palette’s forgiving nature, and it works on short nails without any art at all. The deep ocean blue is the statement: worn plain it is dramatic, and with a white wave or a scatter of tiny white dots it becomes a design that people actually ask about. If you love blue but are not sure which end suits you, try the middle — a cornflower or denim blue — which has the freshness of the pale shades and the presence of the deep ones.
Blue has one quirk to know about: dark blues stain. Always use a base coat, and if you are removing a deep blue, expect the cotton pad to come away very blue indeed — that is normal, and it is not your nails being damaged, just pigment. A peel-off base coat, if you change colours often, makes the whole thing much less of a chore.
Additional Information: Sky blue looks wonderful with a single silver glitter accent nail, which catches the light the way sun catches water. Deep blue pairs with white and cream clothes and with silver jewellery. If you wear blue to the office, keep it to the pale end during the week and save the deep ocean for the weekend — it is a small compromise that keeps the colour in your life instead of in the drawer.
5. Sunset Coral and Pink — Warmth You Can Wear
The last of the five palettes is the warmest: coral, peach, warm pink, the colours of a spring evening. This is the palette that flatters everyone, because warm pinks and corals sit close to the natural tones of skin and lips. A coral manicure looks like you, only more awake — which is why it is the shade people reach for when they want to look polished without looking made-up.
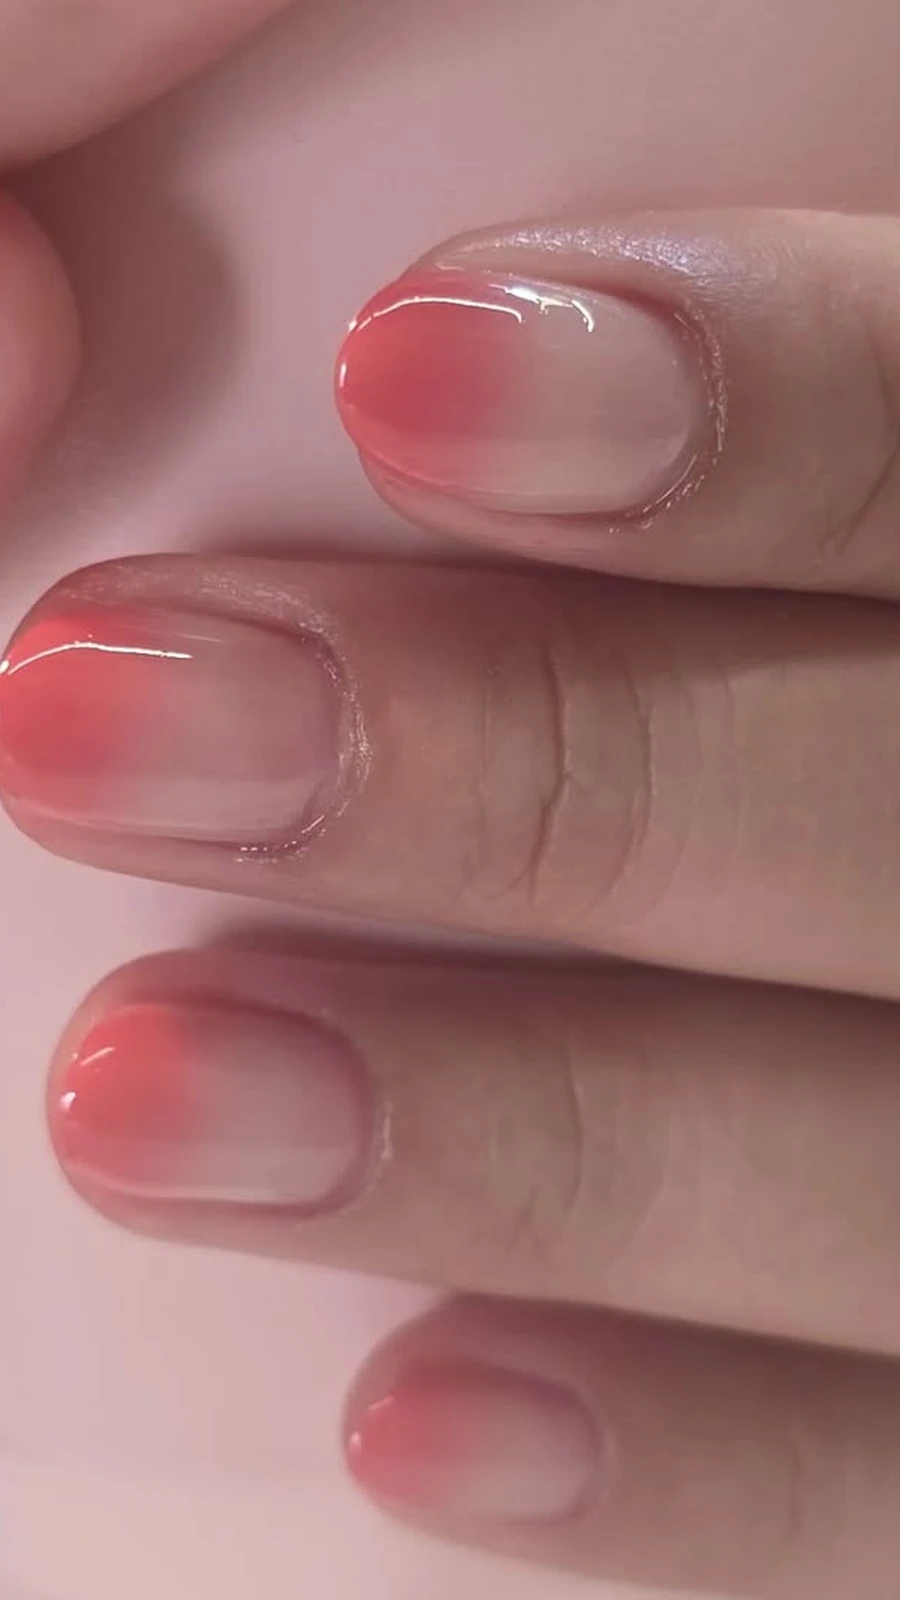
Coral works in two ways. As a full colour, it is cheerful and easy, the shade you wear with a white shirt and feel instantly dressed. As a gradient — coral at the base melting into a soft eggshell white at the tip — it becomes the sunrise look of the season, gentle and romantic, and it suits a slightly longer nail where the fade has room to happen. Warm pink, meanwhile, is the reliable middle: a classic pink with a little sunshine in it, worn with a silver glitter accent on one finger for the days you want a little sparkle.
If you are choosing between coral and pink, think about your wardrobe. Coral loves white, cream and denim; warm pink loves grey, navy and black. Both love gold jewellery, which is a useful thing to know if your rings are gold — these are the spring shades that will sit happily next to them all season.
Additional Information: Coral and warm pink are the most forgiving colours to apply — the pigment is rich, so two coats usually give full coverage with no streaks. They also grow out gracefully, which makes them a good choice for a two-week wear. If your coral looks too orange on you, try a pinker coral; if it looks too pink, try one with more orange. The right coral is out there for every skin tone — it just takes one try to find it.
Act Two — Shapes That Suit Spring
Colour is only half the manicure. The shape decides how the colour behaves, how long it lasts, and how much attention the whole thing asks for. Spring 2024 had three shapes doing most of the work, and choosing between them is mostly a question of how you live.
6. The Short Natural — the Low-Maintenance Hero
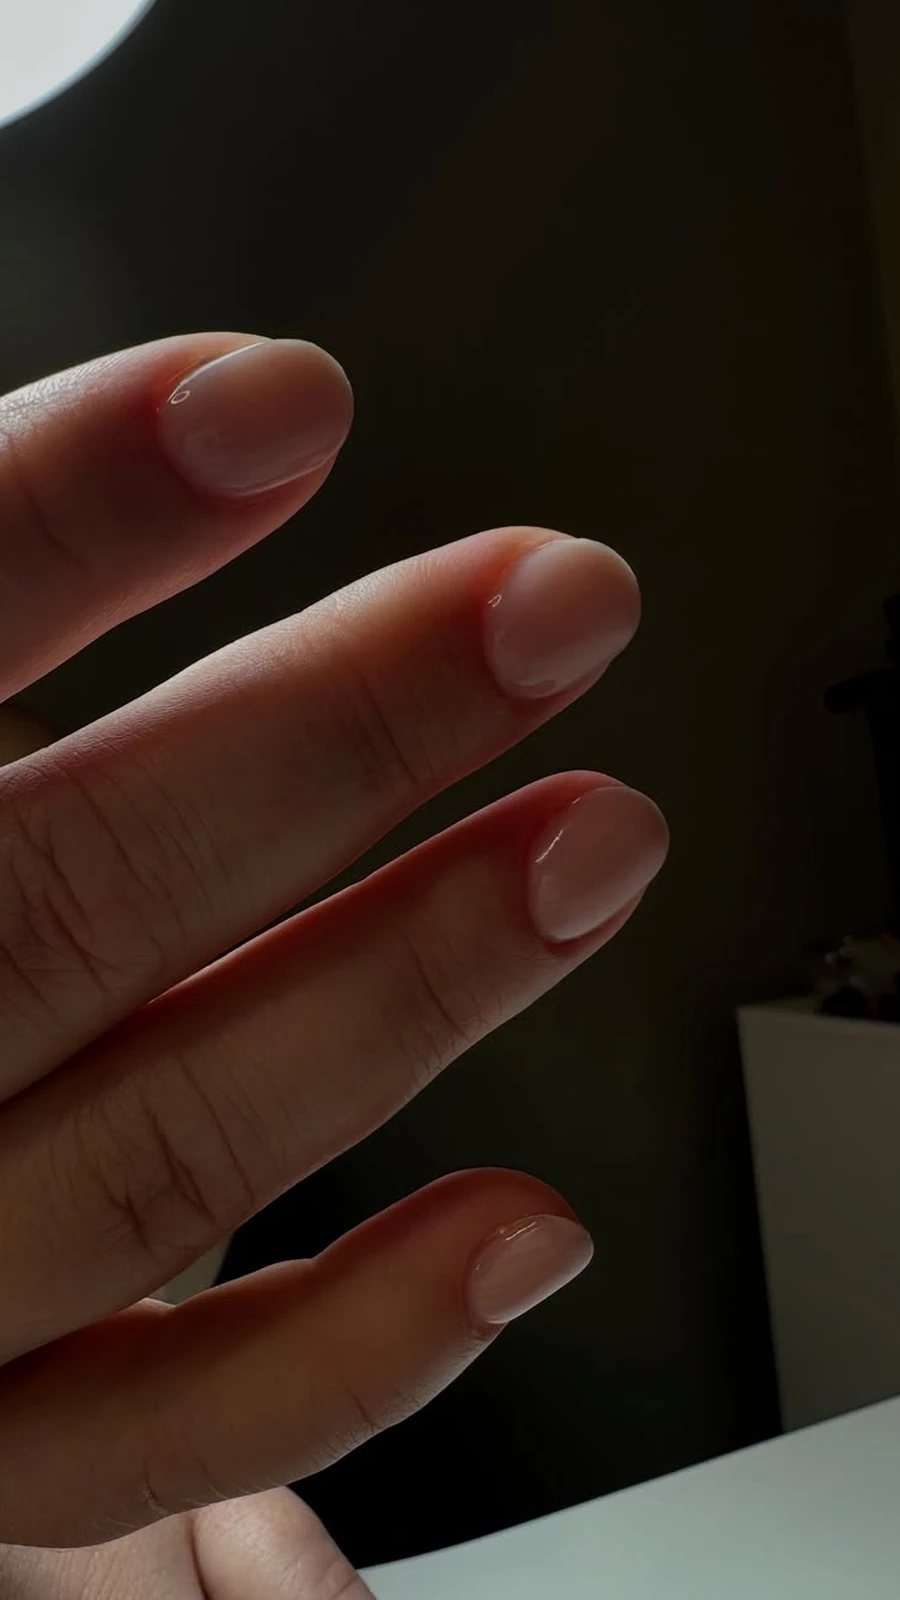
Short, rounded, filed close to the fingertip: this is the shape that carried most of spring 2024, and for good reason. It is the easiest shape to maintain, the hardest to break, and the one that makes any colour look intentional rather than accidental. A short nail with a beautiful milky pastel or a sage green looks like a decision. The same colour on a long nail looks like an occasion.
The short natural shape suits almost every spring look in this guide except the ones that need length to breathe — the sunrise gradient and the stiletto daisy. It is also the shape to choose if you type, cook, garden, or do anything with your hands that involves actual work. Filing is simple: follow the natural curve of your fingertip, keep the corners soft, and file in one direction only so the free edge does not split.
The one thing a short nail needs is neat cuticles, because there is nowhere for ragged edges to hide. A drop of oil a night and a gentle push-back after a shower will do more for a short manicure than any top coat.
Additional Information: Short nails grow out gracefully, so a short manicure can stretch to two weeks without looking untidy — just refresh the top coat on day seven. If your nails are different lengths, file them all to match the shortest one rather than letting one long nail dominate the hand. And resist the urge to cut them with clippers when they are long; file them down instead, a little at a time, so the edge stays smooth.
7. Almond — the Elegant Middle Ground
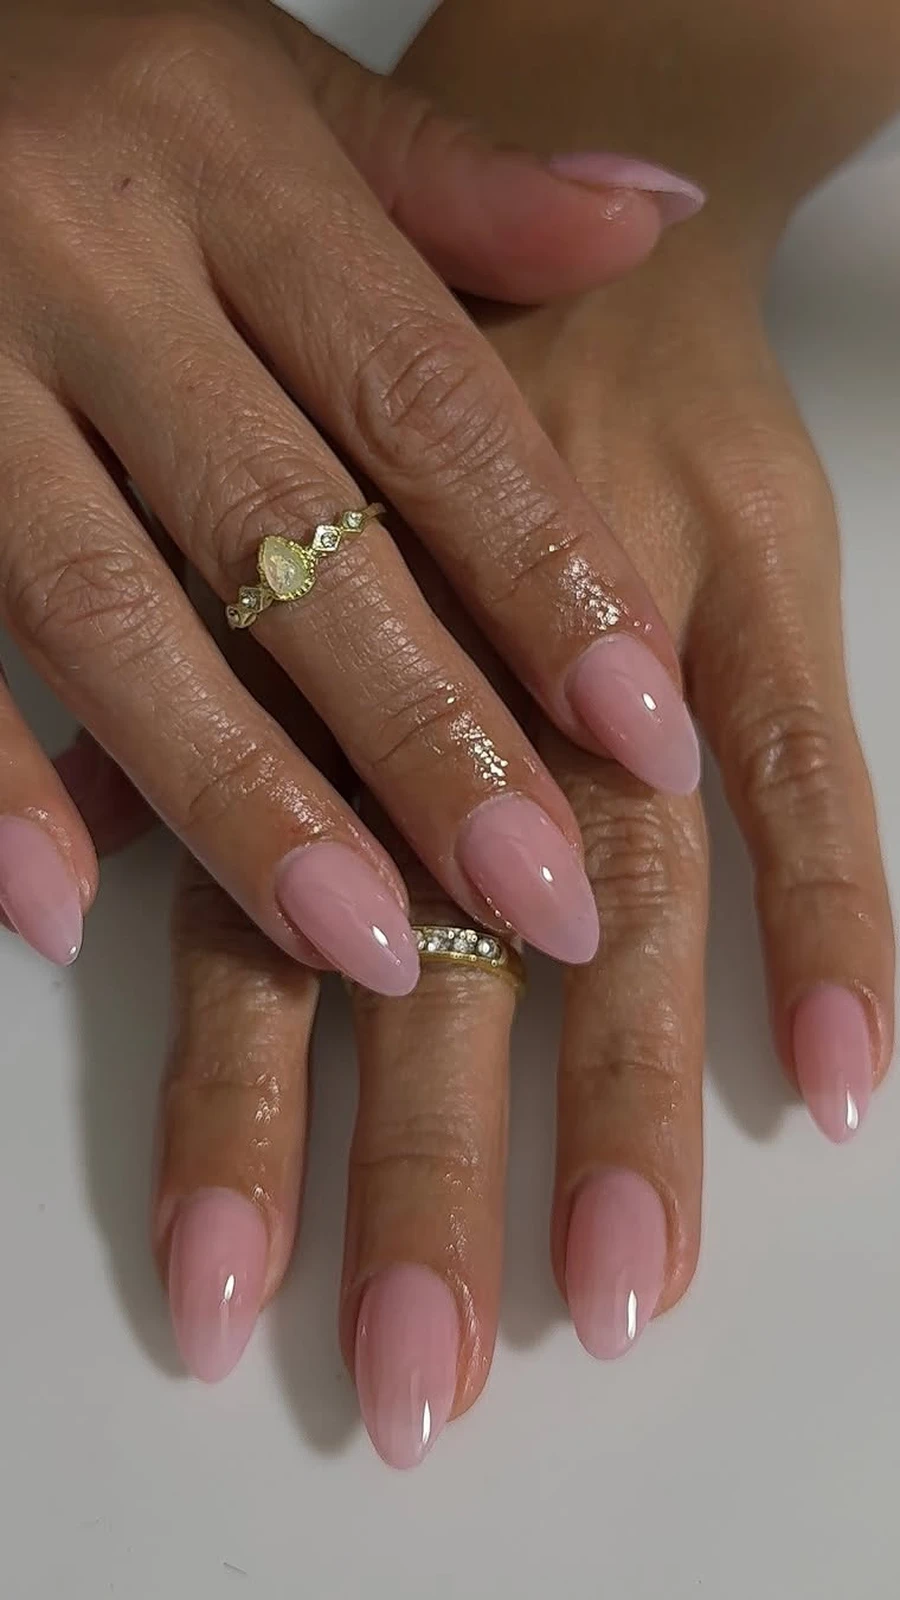
Almond is the shape for the person who wants length without drama: the sides taper gently to a soft point, like an almond, and the effect is to make the fingers look longer and more elegant. It is the shape that made the sheer, barely-there spring looks work — a sheer almond manicure with a hint of pink is one of the most quietly luxurious things you can wear, and it goes with absolutely everything.
Almond needs a little more length than the short natural to earn its name, so it suits nails that grow well and a person who is willing to be slightly careful with them. It is more breakable than a short round nail, especially at the tip, so a strengthening base coat and a gel finish help it survive the two weeks. The payoff is that almost every spring trend — the French twist, the gradient, the floral art — looks better on almond than on any other shape, because the taper gives the design room to unfold.
To get the shape, file the sides at a gentle angle toward the centre and round the tip into a soft point — never a sharp one, which is stiletto territory and a different commitment entirely.
Additional Information: Almond is the best shape for a French manicure with a coloured tip, because the taper makes the tip line look crisp and deliberate. It also photographs beautifully, which matters if your nails are going to end up on Pinterest. Keep a nail file in your bag for the first week: if the tip chips, a quick file-and-top-coat rescue will save the manicure.
8. Stiletto and Coffin — Drama for Special Days
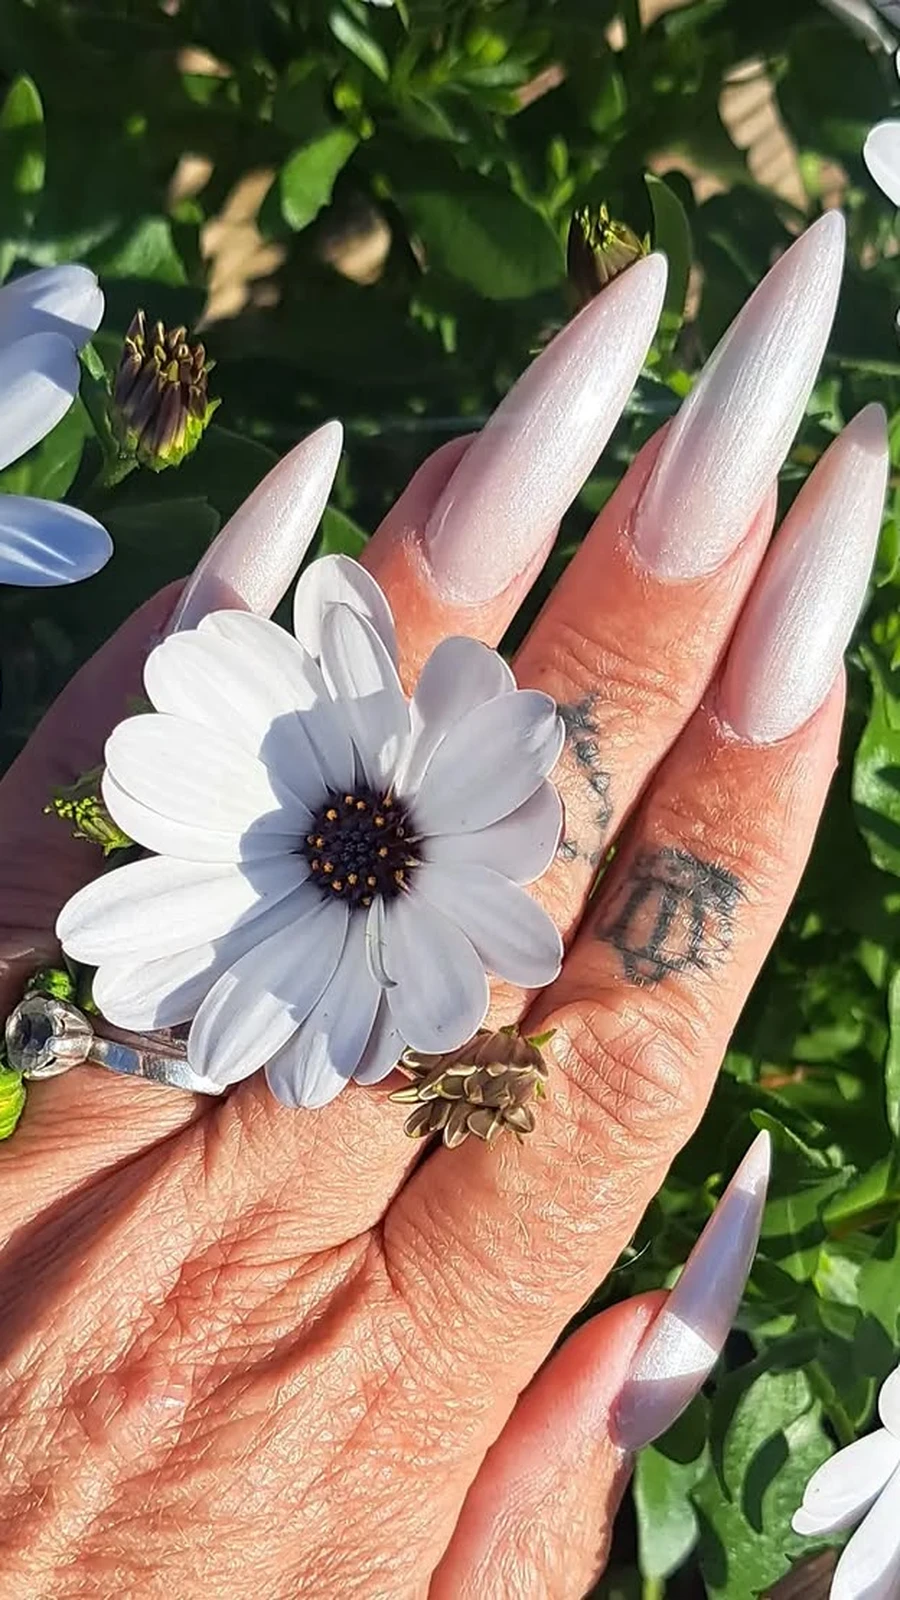
Then there is the drama shape: stiletto, long and pointed, or coffin, long and squared at the tip. Spring 2024 used these sparingly — not as an everyday shape, but as the shape for the one look that needed a canvas. The long stiletto with a single 3D daisy, the coffin with a full floral scene: these are special-occasion nails, and they are wonderful precisely because they are not trying to be practical.
If you want to try a drama shape, do it with intention. Book it for a weekend, a wedding, a party — somewhere the nails will be seen and admired, and where you will not be opening tins or typing for eight hours. Gel or acrylic gives the length the strength it needs; natural nails rarely survive stiletto length without help. And when the weekend is over, file them back down without guilt. The drama was the point, and the point was made.
The most wearable version of the drama shape is a medium coffin with a single statement nail — nine nails in a soft colour, one nail carrying the art. It gives you the length and the look without asking you to live with ten decorated nails.
Additional Information: Long shapes chip at the tip first, so cap the free edge with top coat — paint a thin line of top coat across the very tip of each nail, which seals the colour in. Avoid using long nails to pick things up or press buttons; use the pads of your fingers instead. And if one breaks, do not panic: file the rest to match and treat it as a shorter version of the same look.
Act Three — The Looks, Step by Step
This is the heart of the guide: eight looks, each with the steps to get it. Every one of them was part of spring 2024, and every one of them can be done by a good technician — and most of them can be done at home, with patience and the right tools. Read the steps before you book, so you know what to ask for and how long it will take.
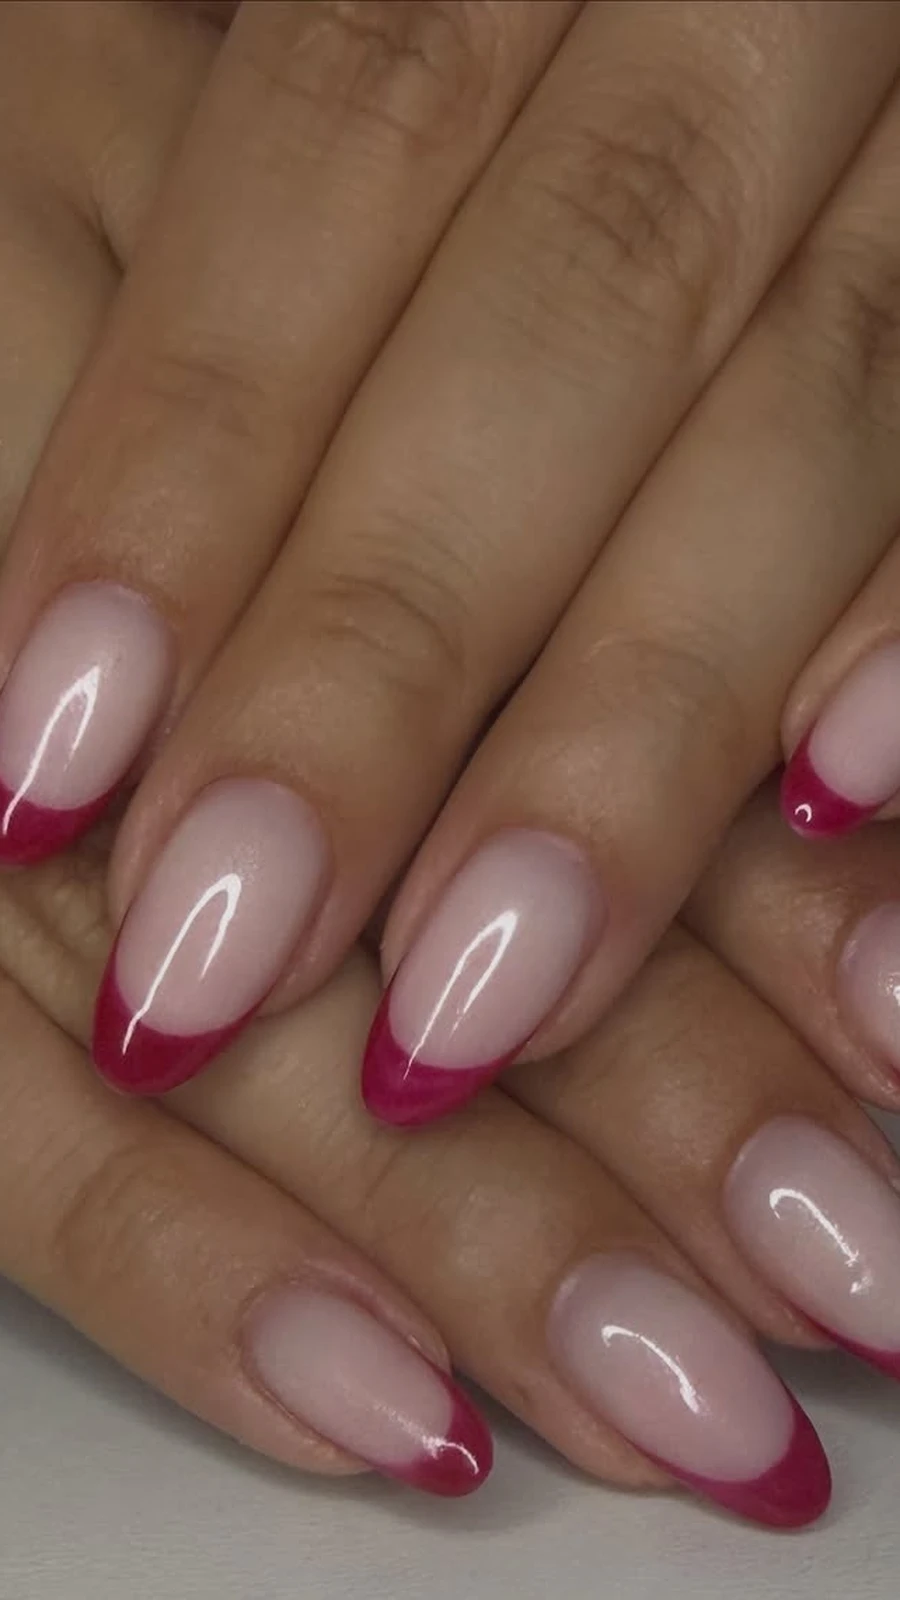
9. The French, Rewritten — Coloured Tips
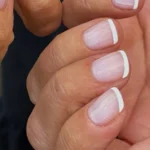
The French manicure never really left; spring 2024 just rewrote it. The rewrite is simple: keep the nude base, change the tip. Olive green tips for the botanical mood, magenta tips for a bold statement, a sharp red V instead of the classic curve for a modern edge. The nude base stays sheer and natural, so the whole look reads as a French — just a French that has somewhere to be.
To get it, start with a ridge-filling base coat and two coats of a sheer nude or pale pink. Let that dry completely — this is the step people rush, and it is why French tips smudge. Then paint the tip: use a thin brush or a French-tip guide sticker, and paint the colour across the free edge, following the natural smile line of your nail or, for the V version, two straight lines meeting at a point in the centre. Two thin coats of the tip colour, then a glossy top coat to melt the line between base and tip.
The beauty of the rewritten French is how many versions it has. Olive tips for work, magenta for the weekend, red V-tips for a night out — same technique, three completely different manicures. It is also the most forgiving nail art there is: if one tip is slightly uneven, nobody will ever notice, because the eye reads the overall line, not the millimetre.
Additional Information: A French-tip brush — long, thin, flat — makes the line ten times easier than a normal polish brush, and it costs very little. If you are doing this at home, do your dominant hand first, while you still have patience; the other hand is always the tidier one anyway. Keep a clean-up brush dipped in remover nearby to sharpen the smile line after each nail.
10. The Sunrise Gradient — Coral to Eggshell
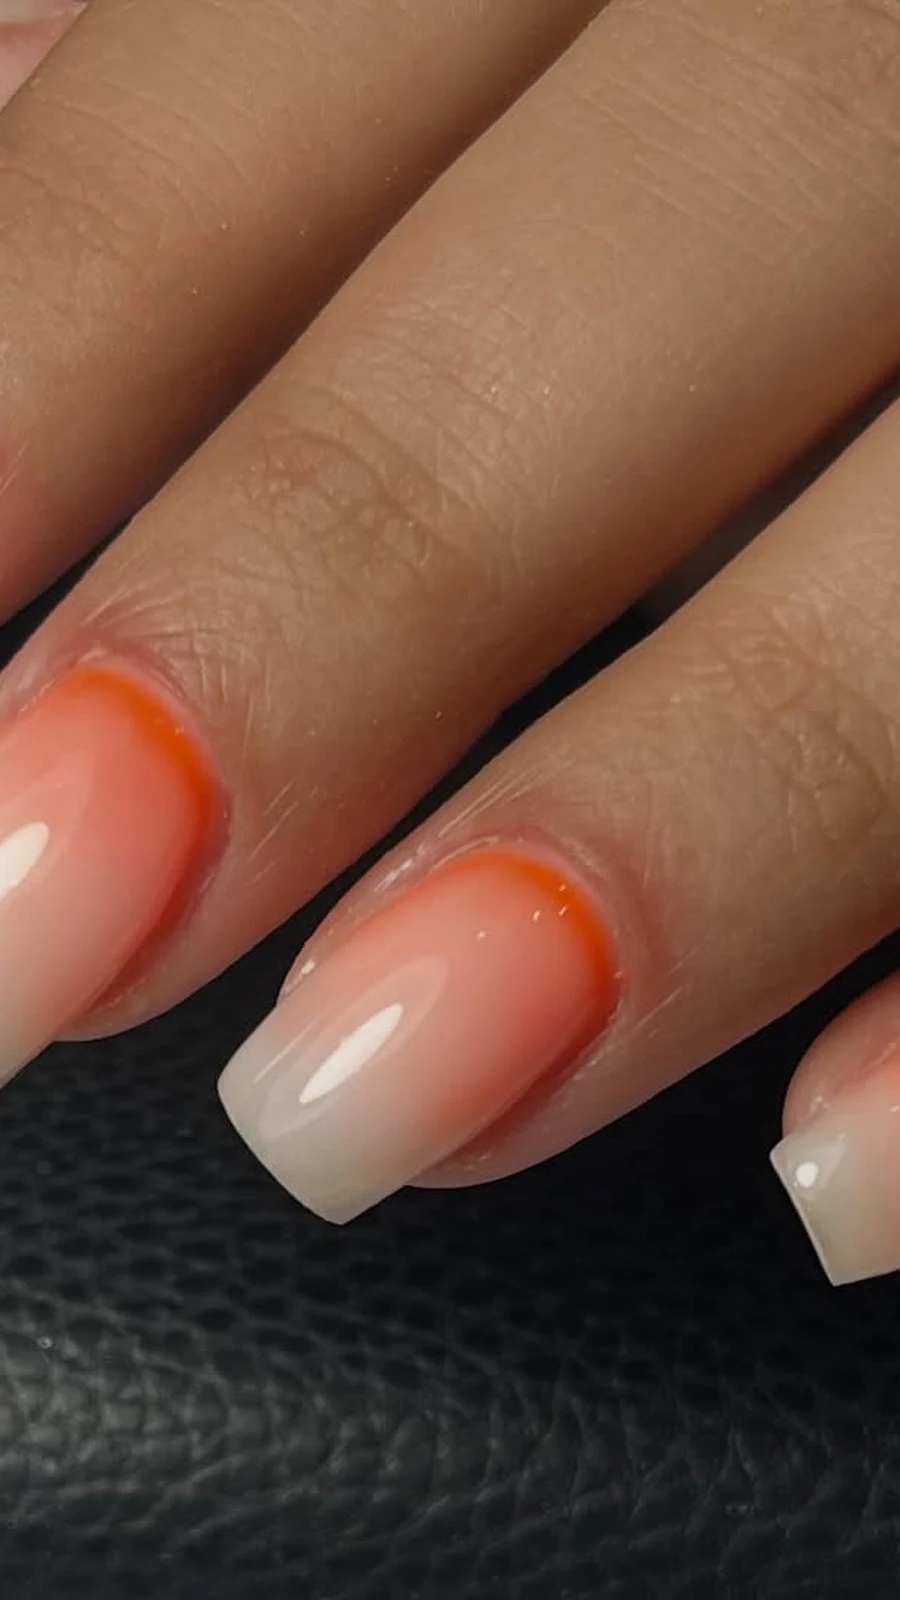
A gradient — one colour melting into another — is the most romantic technique in this guide, and the sunrise version is the one to try first: warm coral at the base, fading to soft eggshell white at the tip, like the sky in the first hour of the morning. It is gentle, it is flattering, and it suits a slightly longer nail, where the fade has room to happen.
The technique is a sponge, not a brush. Paint the base colour on the nail and let it dry. Then, on a small makeup sponge, paint two stripes side by side — coral on one half, eggshell white on the other, slightly overlapping in the middle — and dab the sponge onto the nail in light, repeated taps. The first pass will look patchy; the second and third will smooth it into a real fade. Clean up the skin around the nail with a brush dipped in remover, then seal it all with a glossy top coat, which is what makes the gradient look like a fade instead of a stamp.
Gradient nails look harder than they are, which is part of their charm. The sponge does the blending for you, and the top coat forgives the rest. If your first attempt is uneven, add another sponged layer — gradients improve with layers, unlike most polish techniques.
Additional Information: Use a latex-free makeup sponge cut into small wedges, one per colour pair, and replace it when it gets saturated. Work on one nail at a time and clean up as you go, because dried gradient polish around the cuticle is much harder to remove. A peel-off latex barrier painted around the nail before you start will save you most of the clean-up entirely.
11. Rose Quartz Shimmer — Pink, Light and a Little Luxury
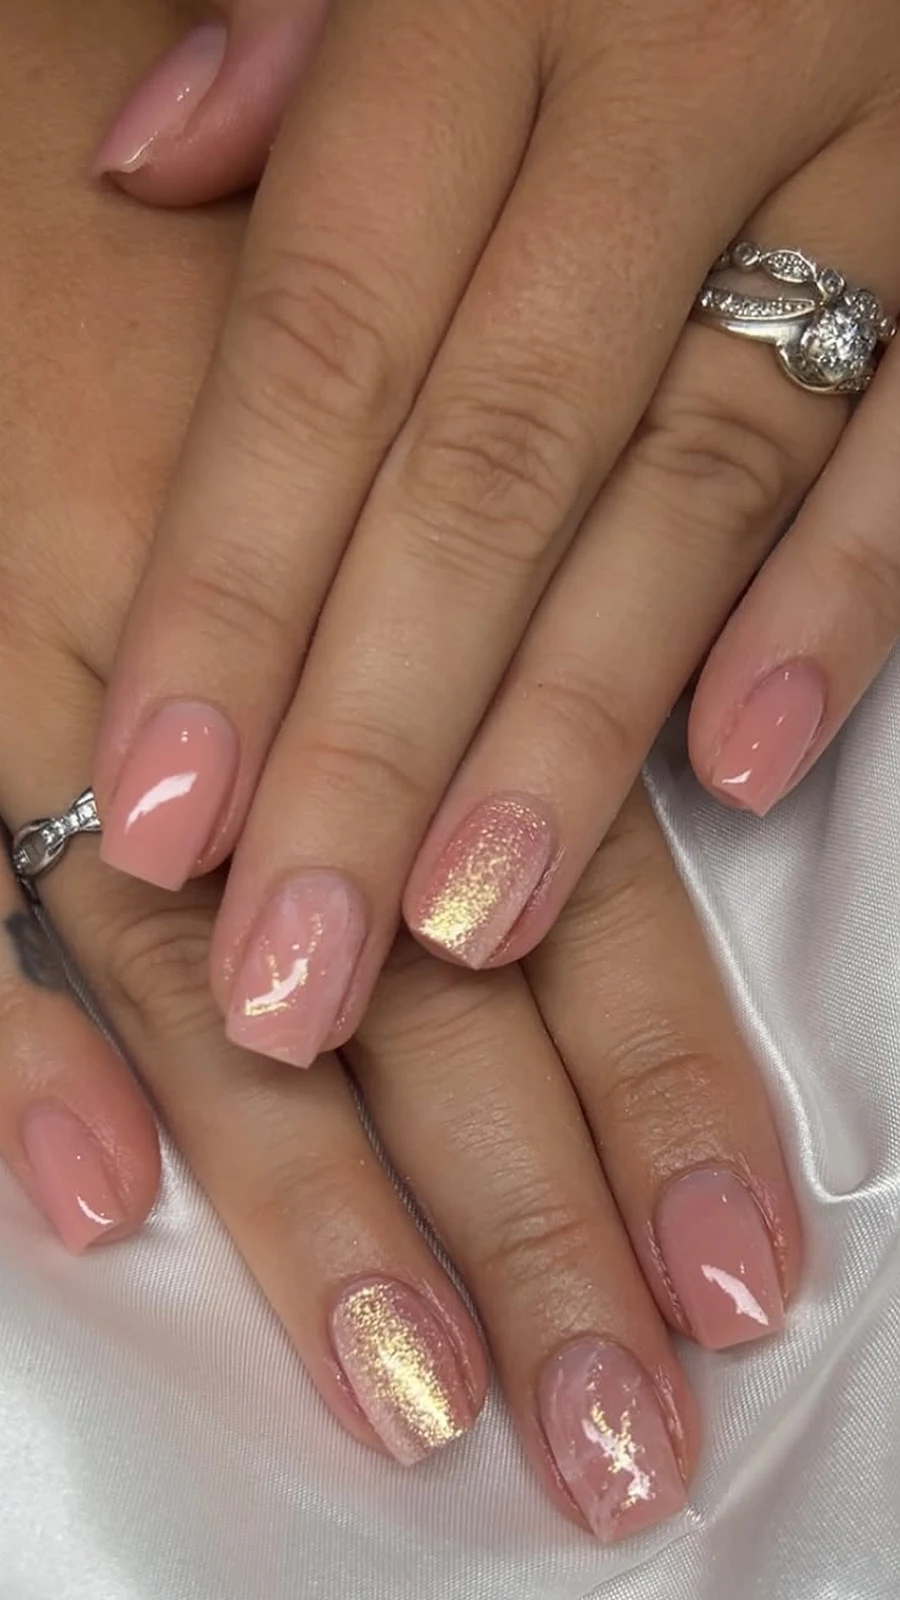
Rose quartz is a stone, a colour, and a mood: pale pink with a shimmer that catches the light when you move your hand. As a manicure, it is a light pink French base with a richer pink and a dusting of glitter — luxurious without being loud, and perfect for spring celebrations, from Easter lunch to a wedding guest outfit.
The base is a classic pink French: sheer pink over the whole nail, with a soft white or pale pink tip. The rose quartz part comes next — a shimmer polish, or a fine glitter, brushed over the base in a thin layer so the pink shows through, and a slightly heavier glitter on one accent finger, usually the ring finger. The gel technique suits this look best, because gel holds the shimmer evenly and keeps the shine for the full two weeks.
What makes rose quartz work is restraint. The shimmer should look like light moving across the nail, not like a craft project. One thin coat of shimmer, one accent nail with more, and a high-shine top coat. Anything more and the stone turns into a disco ball.
Additional Information: Shimmer polishes settle in the bottle, so roll the bottle between your palms before you use it — never shake it, which makes bubbles. If the glitter feels rough after it dries, add a second layer of top coat; a smooth finish is what sells the quartz effect. This is a wonderful look for short nails, because the shimmer gives a short nail all the presence it needs.
12. Foliage and Floral Art — Leaves and Petals, Painted Freehand
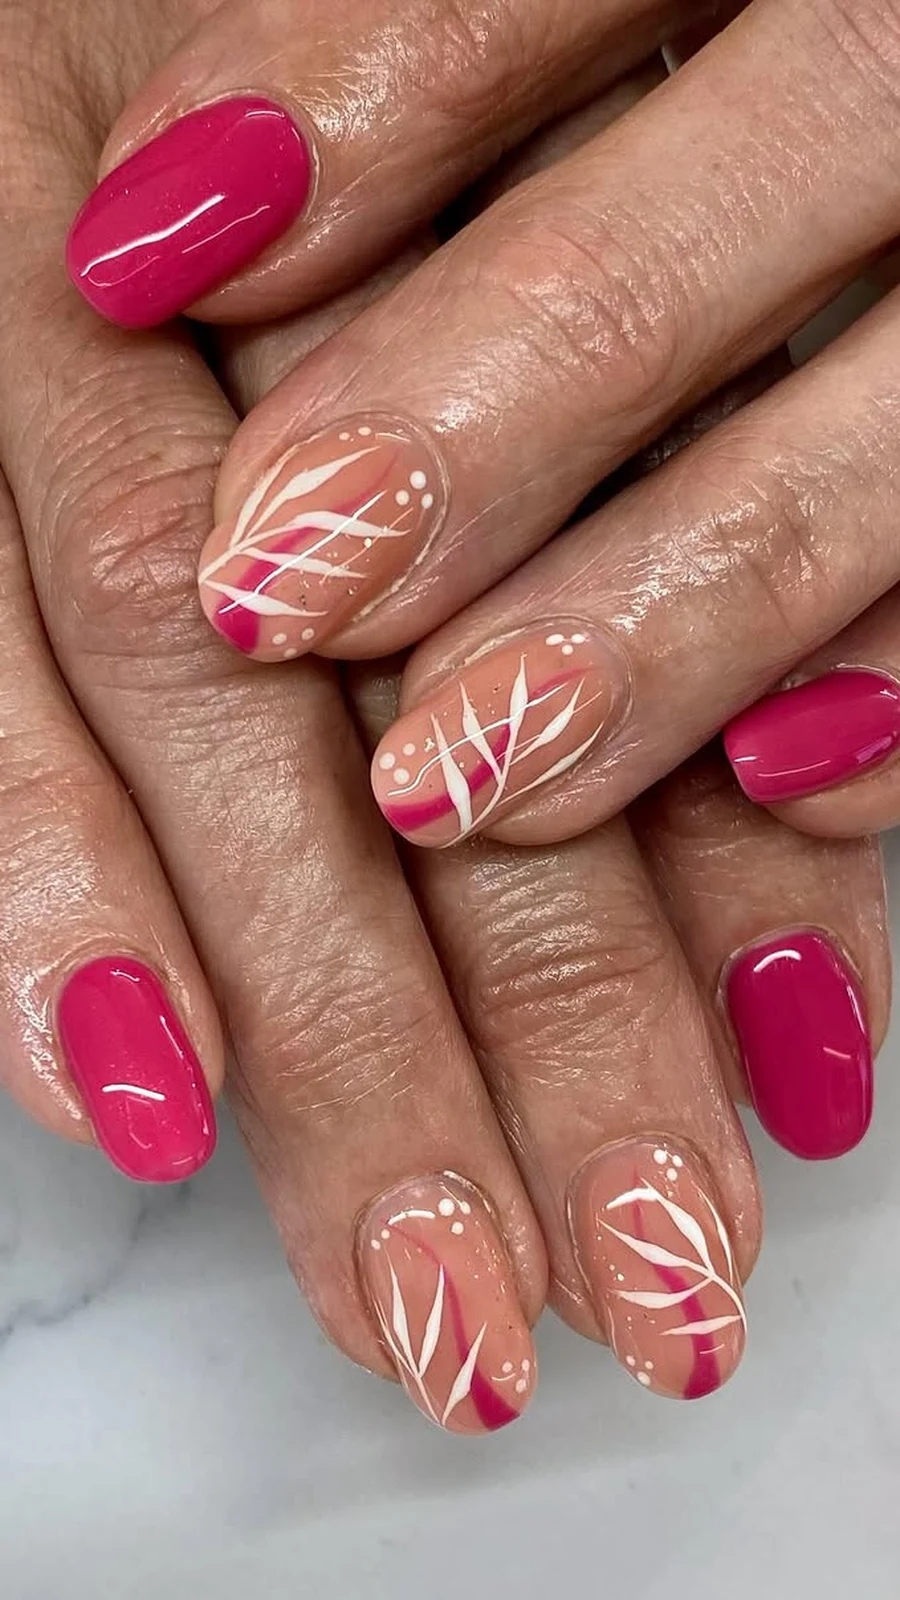
If one technique defined the artistic side of spring 2024, it was hand-painted foliage: delicate white leaves on a bright fuchsia base, tiny petals on a pastel pink, thin green stems curling across a nude nail. It is the trend for the person who sees their nails as a canvas, and it is the one look in this guide where a skilled technician genuinely earns their fee — the difference between good freehand foliage and a sticker is visible from across a room.
The classic version is a bright fuchsia base with white foliage painted over it in fine lines — a leaf here, a curling stem there, nothing symmetrical, nothing too perfect. The softer version is a pastel pink base with black or dark green line-art flowers, the kind of drawing that looks like a sketch from a botanical notebook. Both work because the art is light: thin lines, lots of empty space, the base colour doing half the work.
If you are doing this at home, invest in two things: a fine liner brush, and a dotting tool. The liner draws the stems; the dotting tool makes the petals. Practise on a piece of paper first — five minutes of practice will save you five ruined nails. And keep the design to two or three nails per hand, with the rest in the plain base colour; a full set of foliage is a lot to look at, and a lot to paint.
Additional Information: Freehand art needs a completely dry base — wait at least ten minutes after the base colour, or the brush will drag. Seal the art with two thin layers of top coat rather than one thick one, which can smudge fine lines. If freehand feels out of reach, water decals and stamping plates can give you a very similar look, and nobody at brunch will know the difference.
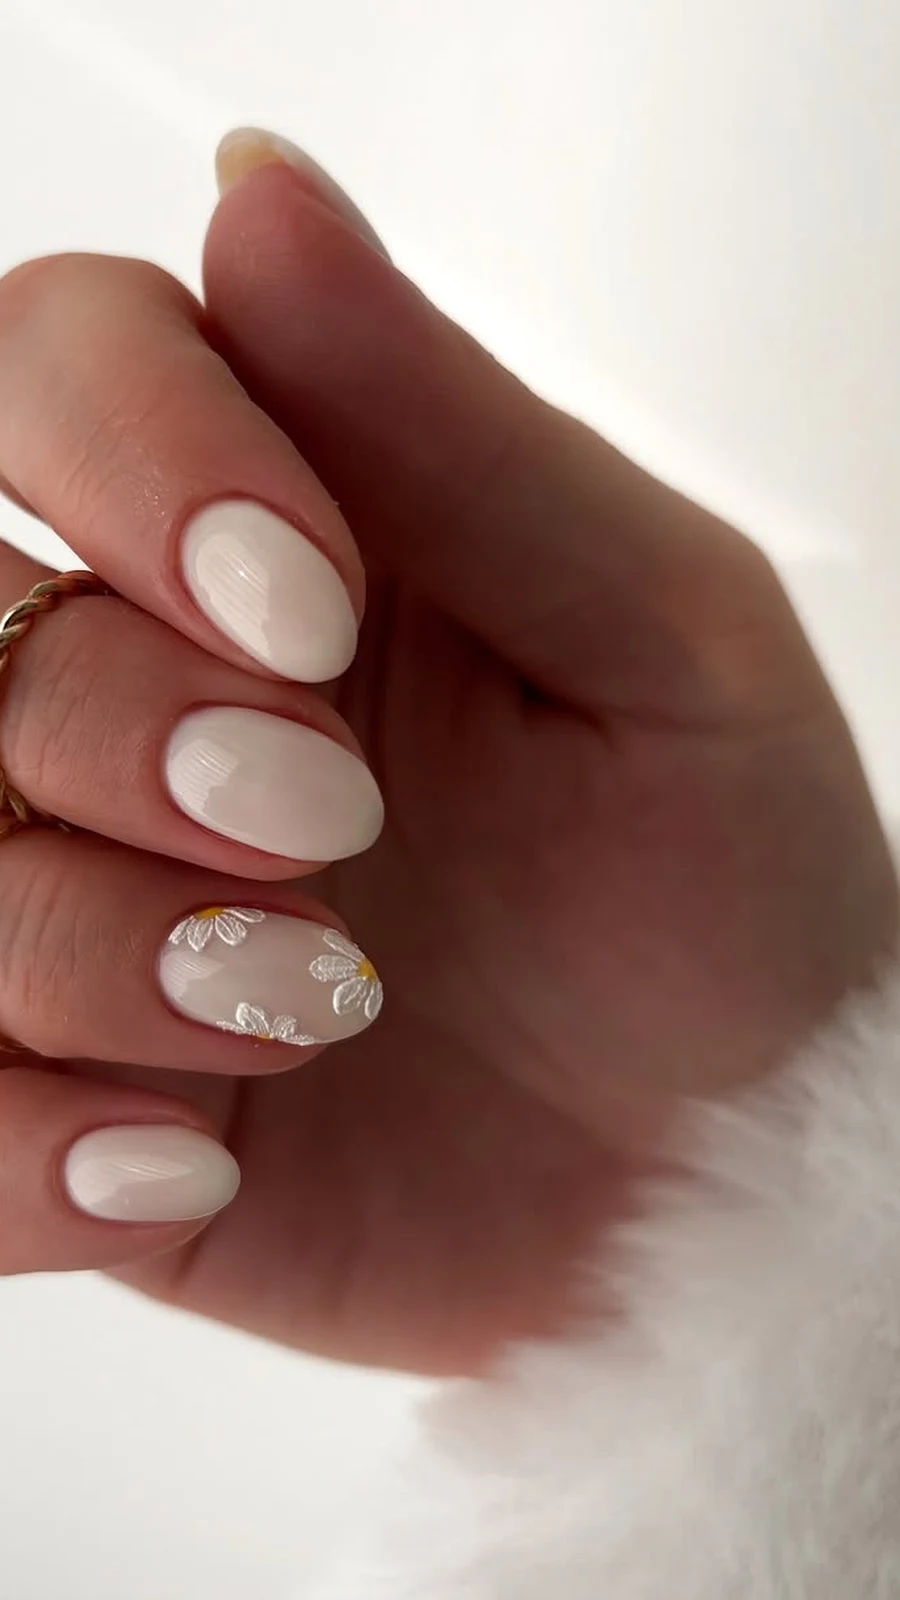
13. The Daisy Accent — One Flower, Done Properly
The daisy is spring’s flower, and the daisy accent nail is spring’s simplest piece of art: nine nails in a soft, plain colour, and one nail — usually the ring finger — carrying a single daisy. It can be painted flat, with white petals and a yellow centre, or it can be a small 3D flower sitting on the nail. Either way, the rule is one flower, done properly, and the rest of the hand staying quiet so the flower has the stage.
The flat version is the easier one: a white base on the accent nail, five or six petals drawn with a dotting tool, a yellow dot in the middle, and a thin green stem if you feel ambitious. The 3D version uses a small acrylic or gel flower, placed while the top coat is still tacky, and it is the version that turns heads — it catches the light, it has real dimension, and it photographs beautifully. The 3D version also needs a longer nail to sit on, which is why it pairs so well with the stiletto and coffin shapes from Act Two.
The rest of the manicure matters as much as the daisy. A soft white, a sheer pink, or a milky pastel on the other nine nails keeps the look fresh; a loud colour on the other nails would fight the flower for attention and lose. Keep the base simple, and the daisy does all the work.
Additional Information: A 3D flower can snag on clothes, so seal its edges with an extra drop of top coat and avoid it for the first few hours while it sets. If you are painting the daisy yourself, draw the petals with the dotting tool rather than a brush — dots are easier to keep even, and five even dots read as a flower instantly. Replace the accent nail’s top coat mid-week if the flower starts to look dull.
14. Citrus Slices — Lemon Art That Tastes Like Spring
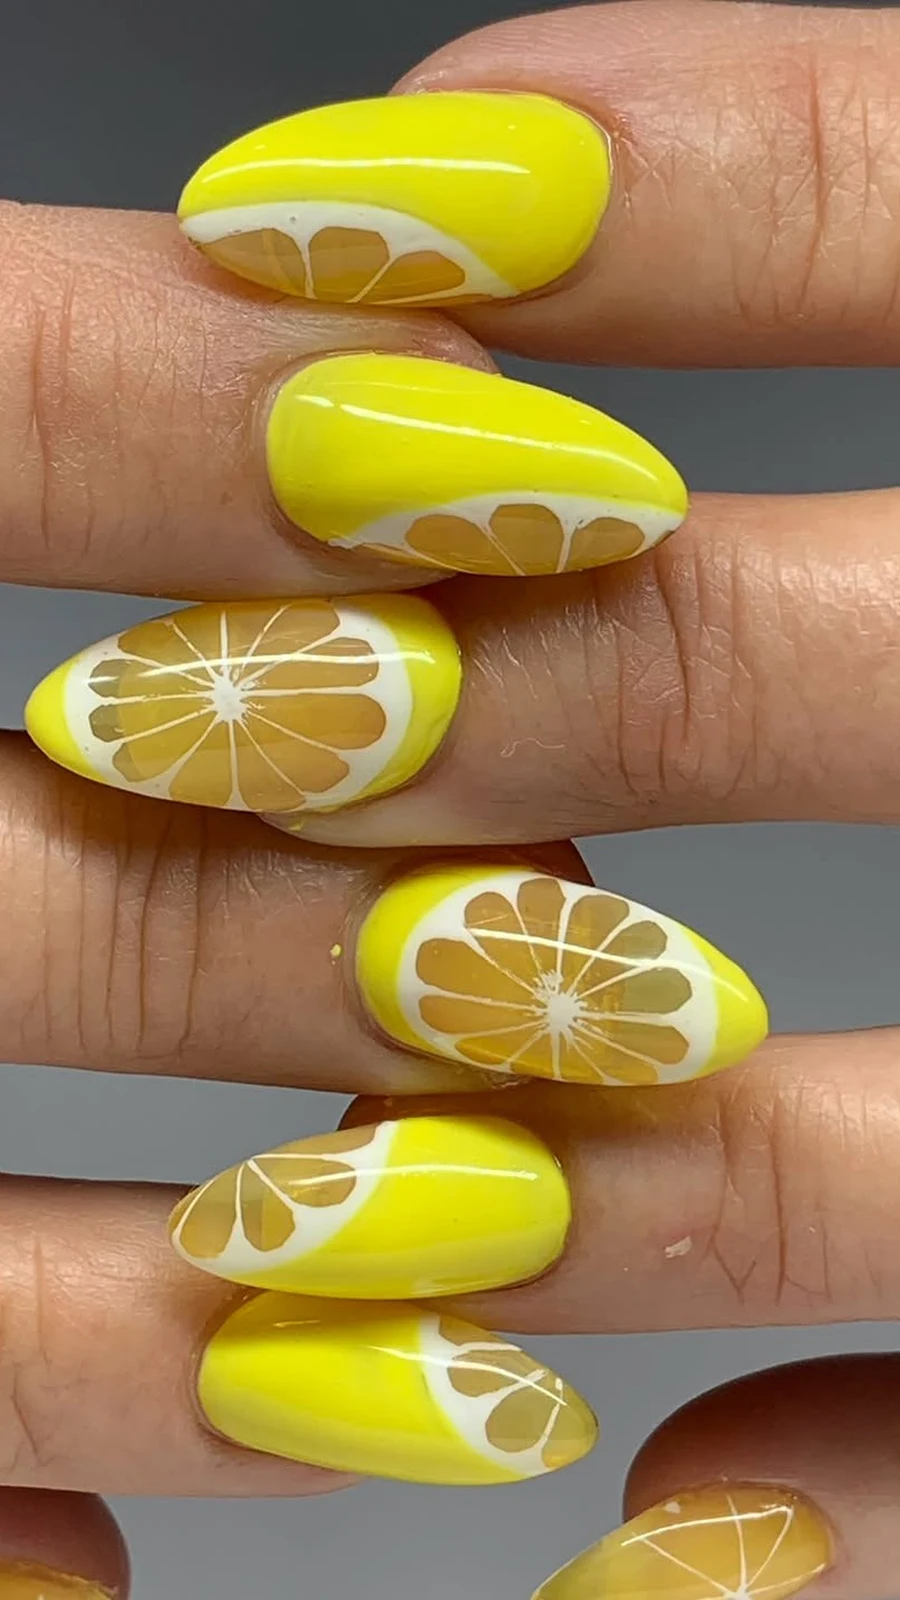
If citrus is the loudest palette of the season, the citrus slice is its most playful expression: a bright yellow base with a tiny lemon slice painted on one or two nails. It is the look that makes people smile before they have even registered what they are looking at — fresh, a little bit silly, and completely spring.
The base is a sunny yellow, worn on short nails where it looks crisp rather than overwhelming. The lemon slice goes on the accent nail: a white circle for the rind, a paler yellow for the flesh, and five or six thin white lines radiating from the centre like the segments of a real lemon. A dotting tool draws the circle; a liner brush draws the segments. It takes about three minutes per nail once you have the hang of it, and the result looks far more skilled than it is.
The trick to keeping citrus slices wearable is proportion: one slice per hand is charming; a slice on every nail is a fruit salad. Keep the rest of the nails in plain yellow, and let the two accent nails carry the joke. It is a weekend look, a holiday look, a look for the first properly warm Saturday of the year — and it pairs, inevitably and perfectly, with a glass of something cold.
Additional Information: Yellow polish is the hardest colour to get even, so use a white base coat under the yellow — one coat of white first makes the yellow brighter and covers in two coats instead of three. Seal the lemon art with a thick top coat so the fine white lines do not wear off. If painting segments feels fiddly, a lemon nail sticker on the accent nail gives you the same look in ten seconds.
15. Confetti and Speckle — A Party on Your Nails
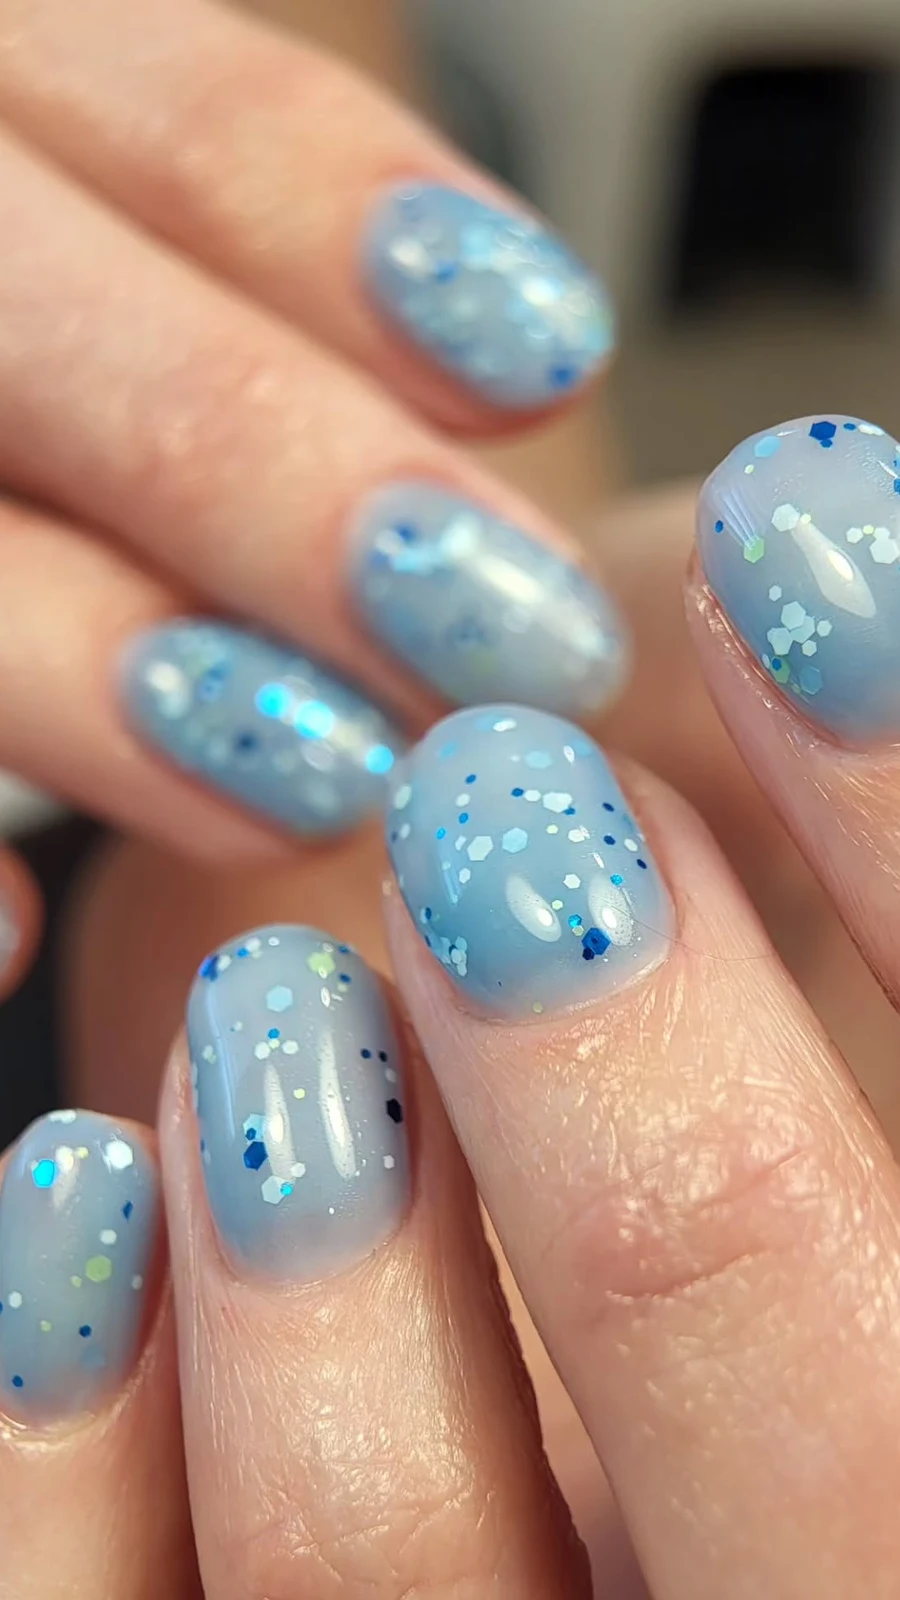
Confetti nails are exactly what they sound like: a soft blue or pale base scattered with tiny specks of glitter in different colours, like the sky on the day someone let go of a handful of kites. It is the most joyful look in this guide, and the easiest to do well, because confetti is supposed to look random — there is no wrong placement, no line to keep straight, no symmetry to maintain.
The base is usually a cool confetti blue or a soft pastel, and the specks are a mix of fine glitter and slightly larger hexagonal glitters in pink, gold, silver and white. The technique is a sponge again: dab the glitter polish on rather than brushing it, because brushing drags the specks into streaks. Two dabs, a minute apart, and you have a sky full of confetti. Finish with two layers of top coat, because glitter is rough and a smooth finish is what makes it look expensive rather than homemade.
Confetti suits short nails best, where the small canvas keeps the specks looking dense and deliberate. It is also the most forgiving look for a beginner, and the best choice for a first attempt at nail art — if you can dab a sponge, you can do confetti nails.
Additional Information: Glitter polish is the hardest to remove, so use a peel-off base coat under confetti if you change colours often — it will save you ten minutes and a lot of cotton pads. Keep the glitter to the top two-thirds of the nail if you want it to look like falling confetti, or cover the whole nail for a full party. Either way, cap the free edge with top coat so the glitter does not catch on fabric.
16. Marble Waves — Pink and White, Swirled
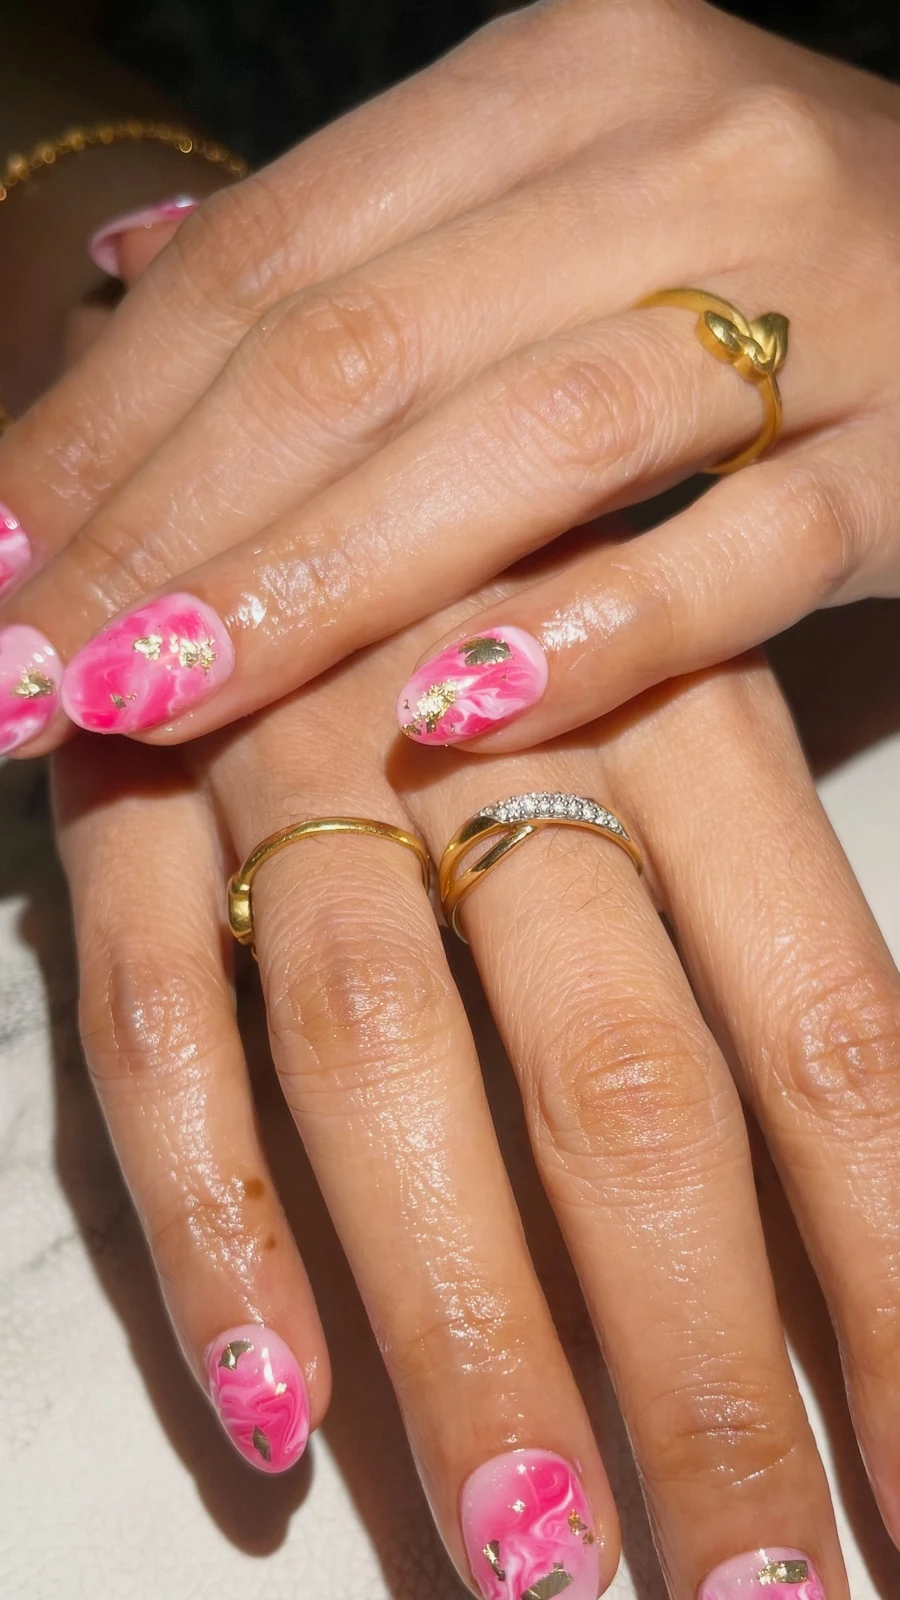
The last look in Act Three is the calmest: marble waves, hot pink and white marbled together so the nail looks like a piece of stone that happens to be pink. It is energetic and elegant at the same time, and it is the look that photographs best of all of them — the swirl gives the camera something to hold on to, and no two nails ever look the same.
There are two ways to marble. The water method: drop polish into a cup of room-temperature water, swirl it with a toothpick, and dip the nail in — dramatic, messy, and genuinely fun the first time. The dry method: paint the nail white, then, while it is still slightly tacky, drag a thin brush loaded with hot pink polish across it in loose S-curves, and let the colours bleed into each other. The dry method is cleaner, more controlled, and the one to choose if you are doing this at home. Either way, the top coat is what turns the swirl into marble: a thick, glossy layer that levels the surface and makes the pattern look like it is under glass.
Marble waves work on any length, but they shine on almond and medium-length nails, where the wave has room to travel. Keep the base simple — white, or the palest pink — and let the pink do the moving. One marbled nail per hand is a whisper; all ten is a statement. Both are correct.
Additional Information: For the dry method, work on one nail at a time and do not wait for the white to dry fully — the marble happens while the polish is still moving. Use a polish that is not too thick; thin, fluid polishes swirl better than gloopy ones. Clean up the skin with a brush dipped in remover, and if the pattern looks muddy, wipe it off and start again — marble is fast to redo, which is part of its charm.
Act Four — Make It Last
A beautiful spring manicure that chips on day three is not a beautiful manicure; it is a photograph of one. The last two sections are the unglamorous half of the guide, and they are the reason the first sixteen sections will actually survive on your hands.
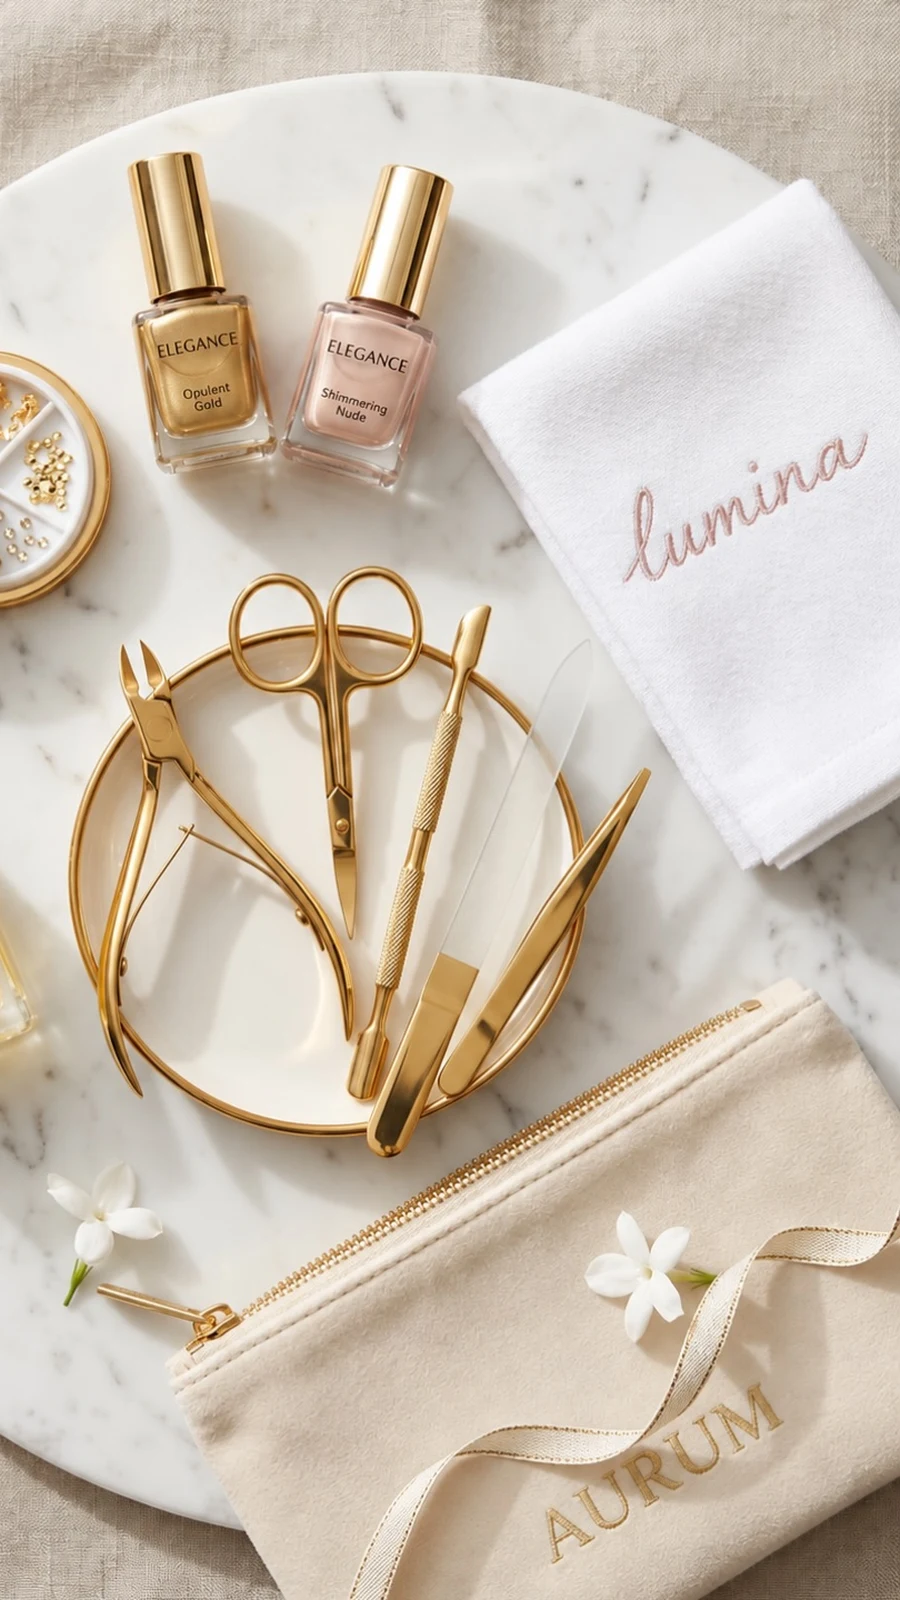
17. The Spring Prep Ritual — Fifteen Minutes That Save the Manicure
Every long-lasting manicure starts before the colour comes out. The prep ritual is short, boring, and the difference between a manicure that lasts four days and one that lasts fourteen. It goes like this: remove the old polish completely, including the bits hiding under the free edge. Wash your hands with soap and dry them properly. Push the cuticles back gently with a wooden stick after a shower, when they are soft — never cut them, which opens the door to infection and makes the regrowth look ragged.
Then file. Shape the nail, smooth the free edge, and run a fine buffer over the surface just once, lightly, to take the shine off — polish grips a slightly matte surface far better than a glossy one. Wipe each nail with polish remover or a dehydrator wipe to take off the last of the oil, because oil is the enemy of adhesion. Then base coat, one thin layer, capped over the free edge.
That is the whole ritual, and it takes fifteen minutes. It is the least exciting part of this guide and the most valuable. A good prep means the colour goes on smoother, the art sits flatter, and the top coat has something to hold on to.
Additional Information: Do the prep the same day you polish, not the night before — hands pick up oil overnight, and the dehydrator step only works if it is the last thing before the base coat. Keep your base coat fresh; a thick, gloopy base coat that has been open for a year will not protect anything. And if you are doing gel, the prep matters even more — gel lifts from the edges when the nail plate is oily, and lifting is how gel manicures fail.
18. The Two-Week Rotation — Wearing Trends Without Wrecking Nails
The last secret of spring 2024 is not a colour or a shape; it is a rhythm. Wear each look for about two weeks, then change it — not because the polish has failed, but because your nails need the break and your eyes need something new. Two weeks is long enough to enjoy a manicure properly and short enough that the regrowth never gets embarrassing. It is also the rhythm that lets you try everything in this guide before the season ends: eight looks, sixteen weeks, one whole spring.
Between manicures, give your nails a day off. No polish, no gel, just oil: a drop on each nail before bed, massaged in properly. If a nail breaks, file the rest to match rather than letting one short nail throw off the whole hand. And if a colour stains — citrus yellows and deep blues are the usual culprits — a gentle buff and a whitening base coat will sort it before the next colour goes on.
The rotation is also how you find your look. The first spring you try a milky pastel, you might think it is too quiet; the second time, you might realise it is the colour you reach for when you want to feel put together. Trends are for trying, not for obeying. Wear the ones that survive your life, keep the ones that make you look at your hands and smile, and let the rest go. That is the whole point of a season: it comes back next year, and so will you.
Additional Information: Keep a small notebook — or a note on your phone — of the looks you tried and how they wore: which colours chipped first, which shapes survived the garden, which art got compliments. By the end of the season you will have a personal list of what works for your hands, which is worth more than any trend report. And when autumn comes, you will know exactly which of these looks to carry with you and which to leave behind with the daisies.
FAQ
What were the biggest spring manicure trends in 2024?
The season’s five colour stories were milky pastels, citrus brights, botanical greens, ocean blues and sunset corals — worn on short natural nails, elegant almond shapes, or dramatic stiletto and coffin lengths, with French tips rewritten in colour, sunrise gradients, floral art and marble waves leading the looks.
Which spring nail trend is easiest for beginners?
Confetti and speckle nails. The glitter is supposed to look random, so there is no line to keep straight and no symmetry to maintain. A milky pastel worn plain is the next easiest — one colour, no art, and it forgives small chips.
How long should a spring manicure last?
About two weeks with proper prep: a dehydrated nail plate, a good base coat, thin colour coats, and a glossy top coat refreshed around day seven. Darker shades and gel finishes usually last the full two weeks; pale pastels may show tip wear sooner.
Can I do the gradient and marble looks at home?
Yes — both are sponge and brush techniques, not salon-only skills. The gradient uses a makeup sponge to dab two colours together; the marble uses a thin brush dragged through still-tacky polish. Practise on one nail first, and remember that top coat forgives almost everything.
What nail shape is best for spring 2024 trends?
Short and rounded for everyday wear and for the milky pastel and citrus looks; almond for the French twist, the gradient and the floral art, because the taper gives designs room; stiletto or coffin for special occasions, especially the daisy accent, where the length gives the flower a proper canvas.
The Last Word
Spring 2024 was a generous season for nails. It did not ask you to choose between soft and loud, between classic and playful — it gave you five palettes, three shapes and eight looks, and trusted you to put them together in a way that felt like you. The milky pastel on a short nail and the citrus yellow with a lemon slice are not competing with each other; they are different days of the same spring.
So start where you are. Pick a palette from Act One — the one that made you pause when you read it. Pick a shape from Act Two that fits your week. Pick a look from Act Three and wear it for two weeks. Then pick another one. By the time the daisies are gone, you will have tried the season properly, and you will know which of these colours is yours — not because a trend report told you, but because you wore it, lived in it, and kept catching yourself looking at your hands.
That is what a good spring manicure does. It does not just decorate your hands. It reminds you, every time you reach for your coffee or your keys, that the cold part of the year is over, and something brighter has started.
Leave a Reply