Find Your Sparkle Mood First
Here is the thing nobody tells you about sparkly winter nails: the sparkle is not one look. It is a whole spectrum, and the design that makes one person feel like the best-dressed guest at the party makes another person feel like a disco ball that wandered into the wrong room. The trick is not to ask “what is the sparkliest design?” but “what kind of sparkle am I?”
So before you scroll to a random design, pick your mood. There are four of them in this list, five designs each. Frost & Ice is for the person who wants winter itself on their nails — cool blues, silver, snowflakes, the kind of shine that looks like morning frost. Candlelight Gold is warm sparkle: gold foil, champagne shimmer, the glow of a room lit by candles and fairy lights. Midnight Sparkle is the after-dark mood — deep colours, starry glitter, the nails you wear when the party starts at nine and nobody is going home early. And Playful & Bright is for the person who treats December like a celebration and wants their nails to laugh a little: candy stripes, confetti, pink and mint and lavender with glitter on top.
You do not have to commit to one mood forever. You can be Frost & Ice for the office party and Midnight Sparkle for New Year’s Eve — that is half the fun. What follows is twenty designs, each with honest notes on how it wears, how long it lasts, and what to ask for at the salon. Pick the mood that sounds like you, then find the design inside it that you keep coming back to.
Frost & Ice: Winter Itself, On Your Nails
Frost & Ice sparkle is cool, clean and a little bit magical. The colours are pale blues, silvers and whites, and the glitter reads like frost on a window rather than like a party. These five are the easiest sparkle to wear in daylight, they suit every skin tone because the bases are sheer or pale, and they photograph beautifully in natural winter light. If you are new to glitter nails, start here.
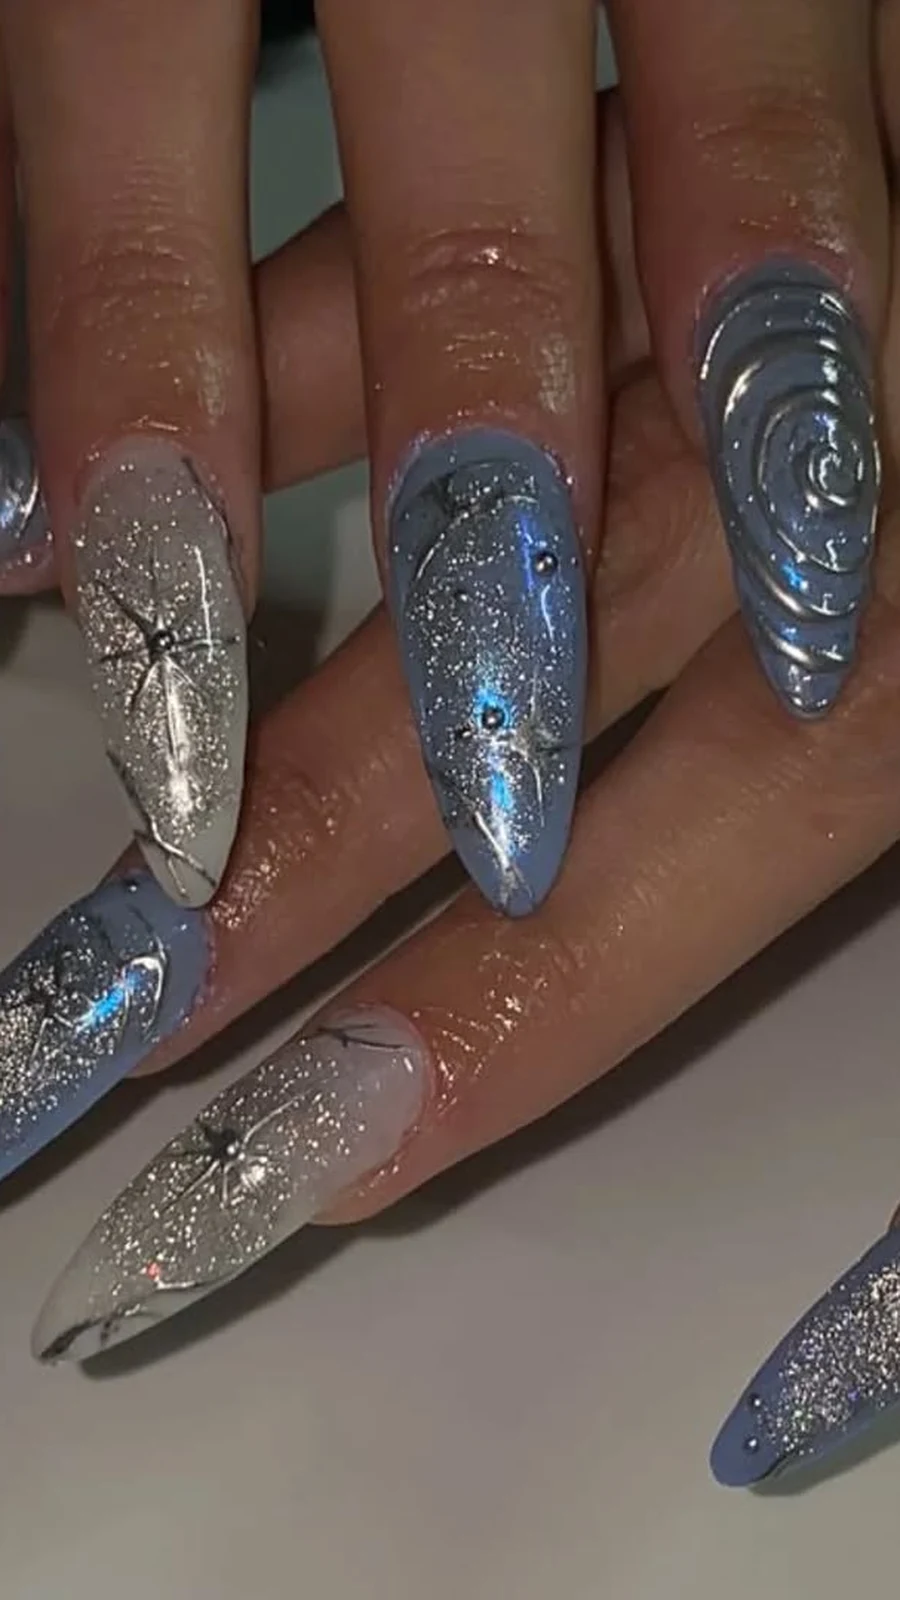
1. Icy Blue Glitter Gradient
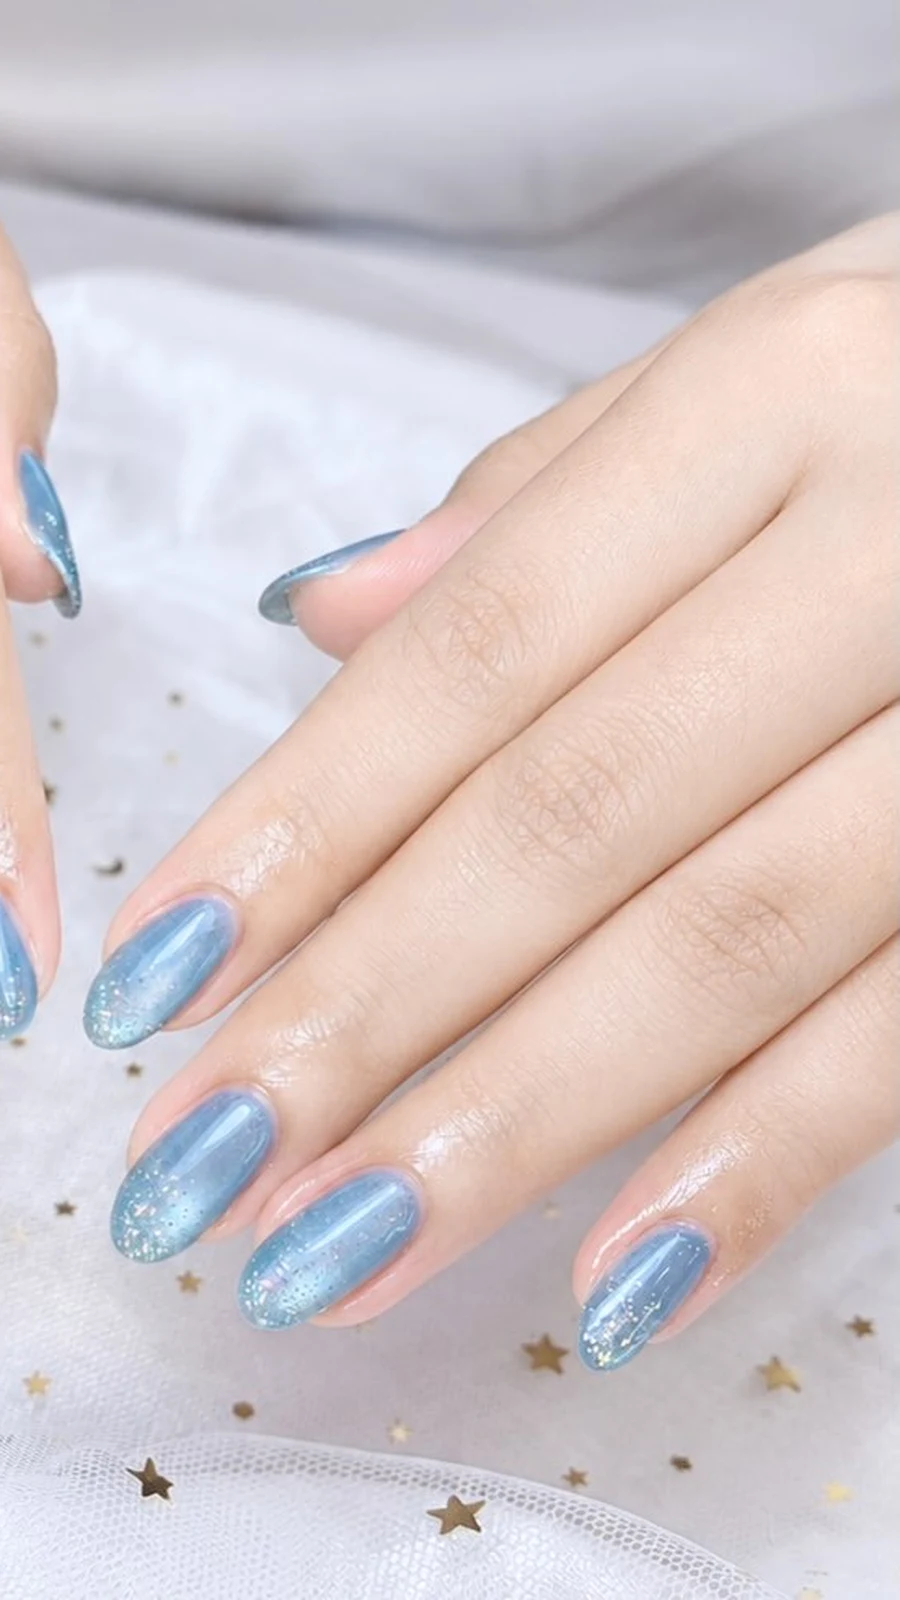
This is the design that looks like a snowstorm decided to be elegant. The base is a sheer, almost-clear icy blue, and fine silver-blue glitter is packed densely at the tips and faded down toward the cuticle, so the sparkle melts into the nail instead of stopping in a hard line. In daylight it reads as a soft blue shimmer; under party lights the tips catch and throw the light back. It works on any length, but it is especially lovely on short to medium nails, where the gradient makes the nail look longer than it is.
Additional Information: The fade is the whole design, so ask for a sponge application: glitter dabbed on with a makeup sponge at the tip, then a second, lighter layer a little lower, so the density falls away gradually. A single coat of a fine glitter polish will not give you this effect — it will give you an even sprinkle, which is pretty but not the same. Seal it with two coats of a glossy top coat, because glitter is rough by nature and the top coat is what turns it into glass. This design lasts well because regrowth shows slowly against the sheer base.
2. Frosted Silver French Tips
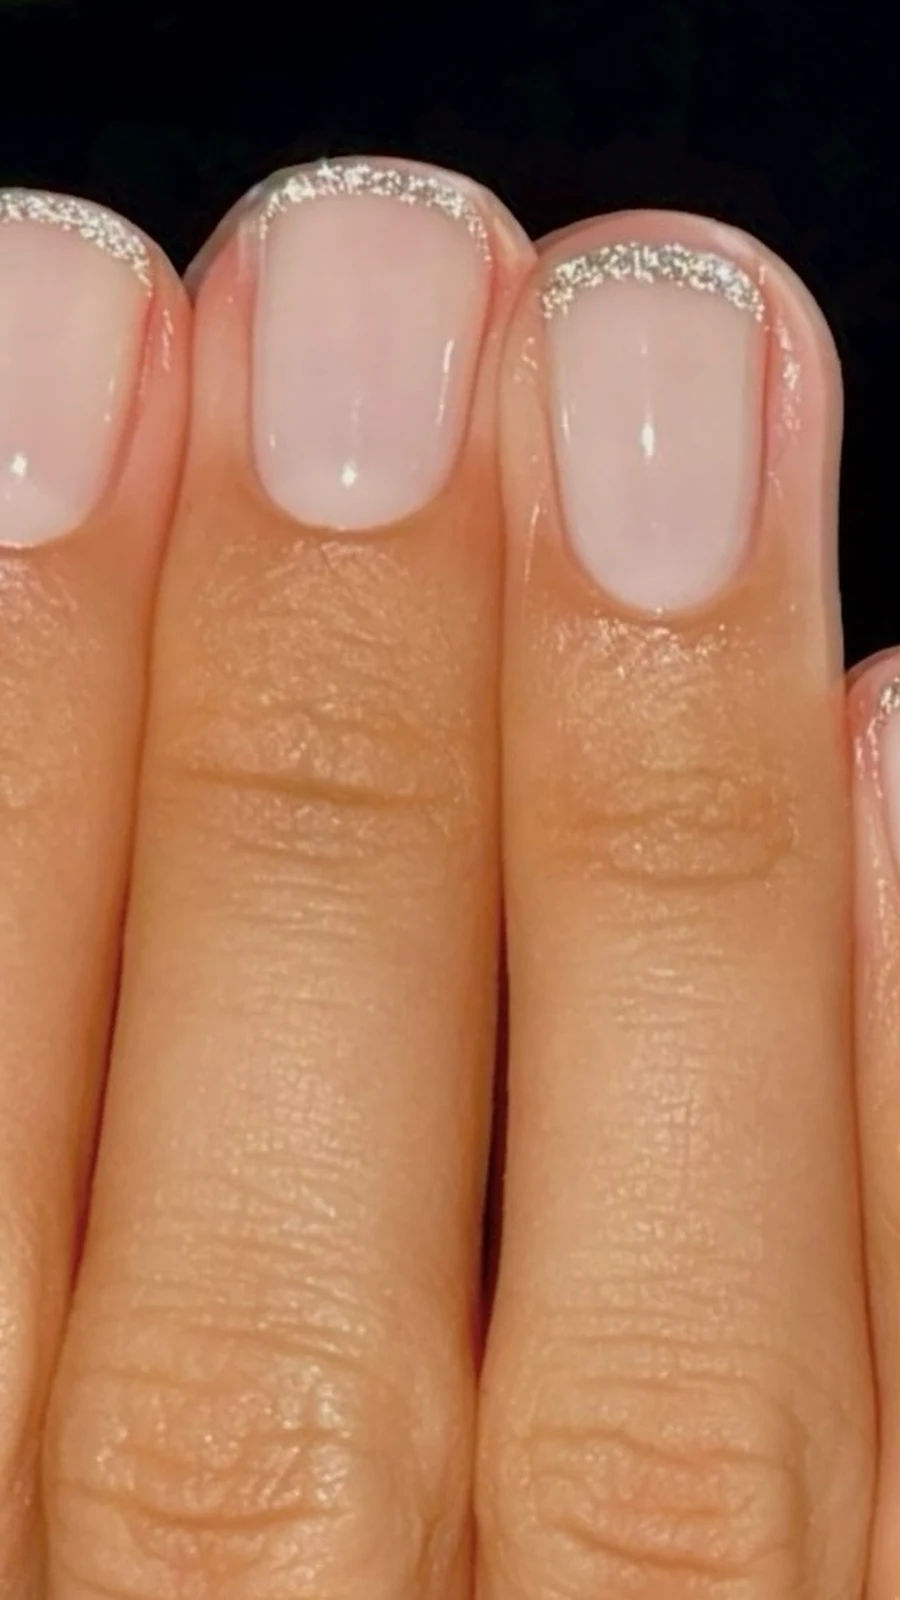
A French manicure, frosted over. The base is the classic sheer pink-nude, but the white tip is replaced with a band of fine silver glitter, painted in the same neat smile line as a traditional French. The effect is familiar and surprising at the same time: from a distance it reads as a French manicure; up close it is pure winter sparkle. It is the most office-friendly design on this list, because the glitter stays at the edge of the nail and the rest of the manicure is quiet.
Additional Information: The smile line matters more here than in a plain French, because glitter has no forgiveness — a wobbly line is visible from across the room. If you are doing it yourself, use a thin liner brush and build the glitter in two thin passes rather than one thick one. Keep the glitter band narrow, about a quarter of the nail, so the design stays delicate. On square nails the straight edge of the tip suits the geometric glitter line; on almond nails it softens into something more romantic. Either shape works — pick the one you already wear.
3. Snowflake Glitter on Sheer Pink
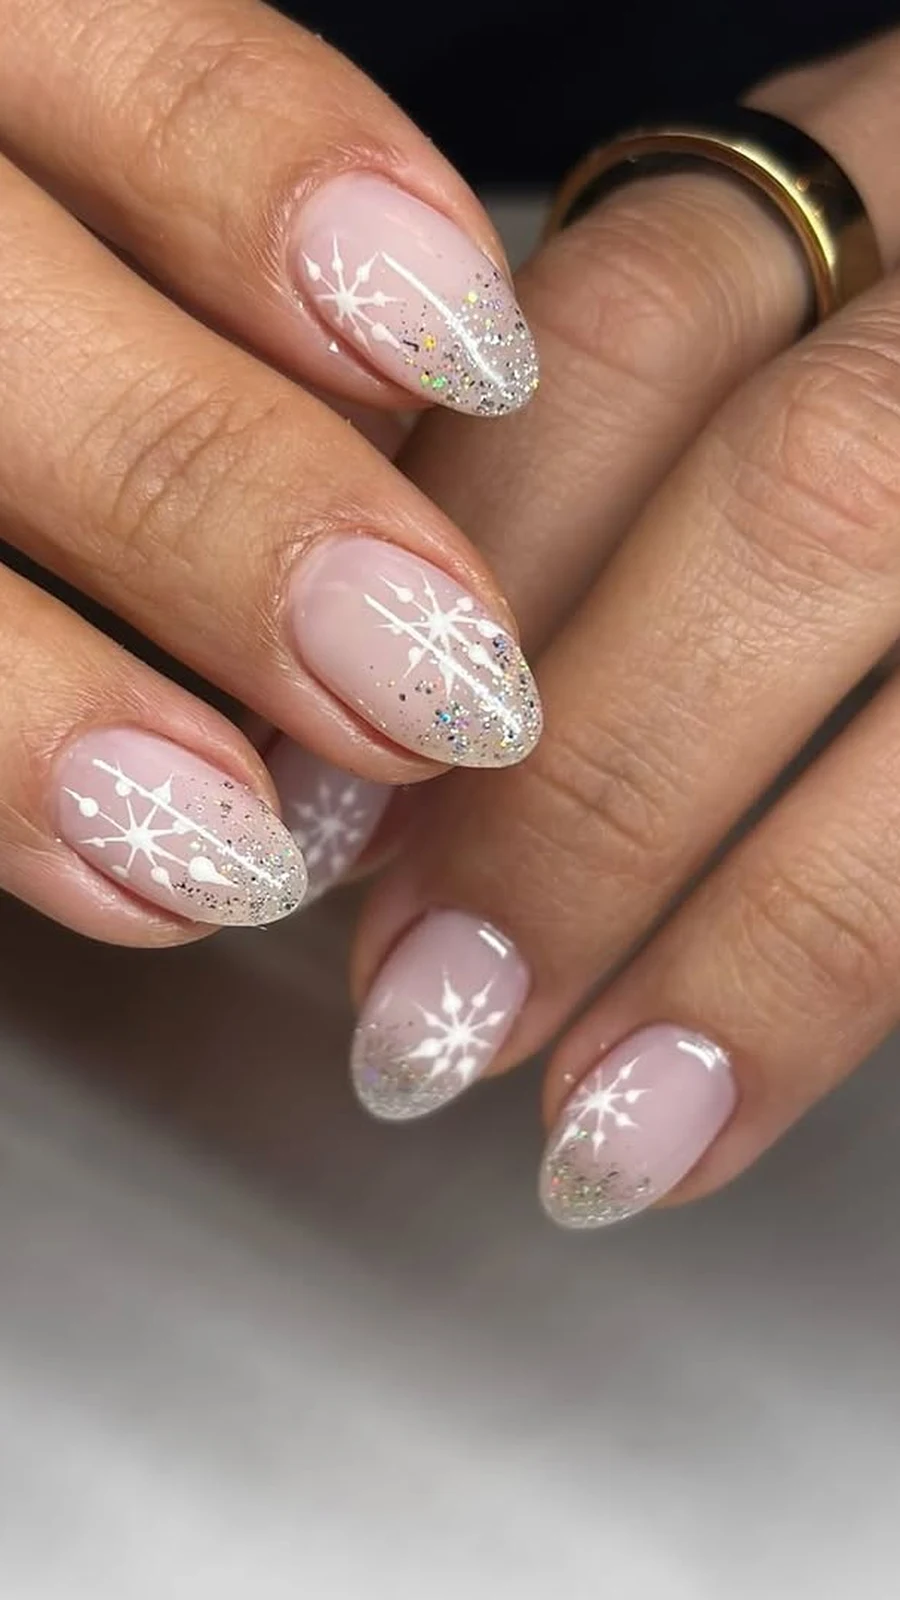
Some winter designs try to do too much. This one does exactly two things: a sheer pink base, and one hand-painted snowflake on each ring finger, dusted with fine silver glitter while the paint is still wet. The rest of the nails stay plain and glossy. The snowflake is the whole story, and because it only appears twice, it looks deliberate and expensive instead of busy. It is the design to choose if you love winter but you do not love nail art that shouts.
Additional Information: The snowflake needs a steady hand, so this is a good one to book with a nail artist rather than attempt freehand at home — or use a snowflake stamp or a thin sticker, sealed under top coat, if you are doing it yourself. Either way, the trick is restraint: one snowflake per ring finger, nothing on the other nails, and keep the glitter fine rather than chunky. A chunky glitter snowflake looks like a craft project; a fine glitter one looks like frost. If your skin is cool-toned, the silver glitter will sing; if you are warm-toned, swap the silver for a pale gold glitter and the whole design warms up.
4. Ice-Blue Chrome with a Glitter Cuticle Line
Chrome nails are usually loud. This one is not. The base is a pale ice-blue chrome — smooth, mirror-like, cool as a frozen lake — and the only decoration is a thin line of fine silver glitter painted along the cuticle of each nail. That single glitter line does something clever: it softens the edge where the chrome meets the skin, and it catches the light every time you move your hand, so the manicure seems to shimmer from the inside out. It is modern, minimal, and quietly dramatic.
Additional Information: Chrome needs a perfectly smooth base, so do not skip the prep: buff the nail, apply a no-wipe gel top coat, rub the chrome powder in, then seal. Any ridge or bump will show through the mirror finish. The glitter cuticle line is best done with a liner brush and a fine glitter gel, applied after the chrome is sealed. This design looks best on medium to long nails, where the chrome has room to reflect, and it pairs beautifully with silver jewellery. Expect compliments from strangers; chrome always draws them.
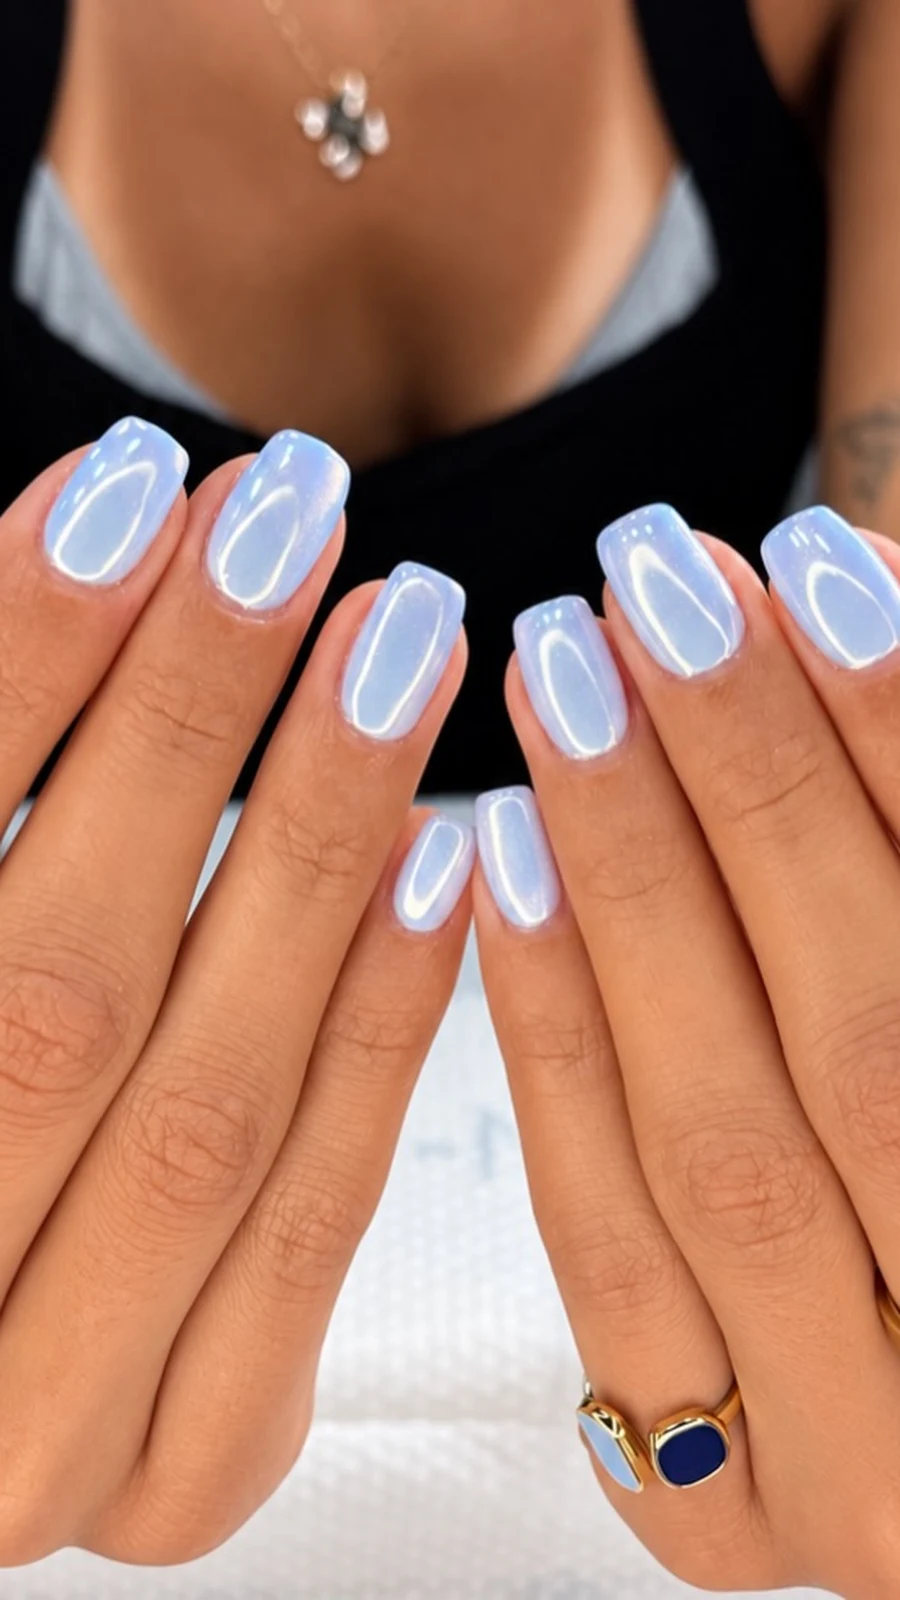
5. White Glitter Snowdrift
Imagine fresh snow under a streetlight — white, soft, sparkling all over. That is this design. Every nail is coated in a milky white base with fine white and silver glitter mixed through it, so the whole nail glitters rather than just an accent. It sounds like a lot, and on paper it is, but in practice white glitter reads as light and clean rather than heavy, especially under a high-gloss top coat. It is the brightest design in the Frost & Ice group, and the one that looks most like winter itself.
Additional Information: White glitter polish can go on streaky, so two thin coats are better than one thick one, and a glitter topper over a milky white base gives a more even result than a single glitter polish. Keep the nails short to medium and neatly shaped — long white glitter nails can look like icicles, which is fun for a party but harder to wear to work. This design is also the most forgiving of the five if a nail chips, because white glitter hides small flaws better than a dark colour does. Pair it with a dark coat and a red lip and let the nails do the sparkling.
Candlelight Gold: Warm Sparkle for Long Evenings
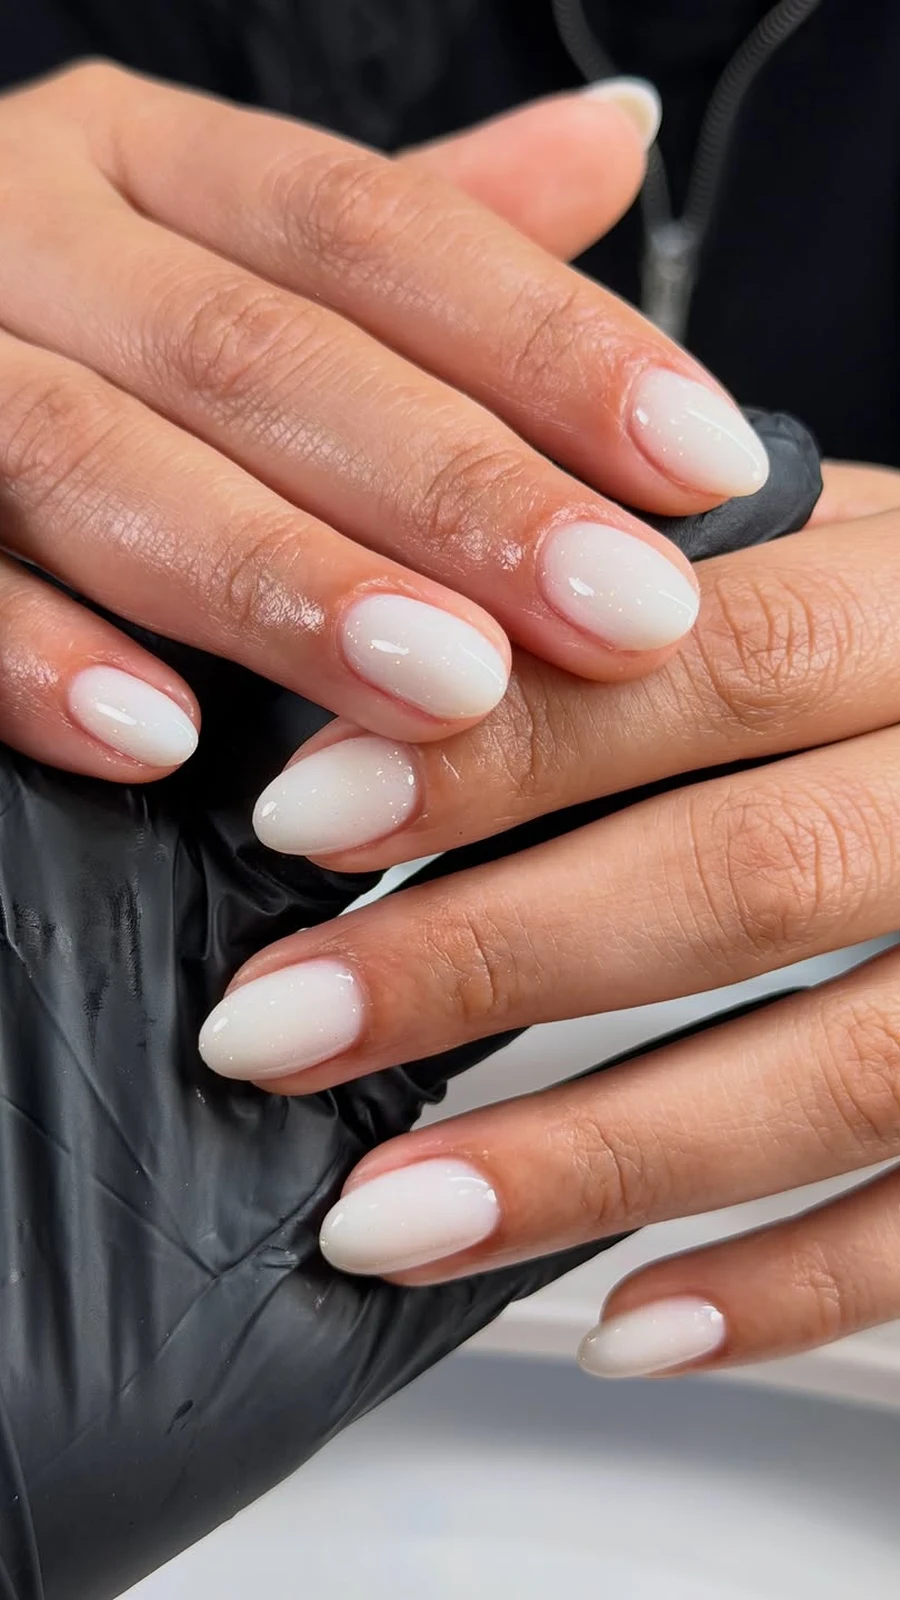
Gold sparkle is the warmest kind. It belongs to candlelight, fairy lights, mulled wine and rooms where everyone is laughing. These five designs use gold in different ways — foil, glitter, shimmer, a single accent — but they share one quality: they make your hands look warm even when the weather is not. Gold flatters every skin tone, it goes with every December outfit from black velvet to cream knitwear, and it never looks out of place at a party. If Frost & Ice is the morning, Candlelight Gold is the evening.
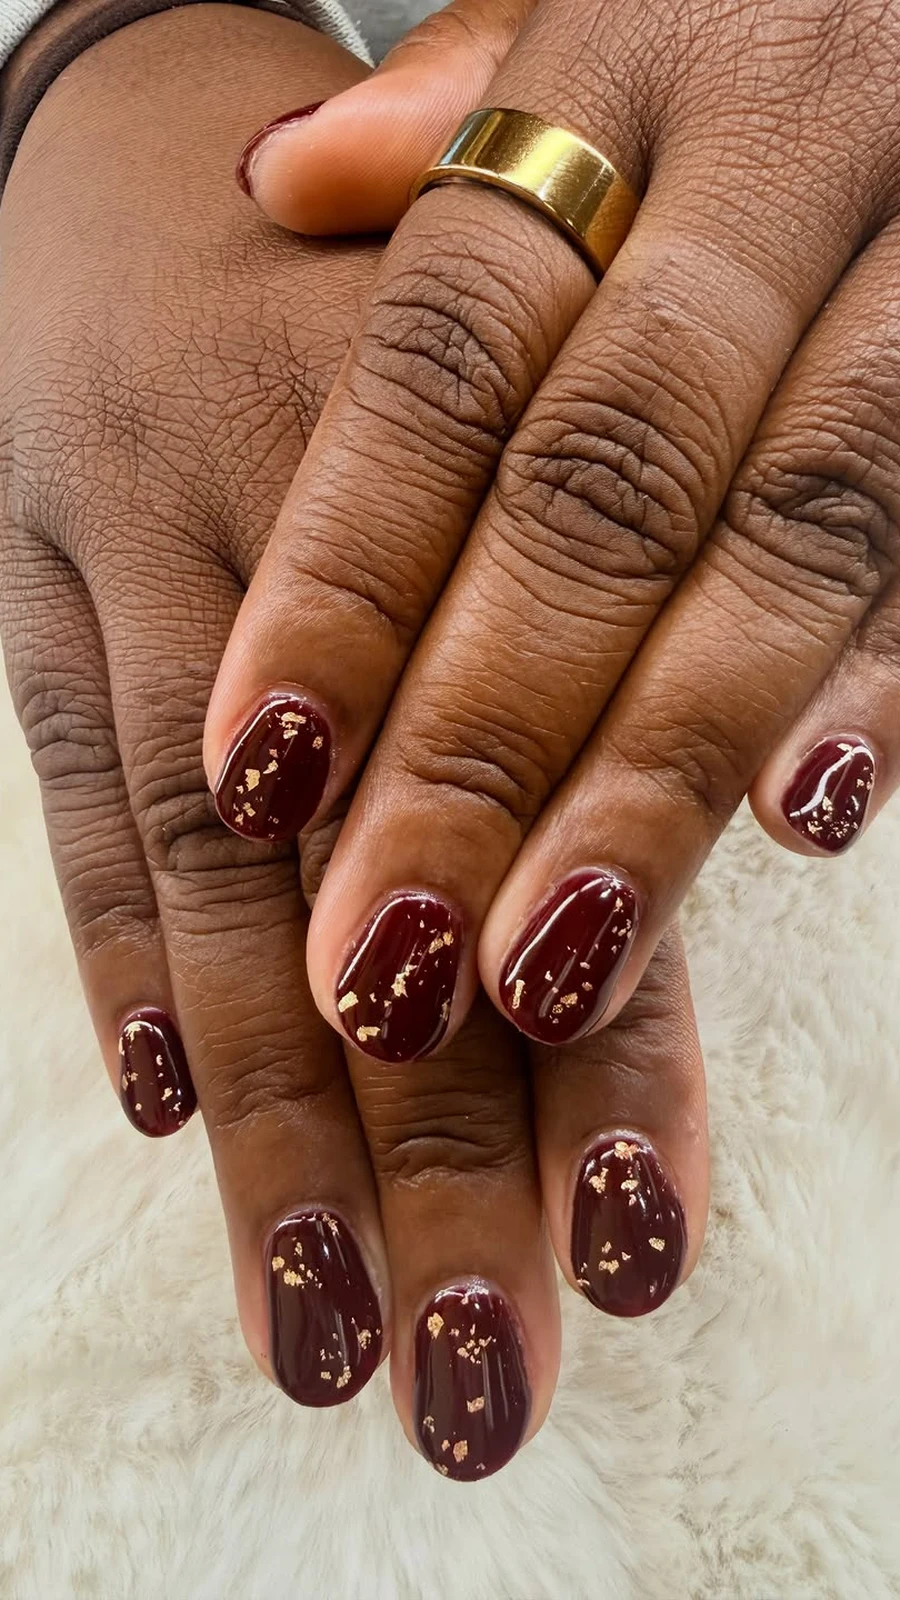
6. Molten Gold Foil on Deep Burgundy
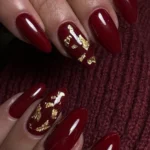
Burgundy is already the most December colour there is. Add molten gold foil — torn, irregular pieces of real gold leaf pressed onto the nail while the polish is still tacky — and it becomes something else entirely: a manicure that looks like it was made by candlelight. The foil sits mostly on two accent nails, with a few small flecks scattered across the others, so the gold feels like it melted and settled rather than being placed. No two nails are alike, which is the point.
Additional Information: Gold leaf is fragile and it hates water, so seal it well: press each piece down gently, let it set, then cover with two coats of top coat, wrapping the free edge so the foil cannot lift. The burgundy underneath should be two even coats of a deep, wine-red gel or polish — a shade that is almost brown in shadow and richly red in the light. This is a salon design if you want the foil to look like liquid metal rather than crumpled paper, but a confident home manicurist can do it with tweezers and patience. Wear it with gold rings and let the foil and the jewellery have a conversation.
7. Champagne Glitter Ombre
Champagne glitter is gold with its shoes off — softer, paler, less demanding. In this design it fades from a dense sparkle at the tips down into a sheer nude base, the way the bubbles in a glass of champagne rise and thin out. The result is a manicure that looks like it is glowing from the ends of your fingers, and it suits absolutely everyone because the base is your own nail colour, only better. It is the design to pick when you want sparkle that a grandmother, a boss and a best friend would all approve of.
Additional Information: The ombre works best with a fine glitter rather than a chunky one, applied with a sponge in two layers: a dense layer at the tip, then a lighter pass a third of the way down the nail. A champagne glitter topper over a sheer nude base is the easiest route at home; at the salon, ask for a glitter gel fade. This design is low-maintenance in the best way — regrowth is nearly invisible against the sheer base, and a small chip at the tip can be touched up with a dab of glitter polish in seconds. It lasts two weeks easily with a gel top coat.
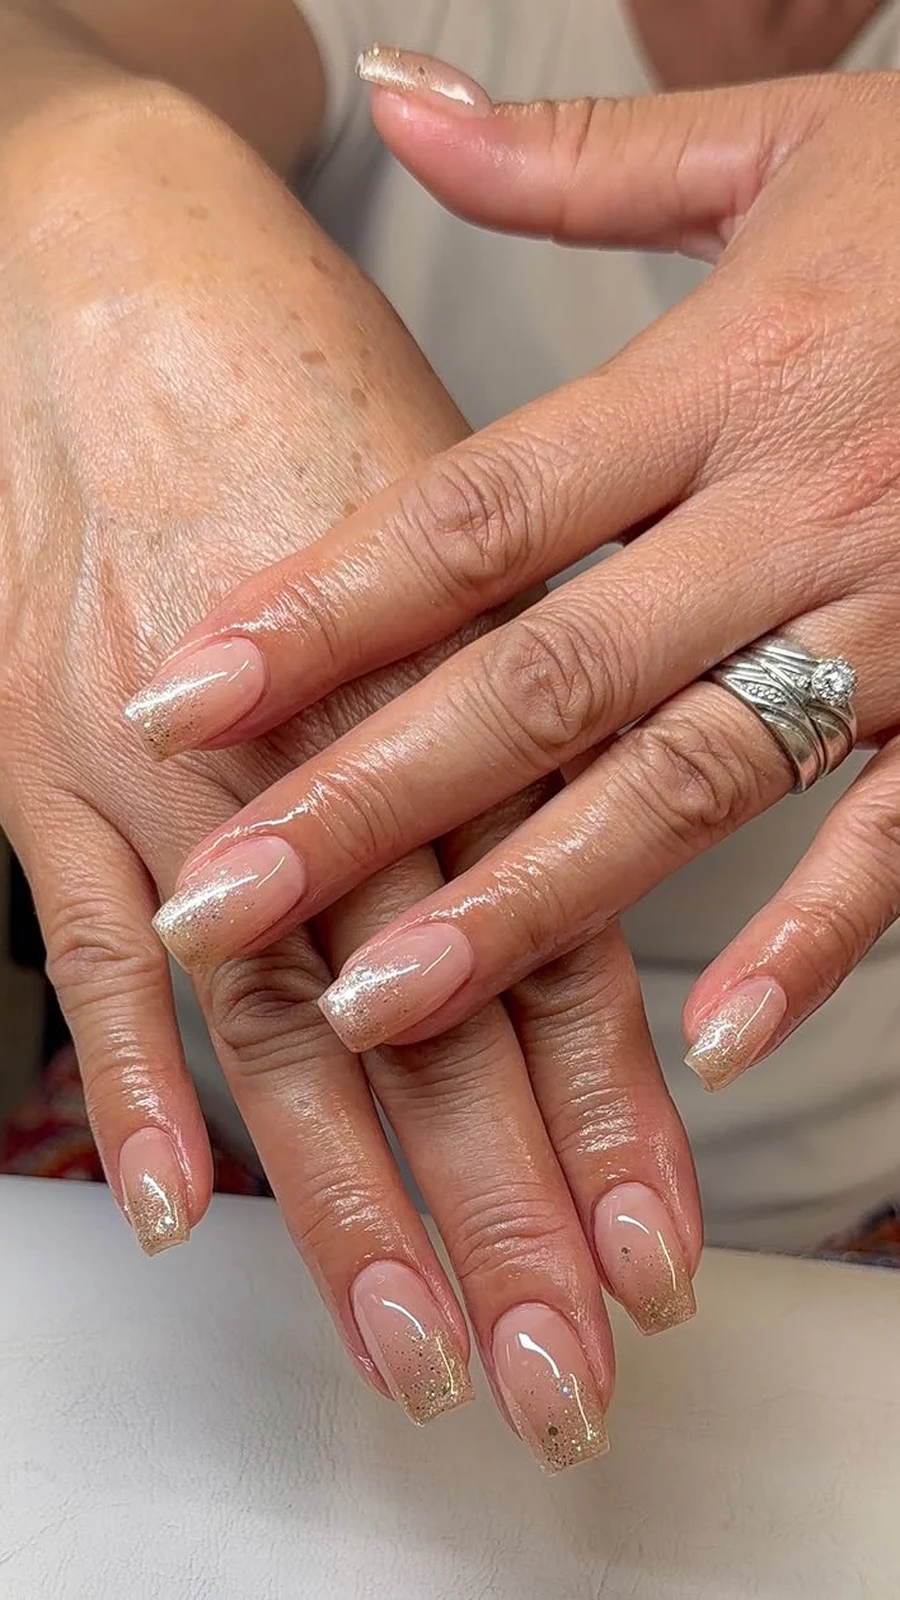
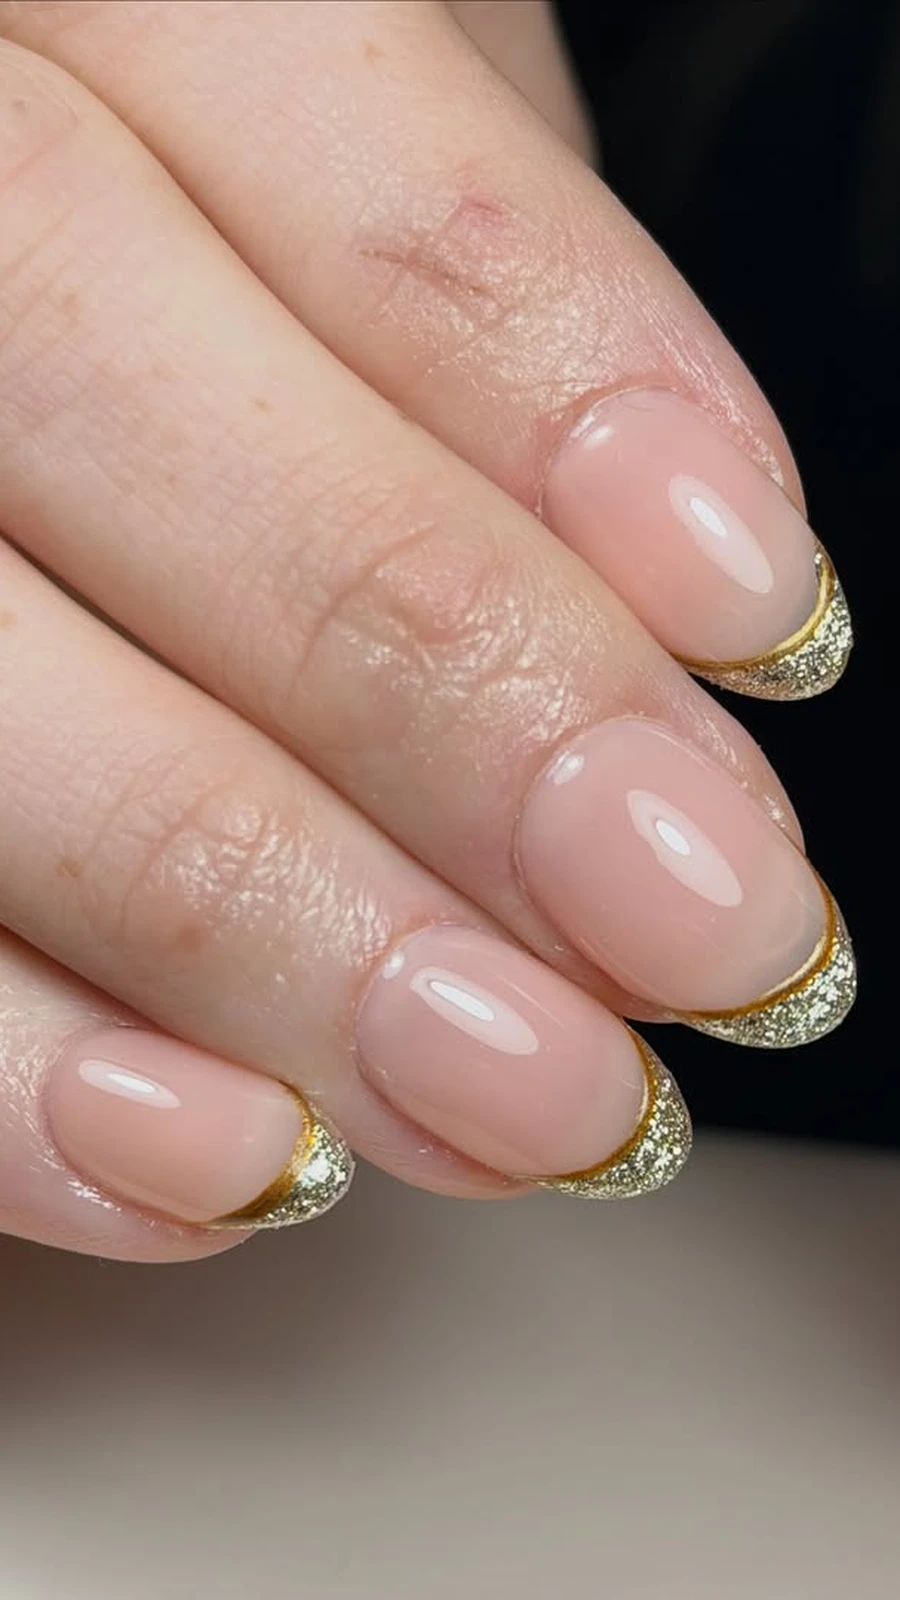
8. Gold Glitter French on Sheer Nude
The French manicure’s festive cousin. Same sheer nude base, same neat smile line — but the white tip is replaced with a band of warm gold glitter, and the line is drawn a fraction wider than a classic French, so the gold has room to shine. It is the kind of design that looks simple in a photograph and much more expensive in person, because the gold catches the light every time you reach for a glass or gesture while you talk. It works for a wedding, a work party, a family dinner — anywhere a plain French would work, only better.
Additional Information: Keep the gold band even: use a liner brush, paint the smile line in two thin passes, and clean up the edges with a flat brush dipped in acetone before the top coat goes on. Gold glitter is more forgiving than silver here because its warmth hides small imperfections. Short to medium nails suit this design best; on very long nails the gold band can look heavy unless the smile line stays narrow. If you want one extra detail, add a single tiny gold dot at the centre of each smile line — a quiet nod to the season that only shows up close.
9. Bronze Shimmer on Espresso
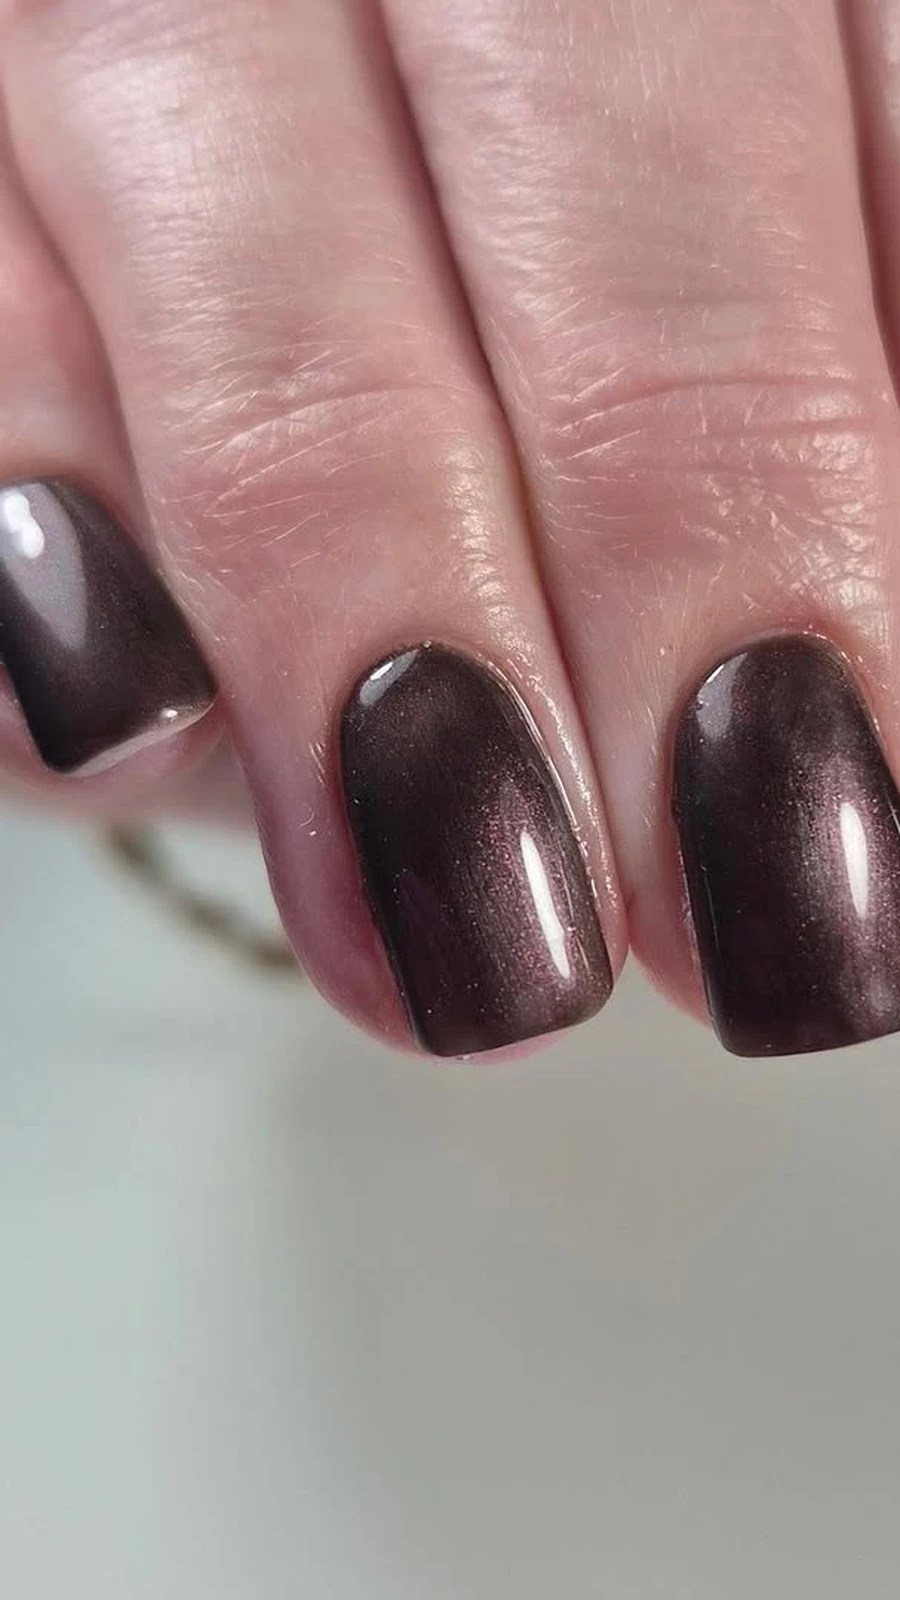
Espresso brown is the quiet achiever of winter nails: deep, rich, flattering on every skin tone, and endlessly elegant. This design gives it a bronze shimmer — a fine metallic bronze glitter dusted through the brown, denser at the tips, so the nail looks like a cup of coffee with the light hitting the surface. It is the least obviously “sparkly” design in the gold group, which is exactly why it works for people who want shimmer without glitter. From across the room it reads as a beautiful dark manicure; up close, it glows.
Additional Information: The bronze shimmer is best as a glitter topper over a solid espresso base, applied in one thin coat so the brown still shows through. Two coats of topper and the bronze takes over; one coat and it stays a shimmer. This design is very forgiving: dark brown hides chips, the shimmer hides imperfections in the base, and it grows out gracefully. It is also the best choice in this list for short nails, because the dark colour and the shimmer together make short nails look deliberate and polished rather than plain. Pair it with bronze or copper jewellery rather than silver.
10. Rose-Gold Glitter Accent Nails
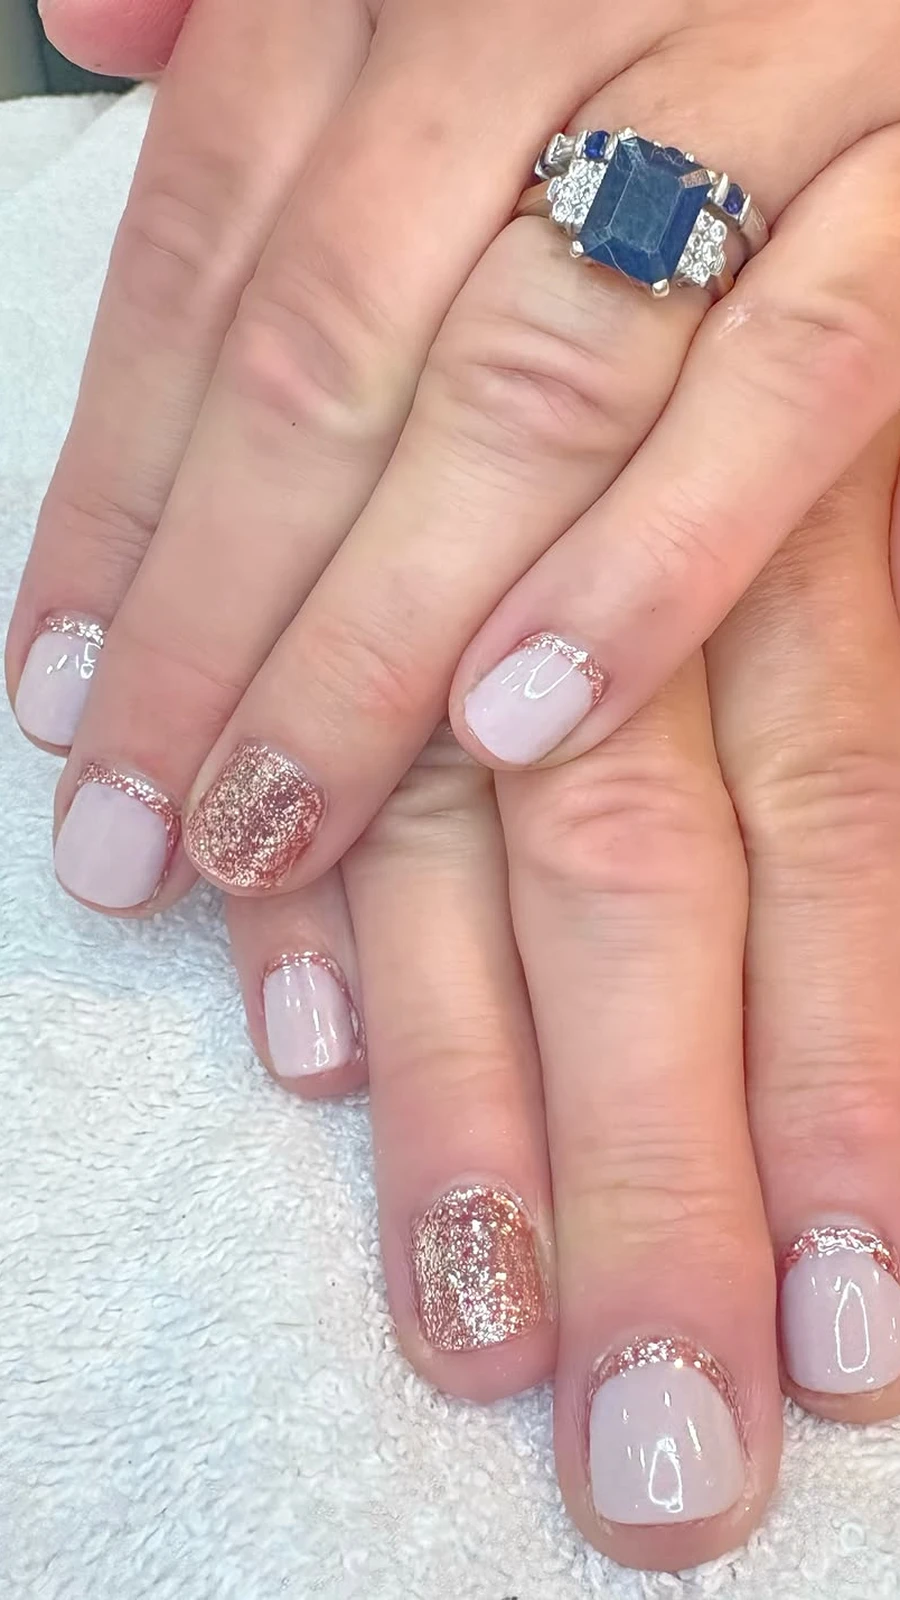
Rose gold is the softest metal in the nail world — pink enough to feel romantic, gold enough to feel festive. In this design, eight nails are a plain, glossy dusty pink, and the two ring fingers are covered in fine rose-gold glitter from cuticle to tip. The contrast is the whole idea: the plain nails make the glitter nails look like jewellery, and the glitter nails make the plain nails look intentional. It is a small commitment with a big payoff, and it is the easiest design in this list to do at home.
Additional Information: The accent nails need two coats of glitter polish to look solid rather than patchy, and a thick glossy top coat to smooth the glitter’s rough texture. The dusty pink on the other nails should be a creme finish, not a shimmer, so the contrast between plain and glitter stays clean. This design is perfect if you are short on time: paint the pink base on all ten nails, then glitter the two ring fingers last. It also grows out gracefully, because the plain nails show regrowth first and the glitter nails hide it. A lovely choice for a first glitter manicure.
Midnight Sparkle: After-Dark Glitter
Midnight Sparkle is the mood for the party that starts late. The bases are deep — navy, black, plum, emerald, charcoal — and the glitter on top is what makes them come alive. In daylight these designs look moody and rich; under party lights they turn into constellations. They are the boldest five in this list, and also the most forgiving, because dark colours hide chips and glitter hides everything else. If you are going out on New Year’s Eve, or to any party where the photos will be taken after dark, this is your group.
11. Starry Night Navy with Silver Constellations
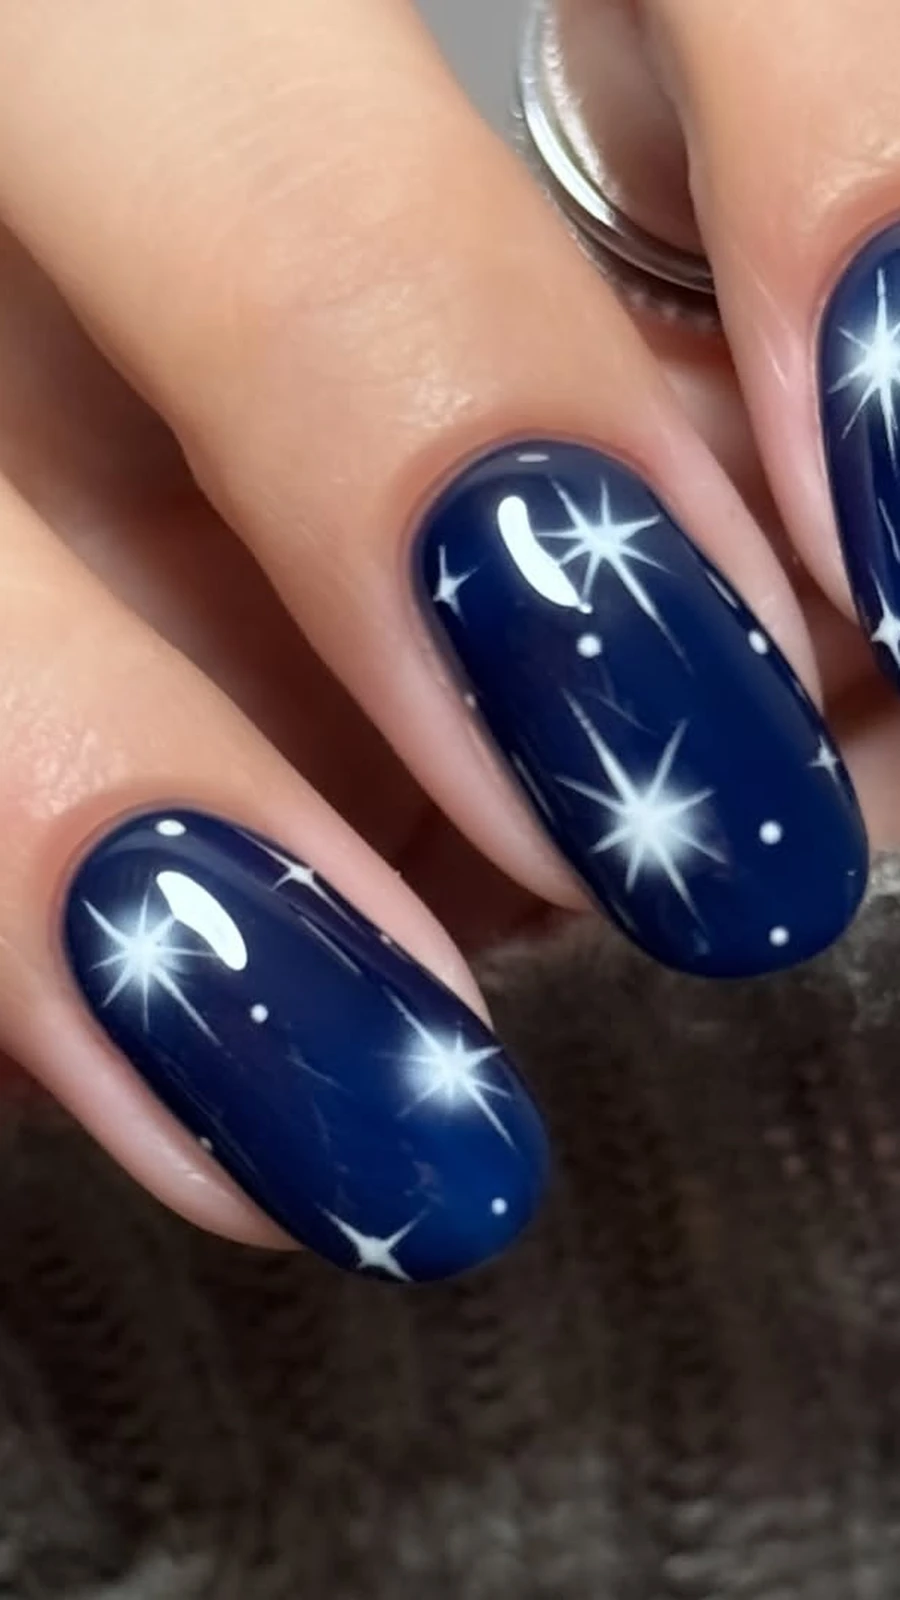
Deep navy, painted like the night sky, with tiny silver stars and a dusting of fine silver glitter scattered across each nail like a constellation. The stars are hand-painted — some four-pointed, some simple dots — and no two nails match, which makes the whole manicure feel like a sky rather than a pattern. It is the most romantic design in this list, and the one that gets the most compliments after dark, when the silver catches the light and the navy goes almost black.
Additional Information: The navy base needs two coats to reach full depth, and a gel formula will give you the inky, almost-black blue that makes the silver pop. Paint the stars with a dotting tool and a fine liner brush: four-pointed stars on the accent nails, simple silver dots and a little glitter dust on the rest. Do not aim for symmetry — real constellations are not symmetrical, and a little randomness is what makes this look like a sky instead of a sticker sheet. This design looks best on medium to long nails, where the stars have room to spread out.
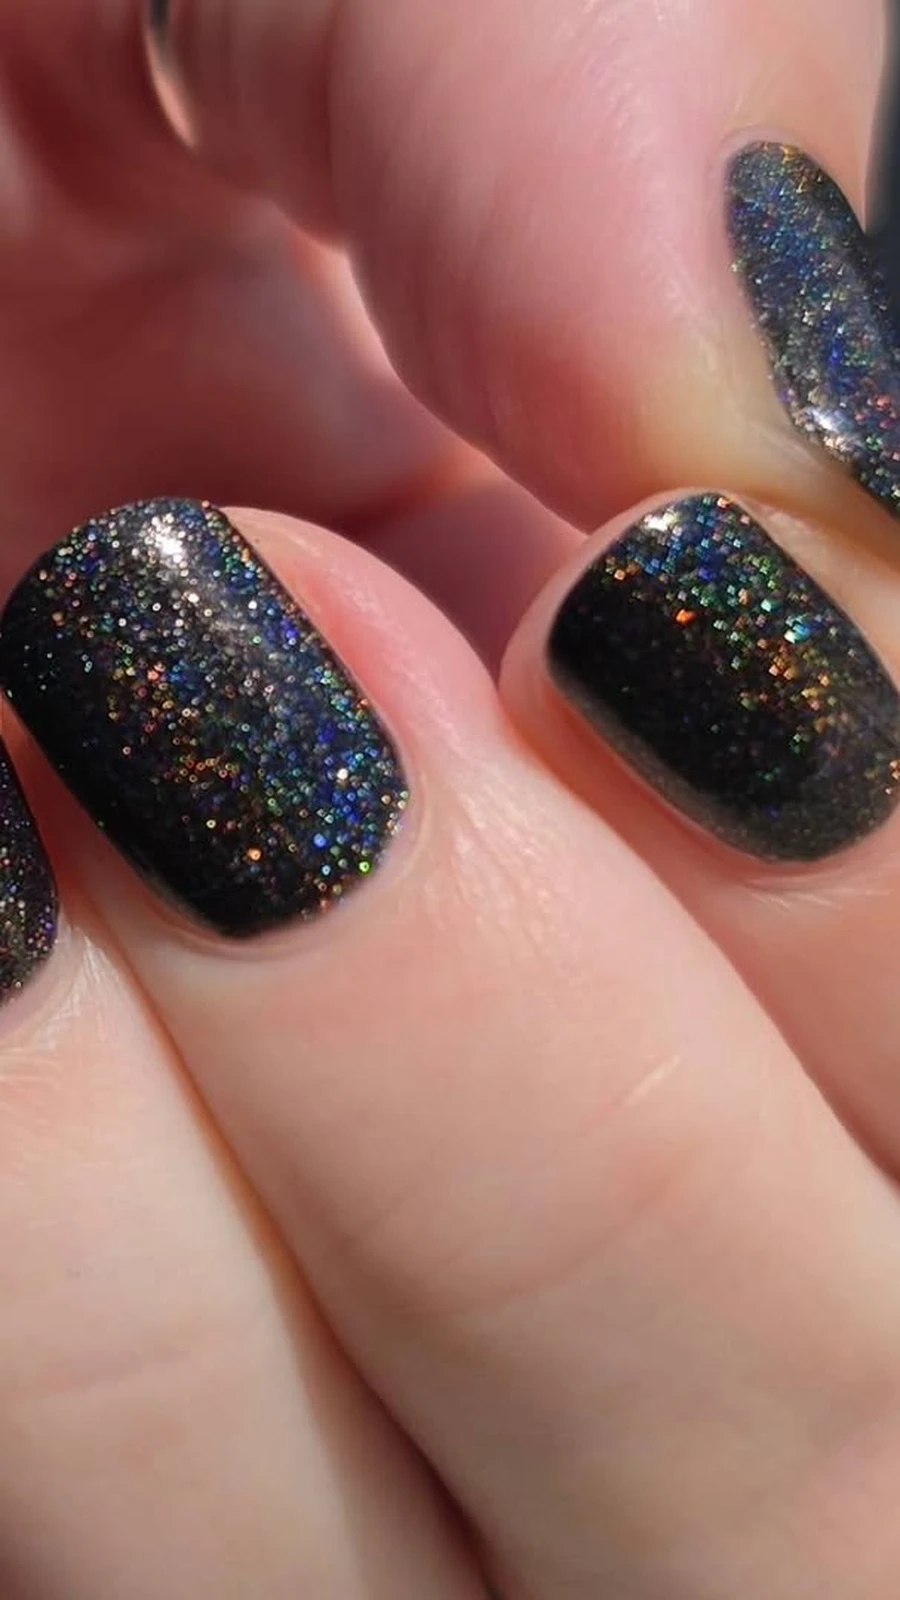
12. Black Glitter with Holographic Flakes
Black polish on its own is chic. Black polish with holographic glitter flakes is a different animal: in normal light it looks like a glossy black manicure with a secret, and when the light hits it, the flakes flash green, pink, blue and gold. It is the most dramatic design in this list and also the easiest to wear, because black goes with everything and the holographic flakes do all the talking. Wear it to the New Year’s Eve party and watch people lean in to look at your nails.
Additional Information: The flakes need a black base that is fully opaque — two coats of a good black creme — and then one coat of a holographic flake topper, applied thinly so the flakes sit flat. A thick top coat over the top seals the flakes in and gives the manicure its glassy finish. This design chips the least visibly of any dark manicure, because the flakes break up the edge of any chip. It is also the best choice for very short nails: black with holographic flakes looks deliberate and expensive at any length, and it makes short nails look like a style choice rather than a compromise.
13. Deep Plum with a Gold Glitter Fade
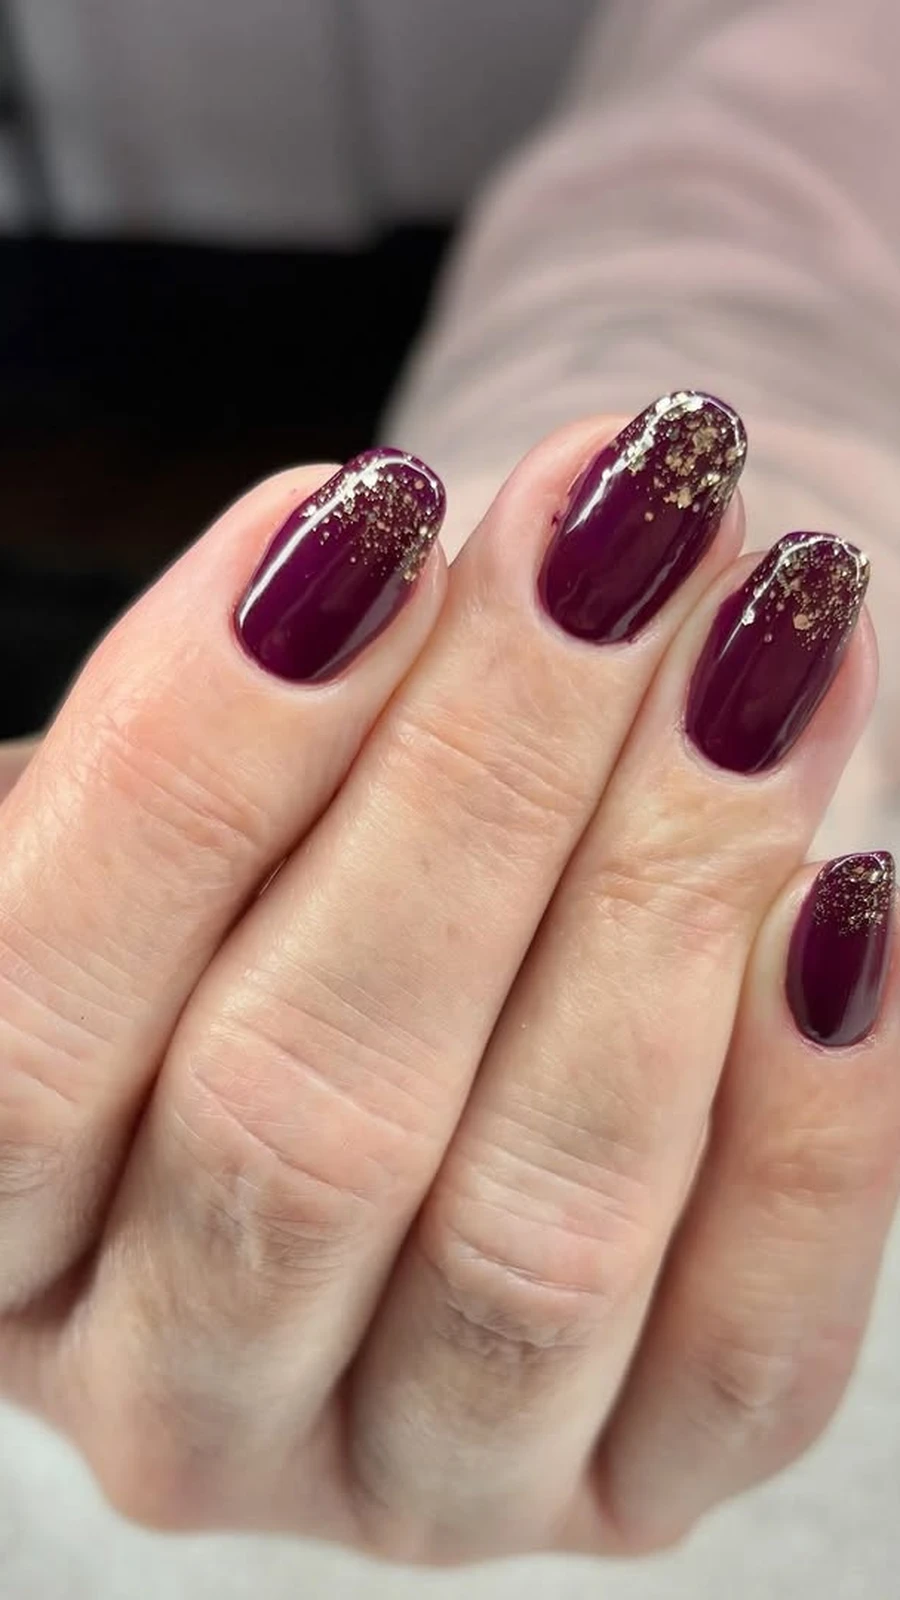
Plum is the colour between purple and wine, and it is criminally underused at Christmas. This design fades fine gold glitter from the tips down into a deep plum base, so the nail looks like a glass of red wine held up to candlelight. The gold warms the plum up, the plum keeps the gold from looking gaudy, and together they are the most grown-up sparkle in this list. It is the design to choose if you want to look expensive without looking like you tried too hard.
Additional Information: The fade is the same sponge technique as the icy blue gradient: glitter dabbed densely at the tip, then a lighter pass lower down, so the gold melts into the plum. Use a fine gold glitter rather than a chunky one — chunky gold on plum looks like a craft project, fine gold looks like candlelight. Two coats of glossy top coat are essential, because the glitter’s texture will dull the plum’s depth if it is left unsealed. This shade is particularly beautiful on deeper skin tones, where the plum reads rich and jewel-like, and on medium almond nails.
14. Emerald Glitter Velvet
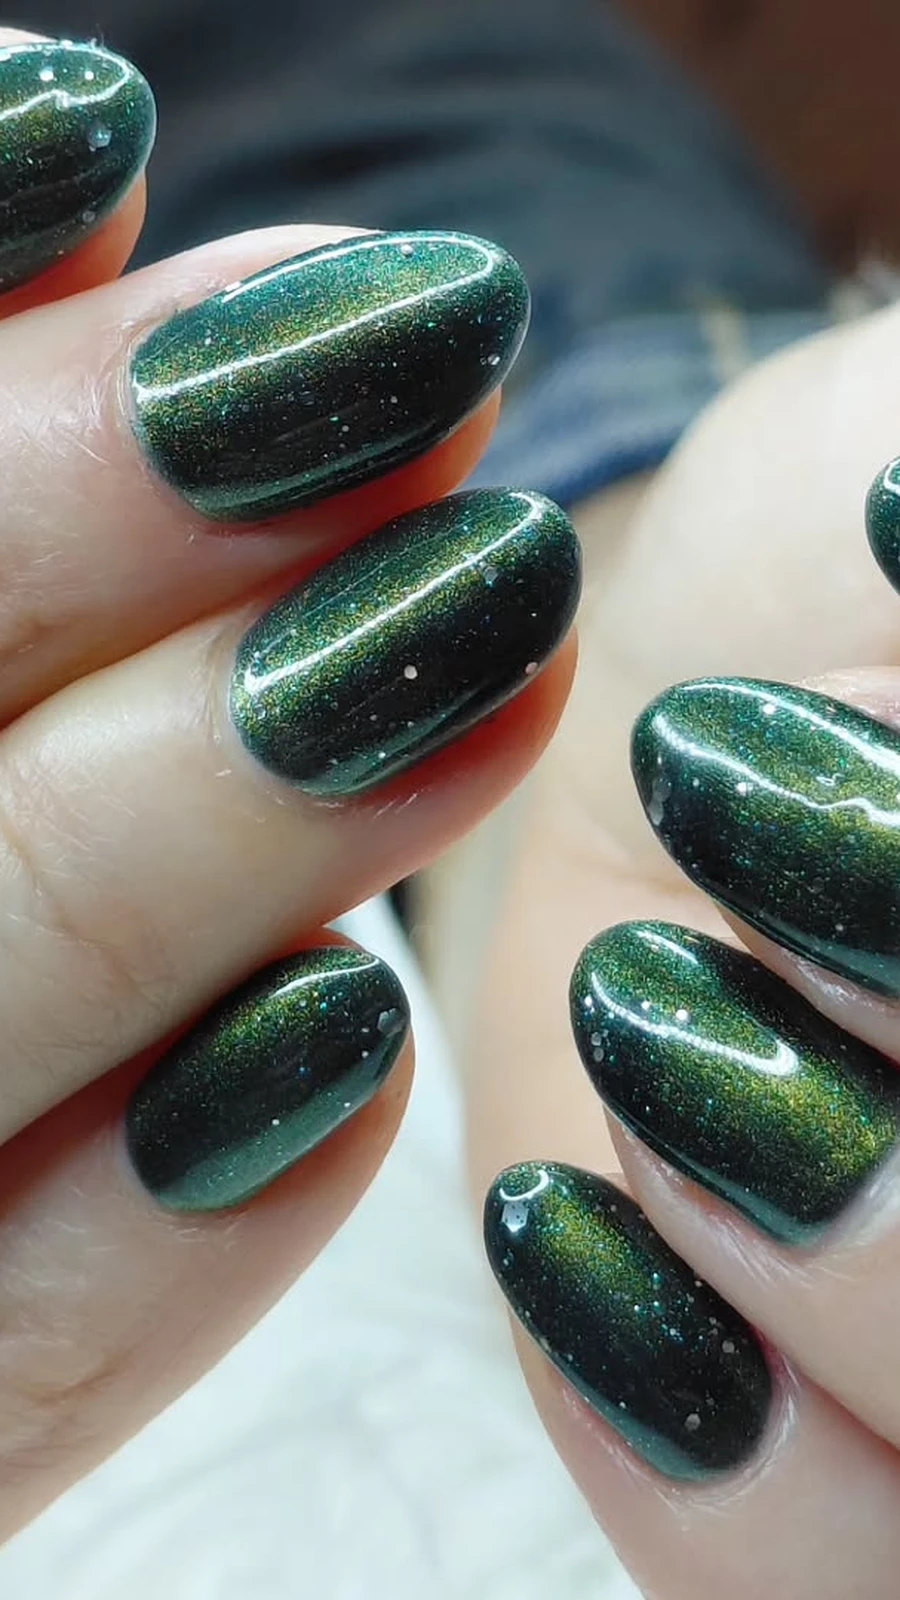
Emerald green is Christmas’s best-kept secret — everyone reaches for red, and the green sits there looking jewel-like and ignored. This design wears it as a glitter velvet: a deep emerald base with fine green and gold glitter mixed through, finished matte on some nails and glossy on others, so the manicure has two textures at once. The matte nails look like velvet; the glossy ones look like polished stone. It is a small detail that makes people look twice, and it is much easier than it sounds.
Additional Information: The trick is the top coats, not the colour. Paint all ten nails in the emerald glitter base, then apply a matte top coat to four nails and a glossy top coat to the other six — alternating, or matte on the ring fingers only if you prefer a quieter version. The glitter needs to be fine; chunky glitter under a matte top coat looks rough, while fine glitter looks like fabric. This design is best done with gel, because gel matte top coats stay matte longer than regular ones. Pair it with gold jewellery and a dark green or black outfit, and let the nails be the colour in the room.
15. Charcoal with Crystal Dust
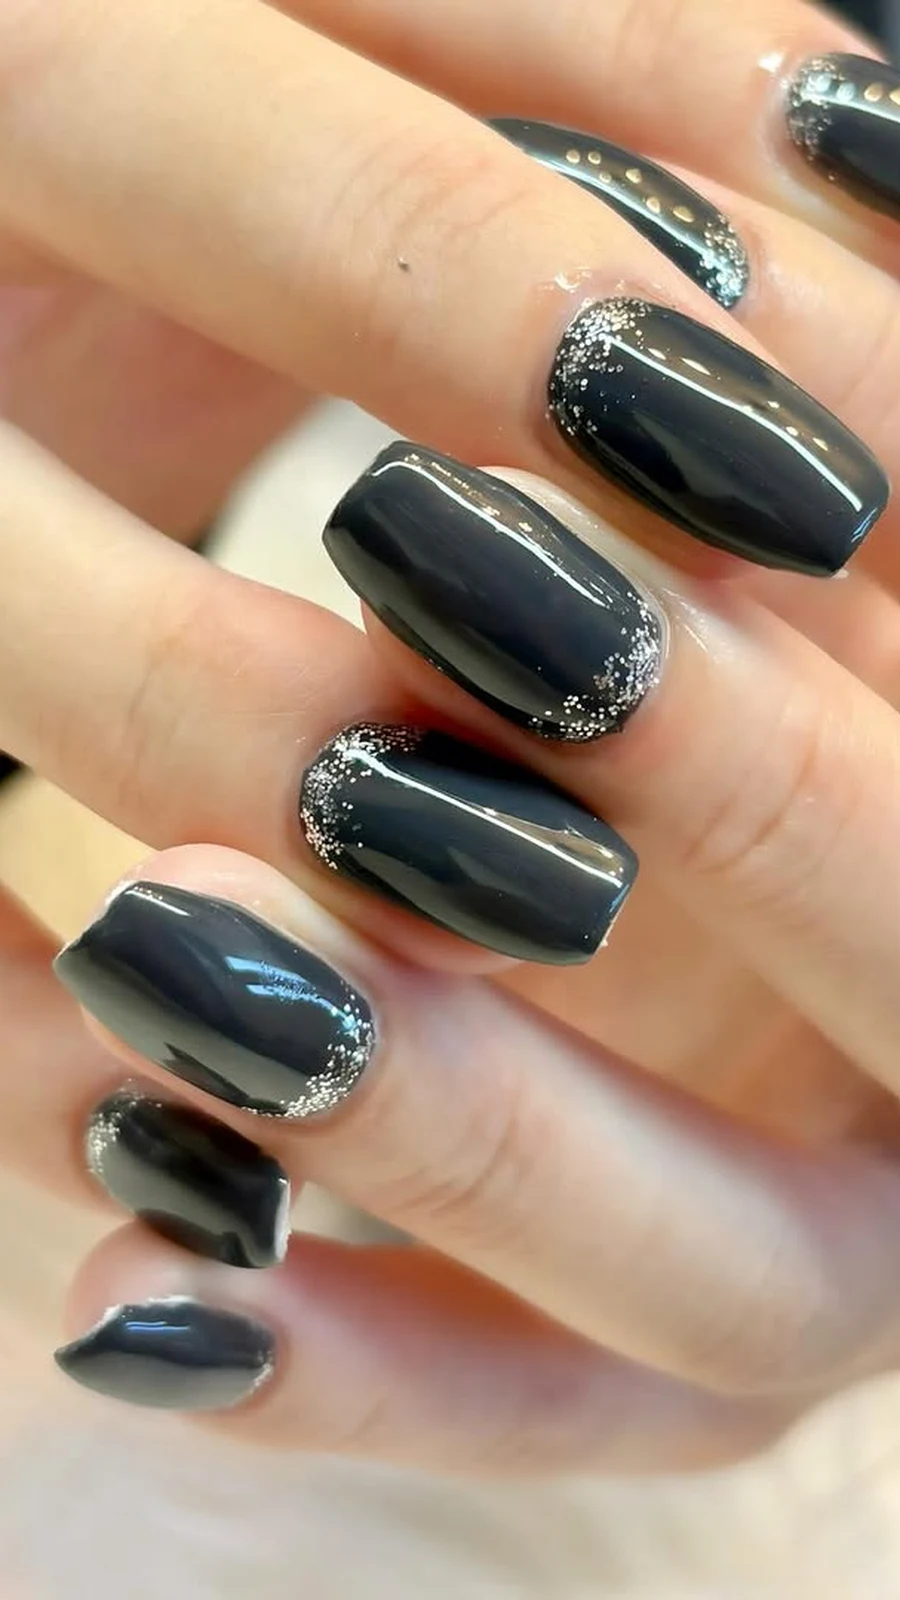
Charcoal is black’s softer, smarter sibling — dark grey with a hint of warmth, less harsh against the skin, and endlessly elegant. This design dusts it with crystal glitter: a fine silver-white glitter concentrated at the cuticle and fading toward the tip, like frost creeping down a window in reverse. The effect is subtle in daylight and quietly dazzling under lights, and it is the most wearable of the midnight group for anyone who finds black nails a little too much.
Additional Information: The crystal dust works best as a glitter topper applied with a sponge at the cuticle, faded down the nail so the charcoal still shows through at the tip. One coat of topper is enough — two coats and the glitter takes over and the charcoal disappears. Keep the nails short to medium and squared or softly rounded; the geometric shape suits the cool, clean colour. This design is also the most office-appropriate of the midnight group, because the glitter is pale and fine rather than chunky, and the base is a neutral dark rather than a bright colour. A good bridge design if you want midnight sparkle without the full drama.
Playful & Bright: Sparkle That Laughs
Not all winter sparkle has to be elegant. Some of it should be fun. This last group is for the person who puts on a Santa hat without irony, who buys the novelty Christmas jumper, who thinks December should feel like a celebration and not a photoshoot. The colours are brighter, the glitter is chunkier, and the designs are the ones that make people smile when they notice them. They are also, secretly, the easiest to do at home — bright colours and chunky glitter forgive a multitude of sins.
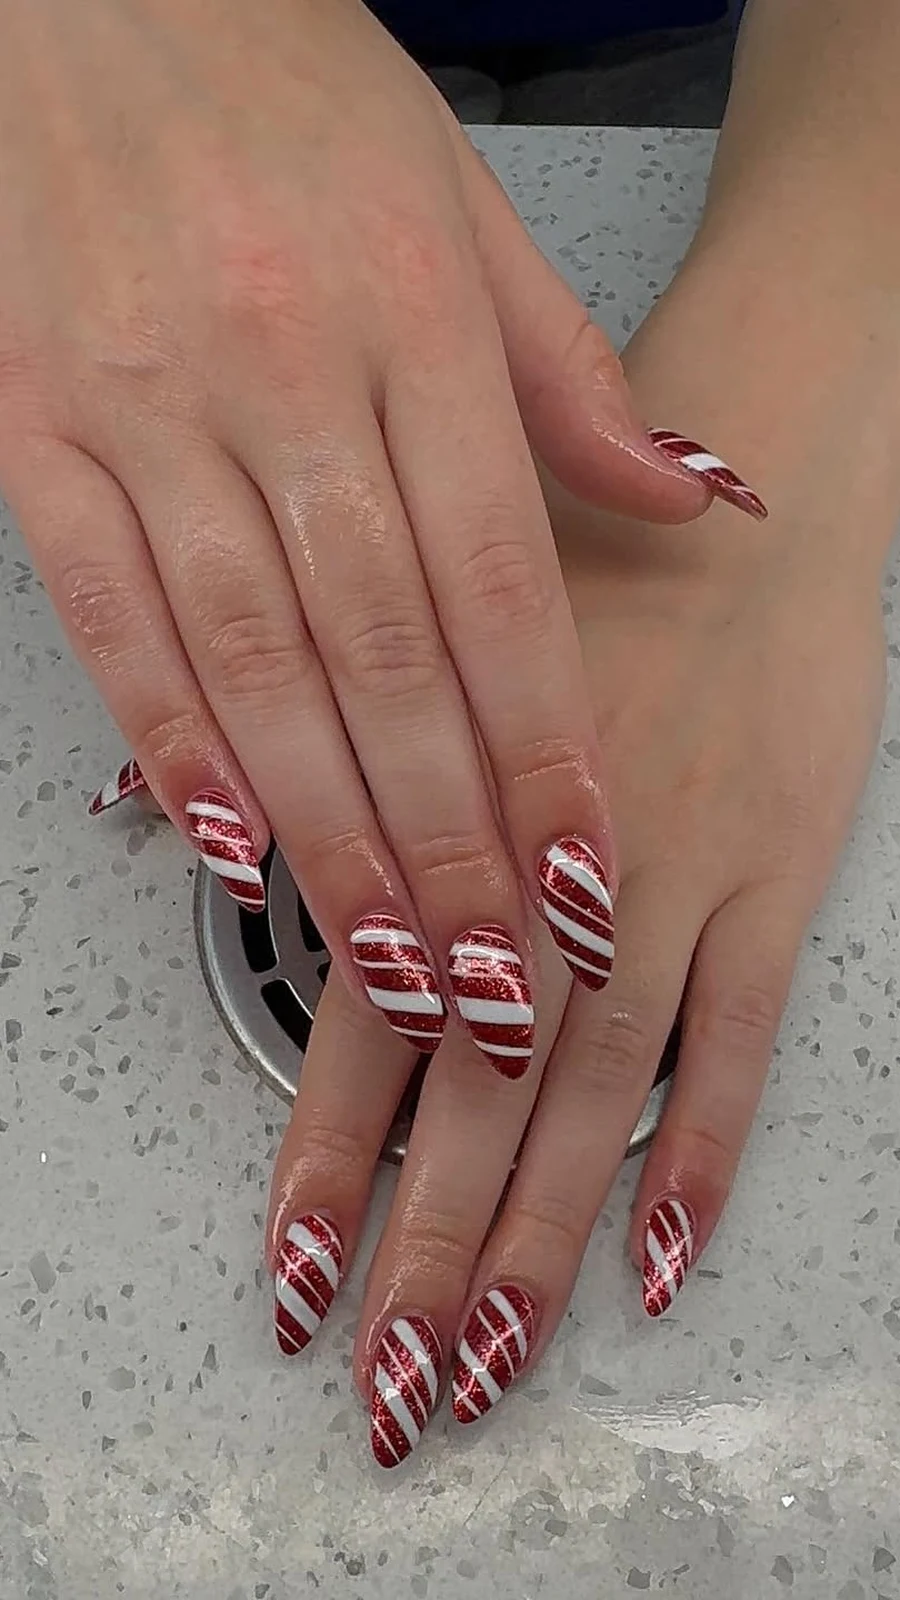
16. Candy-Cane Glitter Stripes
Red and white, striped like a candy cane, with a glitter finish that makes the whole thing look like it was dipped in sugar. The stripes are diagonal, painted over a white base, and the red is a true candy red rather than a deep burgundy. A fine red glitter topper over the whole nail ties the stripes together and gives the design its sparkle. It is unapologetically festive, it is impossible to ignore, and it is the design that gets photographed the most at Christmas parties.
Additional Information: The stripes are the hard part, so use striping tape or a thin liner brush and take your time — or ask your nail artist, because straight diagonal lines on ten nails are genuinely fiddly. Keep the stripes even in width and the same angle on every nail, or the design looks accidental rather than deliberate. A glitter topper over the finished stripes softens any small wobbles and unifies the red and white. This design is best on medium to long nails, where the stripes have room to run, and it looks wonderful with a plain outfit — let the nails be the festive part.
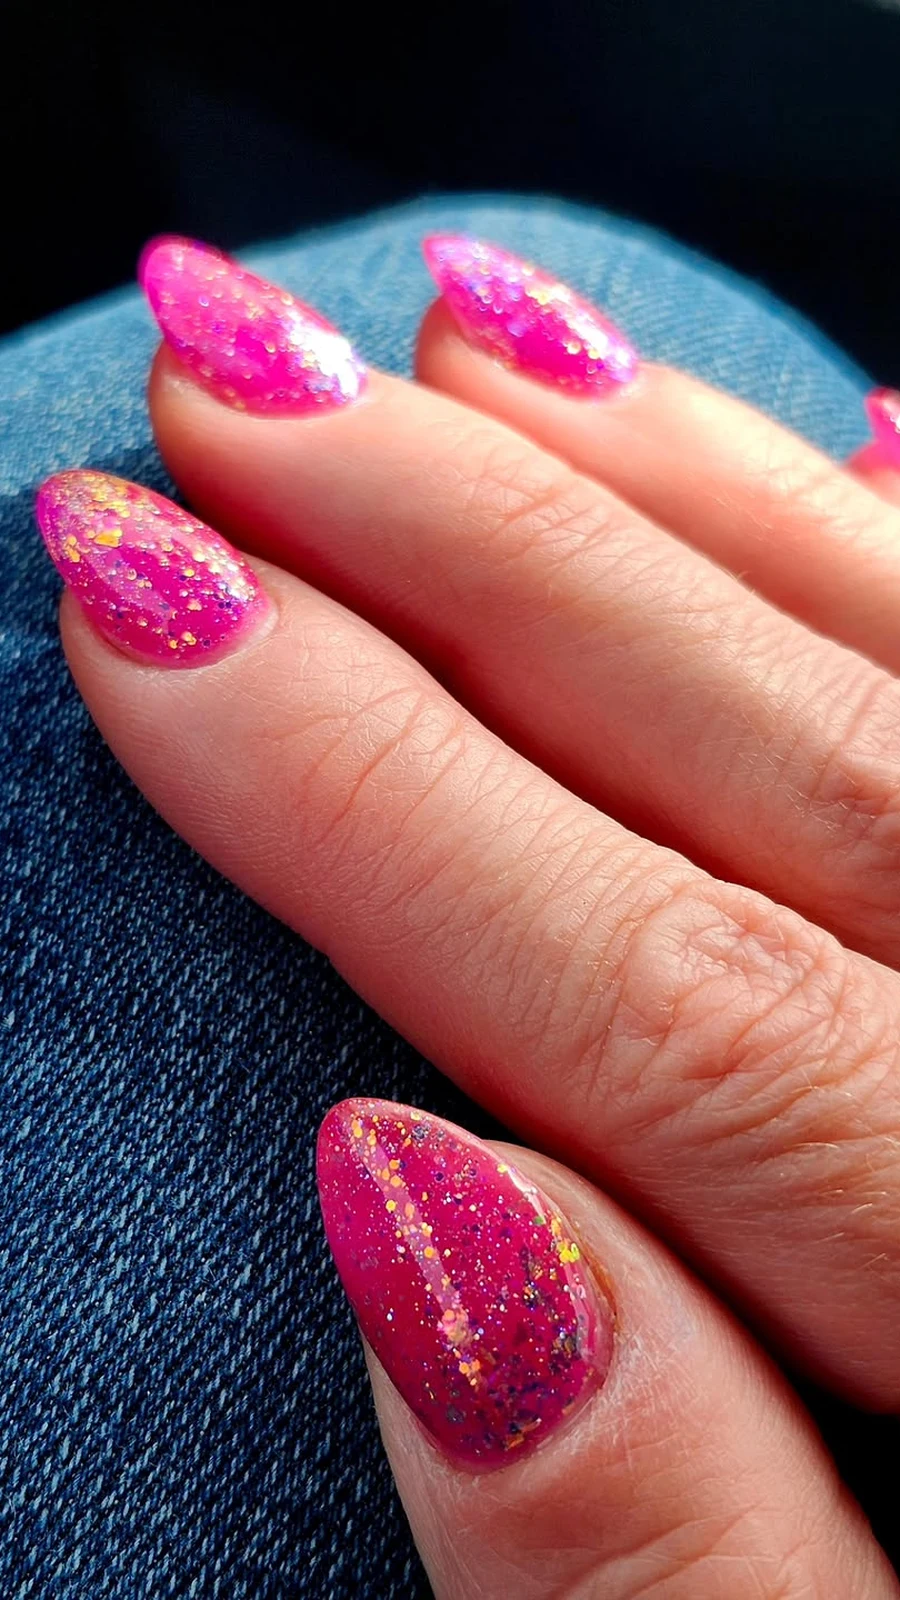
17. Bubblegum Pink with Iridescent Flakes
Bubblegum pink is not a colour people associate with winter, which is exactly why it works. This design pairs a bright, cheerful pink base with iridescent glitter flakes — the kind that shift between pink, blue and gold depending on the light — scattered across the nail like confetti. The result is playful without being childish, bright without being loud, and it stands out beautifully in a season dominated by red, green and gold. It is the design for the person who wears pink in December and does not apologise for it.
Additional Information: The flakes are the star here, so keep the pink base simple: a creme bubblegum pink, two coats, no shimmer underneath. Apply the iridescent flake topper in one thin coat, then seal with a thick glossy top coat, because flakes sit on top of the polish and need to be locked in or they will catch on everything. This design is the most fun to wear with a chunky knit jumper and jeans, and it is a lovely choice for younger wearers or anyone who wants their winter nails to feel like a party rather than a statement. It also hides chips well, because the flakes break up the nail’s surface.
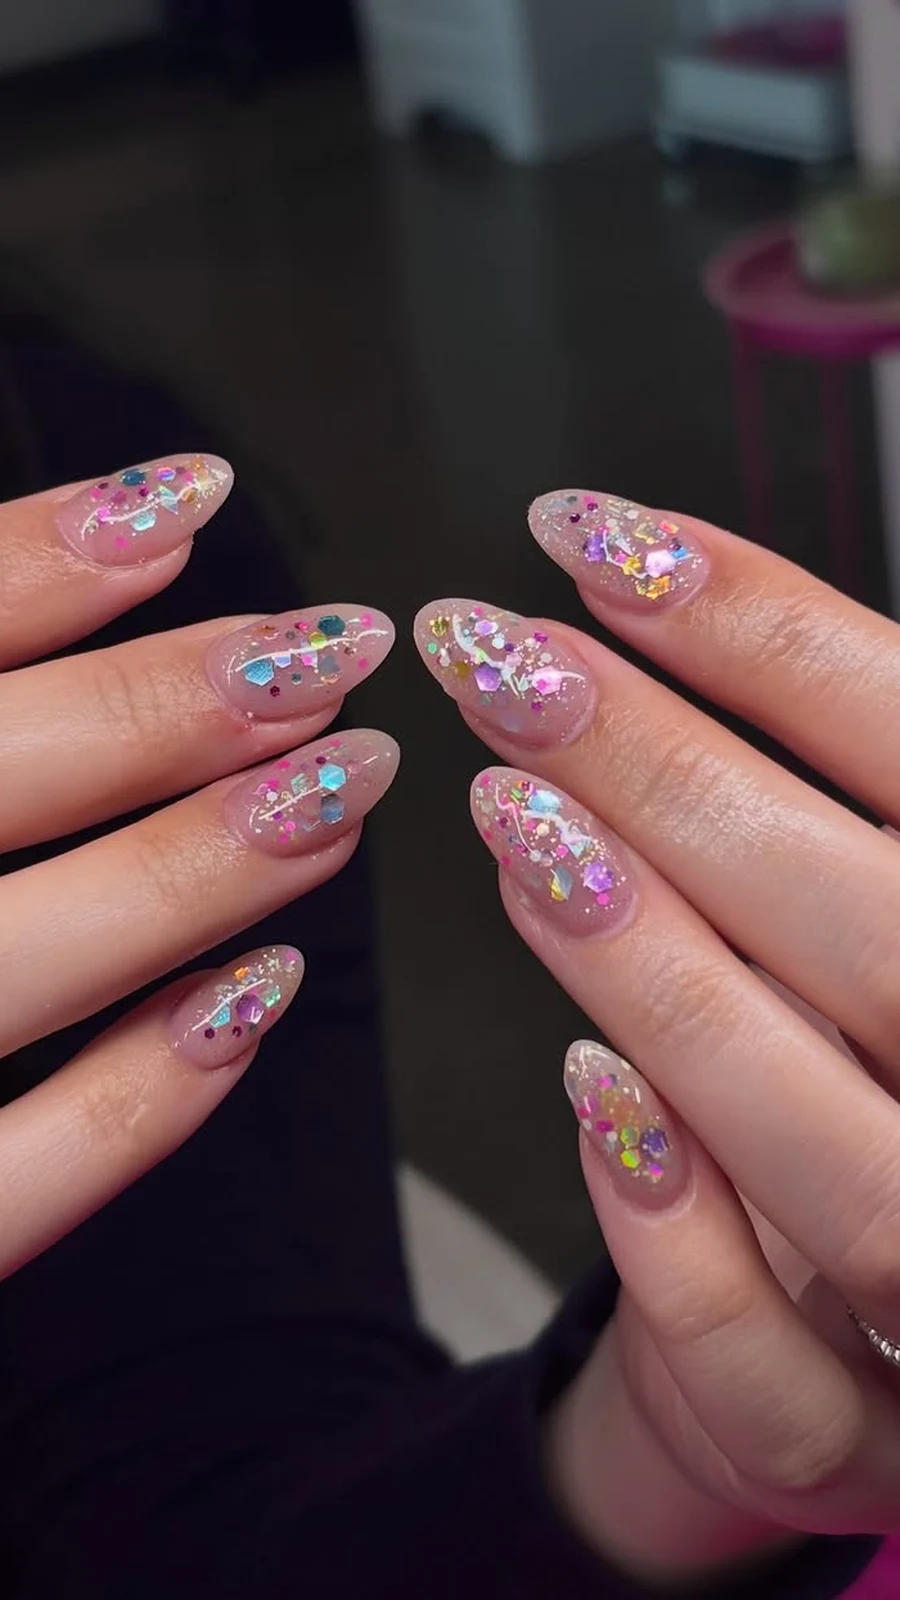
18. Confetti Glitter on a Clear Base
This is the simplest design in the list and one of the prettiest. A clear or very sheer nude base, with multi-coloured glitter confetti — tiny hexagons and circles in silver, gold, pink and blue — scattered across each nail and sealed under a thick glossy top coat. Because the base is clear, the confetti looks like it is floating, and because the glitter pieces are different shapes and colours, no two nails are alike. It is the nail equivalent of a snow globe, and it suits every length, every skin tone, and every occasion from a school run to a New Year’s Eve party.
Additional Information: Confetti glitter needs a thick top coat — two coats, ideally — because the pieces are three-dimensional and will feel rough and catch on fabric if they are not fully sealed. Apply the confetti with a small brush or a toothpick so you can place the pieces deliberately rather than dumping them on; five or six pieces per nail is plenty. This is a wonderful design to do at home because it requires no steady hand and no special skill, just patience. It also grows out invisibly against the clear base, so it is the lowest-maintenance sparkle in this list.
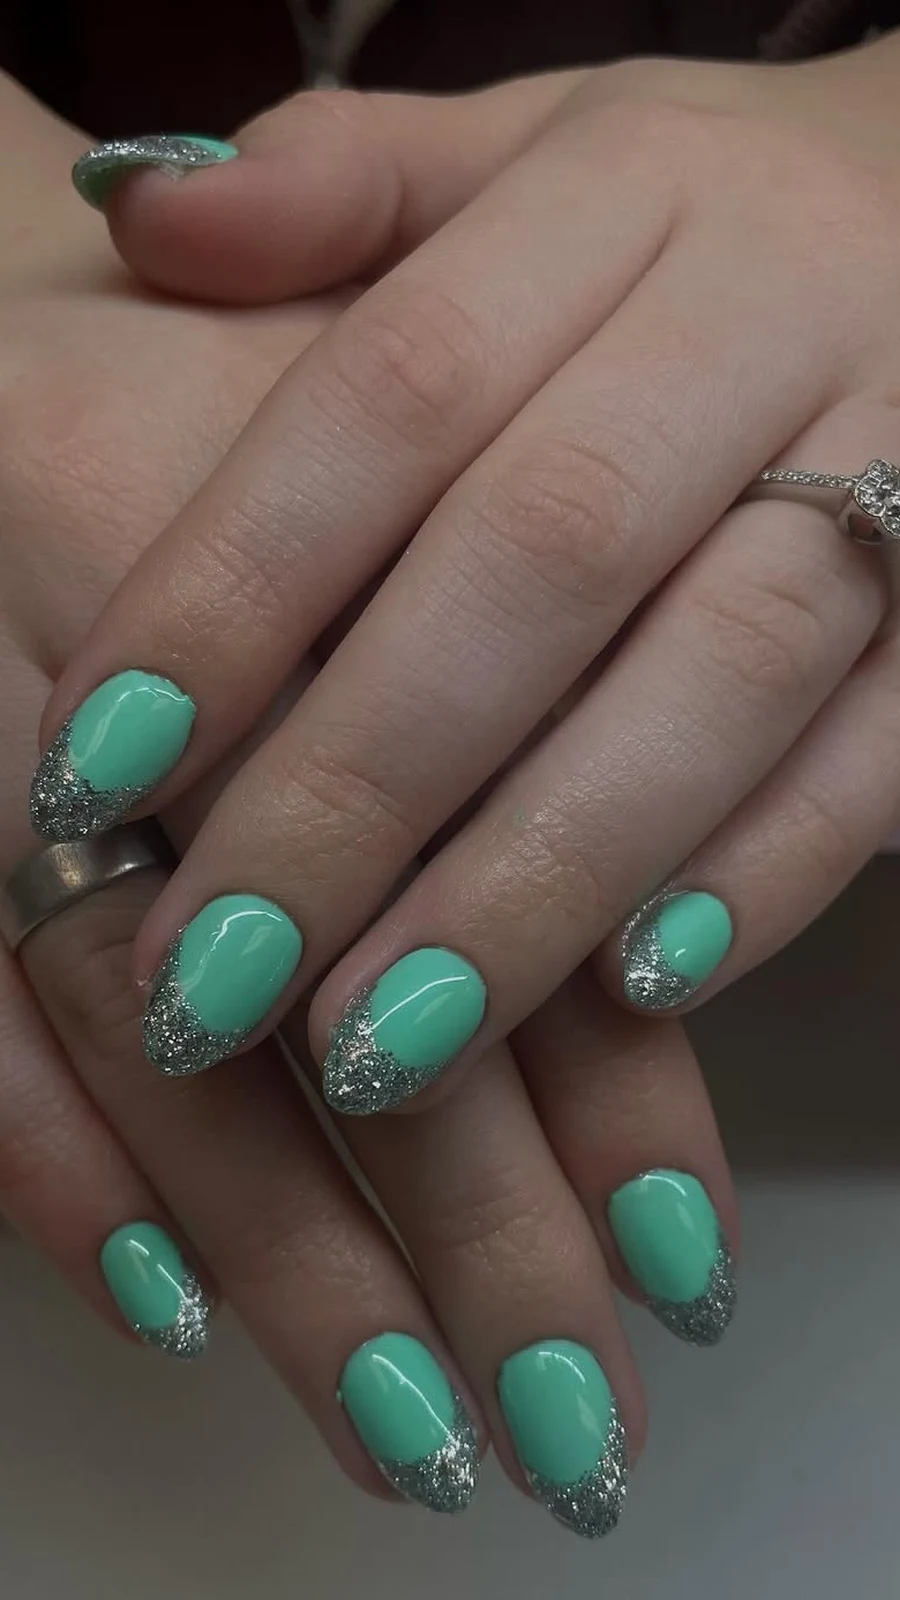
19. Mint Frost with Silver Sparkle
Mint green is the coolest colour in this list, in both senses. A pale, icy mint base with fine silver glitter concentrated at the tips — like frost on a mint leaf — is fresh, unusual and surprisingly wearable. It suits cool skin tones beautifully and it stands out in a sea of red and gold without clashing with anything. It is the design to choose if you want winter sparkle that nobody else at the party will be wearing, and if you like your nails to look like a breath of cold air.
Additional Information: Mint polish can be streaky, so two thin coats are better than one thick coat, and a gel formula will give you the smoothest finish. The silver glitter at the tips should be fine and densely packed, applied with a sponge so the fade into the mint is gradual. Keep the nails short to medium and neatly shaped — long mint nails can look a little icy in the wrong way, while short mint nails look crisp and modern. Pair it with silver jewellery and cool-toned outfits; it is particularly lovely with grey, white and navy.
20. Lavender Glitter with a Snowflake Charm
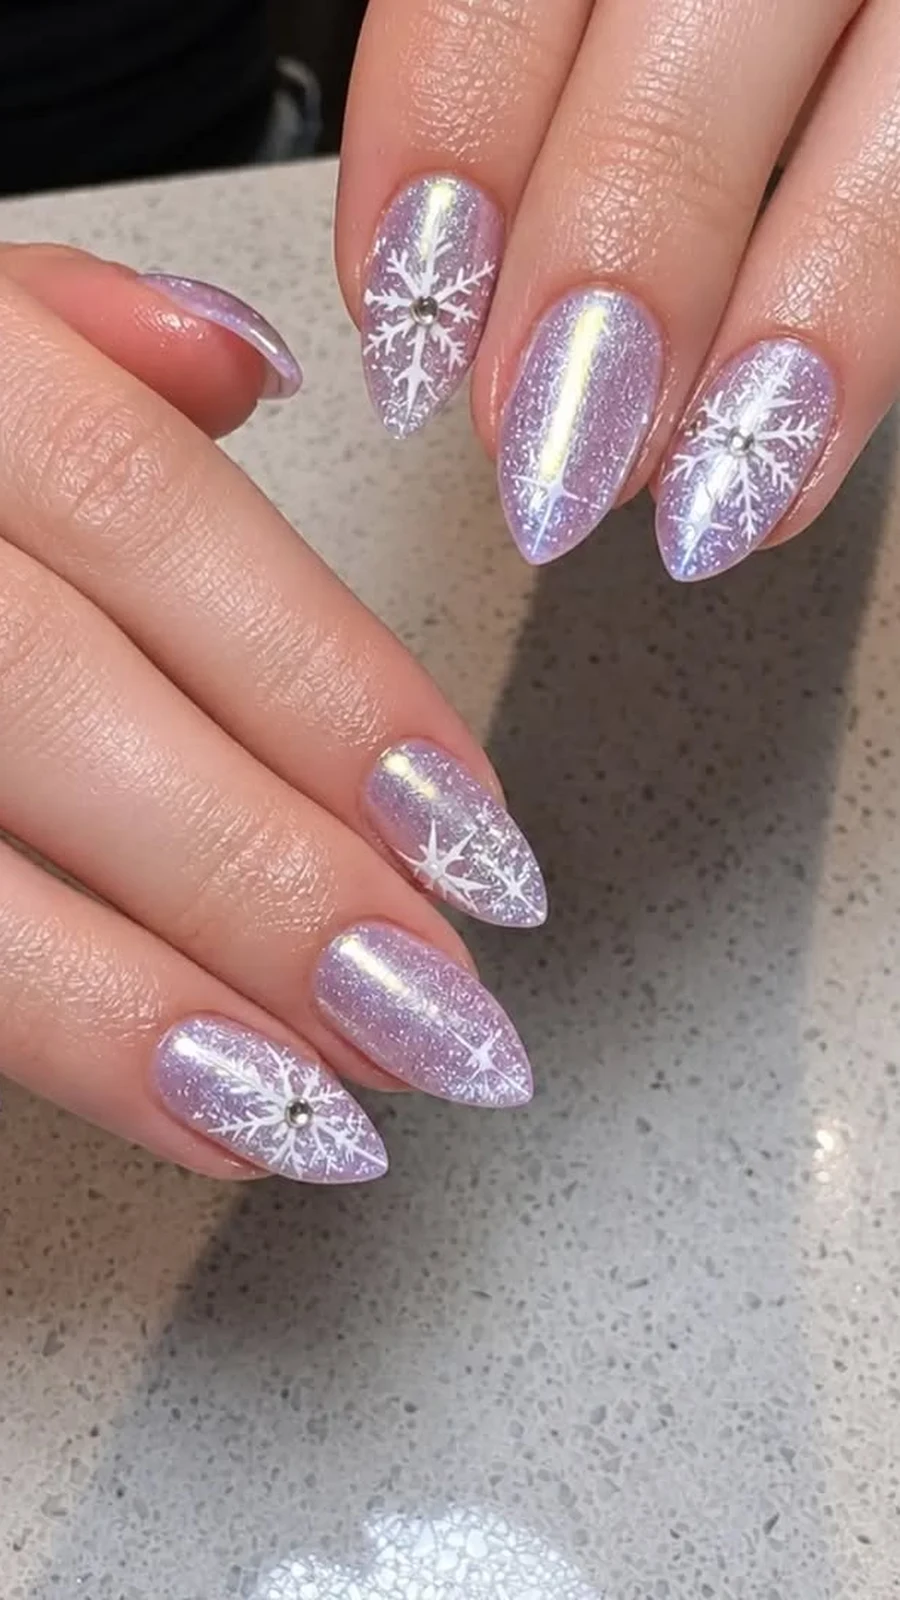
The last design is the softest one in the list, and it is the one to end on. A pale lavender base — the colour of winter dusk — with fine lilac and silver glitter mixed through, and a single tiny silver snowflake charm glued onto each ring finger. The charm is the only three-dimensional element in the whole article, and it is worth it: it catches the light when you move, it makes the design feel like jewellery, and it turns an already pretty manicure into something people ask about. It is gentle, dreamy, and the perfect final note for a list about winter sparkle.
Additional Information: The charm needs to be small — a snowflake no wider than the nail itself — and it must be glued on with nail glue, not top coat, then sealed around the edges with top coat so it cannot snag. Charms do catch on knitwear, so this is a design for a special occasion rather than a two-week wear, and it is best on medium to long nails where the charm has room to sit flat. If you love the idea but not the upkeep, skip the charm and paint a tiny snowflake on the ring finger instead — the lavender glitter base is beautiful on its own, and the design loses nothing without the hardware.
How to Make the Sparkle Last
Glitter nails have a reputation for chipping, and it is partly deserved — glitter polish is rougher and thicker than a creme, and it does not flex with the nail in the same way. But a glitter manicure that is applied well can last just as long as any other, and the tricks are simple. First, the base matters more than the glitter: a ridge-filling base coat gives the glitter something smooth to grip, and it stops the glitter from staining the nail underneath. Second, wrap the free edge — run the glitter polish and the top coat over the very tip of the nail, so the edge is sealed and water cannot get underneath. Third, and most important, use two coats of a good top coat, not one. The first coat locks the glitter down; the second gives you the glassy finish that makes glitter look expensive instead of gritty. Reapply a fresh coat of top coat every three or four days and your sparkle will look newly done for a fortnight. And wear gloves for the washing up. Glitter hates hot water and detergent more than any other finish, and five minutes in a sink will do more damage than a week of typing.
Taking Glitter Off Without the Fight
Everyone loves glitter nails until it is time to take them off. The trick is the foil method, and it is worth the ten minutes it takes. Soak a small piece of cotton wool in pure acetone — not regular nail polish remover, which is too weak for glitter — place it on the nail, wrap the fingertip in a small square of kitchen foil, and wait ten minutes. The glitter will lift off in one soft sheet instead of needing to be scraped, which is what damages the nail surface. Never peel glitter polish off, however satisfying it feels: it takes the top layer of your nail with it, and the next manicure will not last. After removal, wash your hands, push the cuticles back gently, and apply cuticle oil. Your nails will thank you, and they will be ready for the next sparkle in a day or two.
Conclusion
Sparkly winter nails are not really about the glitter. They are about the feeling: the small lift you get when you catch your own hand in the light and it throws a sparkle back at you. Whether your mood is Frost & Ice or Midnight Sparkle, Candlelight Gold or Playful & Bright, there is a design in this list that fits the way you want December to feel — and the best one is the one you keep thinking about after you have finished reading. Book it, paint it, or save it for the party you are already looking forward to. Winter only comes once a year, and your nails might as well shine while it is here.
Frequently Asked Questions
Does glitter nail polish damage your nails?
Glitter polish itself does not damage nails — bad removal does. Peeling glitter off takes the top layer of the nail with it, which leaves nails thin and flaky. Use the foil-and-acetone method described above, never peel, and always wear a base coat underneath glitter to protect the nail surface.
How long do sparkly winter nails last?
A well-applied glitter manicure lasts 10 to 14 days with gel, or 5 to 7 days with regular polish. Designs on a sheer base, like the champagne glitter ombre or the confetti glitter, show regrowth the least and can look good for the longest. Reapplying top coat every few days extends the wear noticeably.
What is the best base coat for glitter nails?
A ridge-filling base coat is the best choice, because it gives the glitter a smooth surface to grip and prevents the glitter from staining the nail. A peel-off base coat is also popular for glitter, because it makes removal much easier — but it shortens wear time, so save it for a one-night party manicure rather than a two-week one.
Can I do sparkly winter nails at home?
Yes — several designs in this list are genuinely easy at home, especially the rose-gold accent nails, the confetti glitter, and the champagne glitter ombre, which all use a sponge or a simple topper. The hand-painted designs, like the starry night constellations and the snowflake glitter, are best left to a nail artist unless you are confident with a liner brush.
How do I remove glitter polish without acetone?
Acetone is the most effective option, but if you want to avoid it, soak your nails in warm soapy water for ten minutes, then gently rub the glitter off with an old toothbrush and a little cuticle oil. It takes longer and it will not remove a gel glitter manicure, but it works for regular glitter polish without drying the nails out.
Which nail shape suits sparkly winter nails best?
Almond and oval shapes suit glitter best, because their curved edges catch the light and make the sparkle look soft and elegant. Square nails suit geometric glitter designs like the candy-cane stripes and the frosted French tips. Short nails suit dark glitter designs like the black holographic flakes, because the dark colour looks deliberate at any length.
Leave a Reply