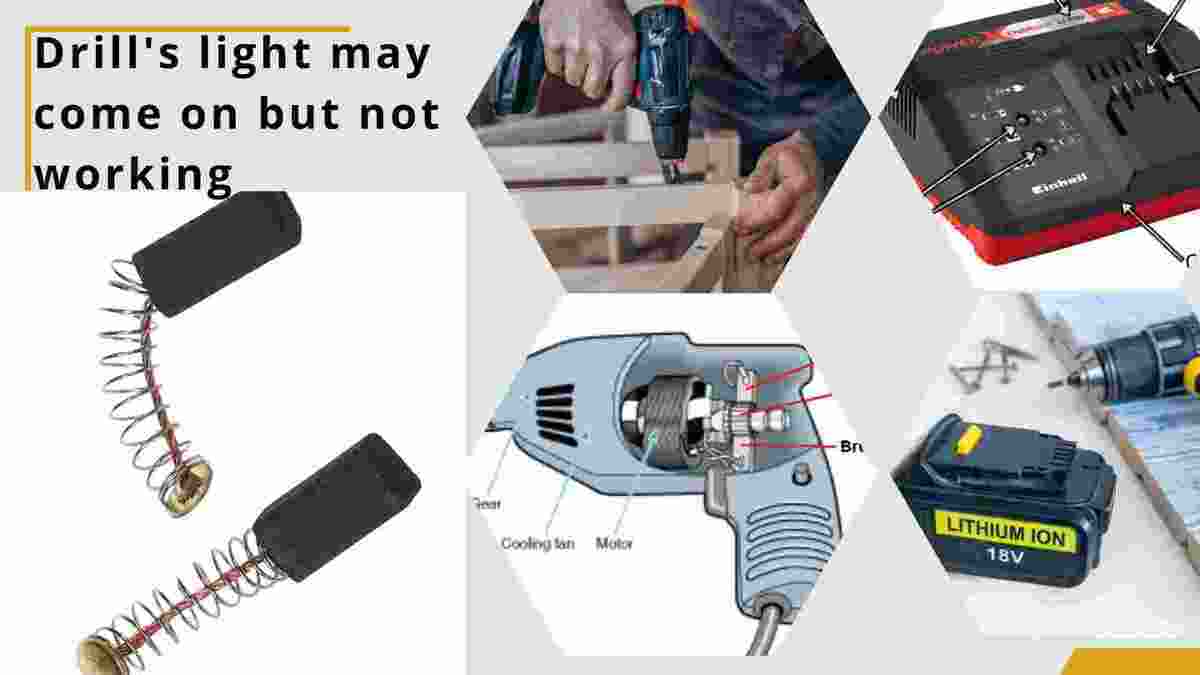
Power drills are invaluable tools in the arsenal of both professionals and DIY enthusiasts. They help make tasks faster and more efficient. However, there may come a time when you encounter a perplexing issue: drill light come on but not working: the drill’s light is on, indicating power, but the drill itself remains dormant.
This can be quite frustrating. But fret not, as we will delve into the troubleshooting process for drill not working, in a comprehensive manner to help you pinpoint and resolve the problem. Here are some fixes:
Drill’s Light Come On but Not Working:
if your cordless drill light comes on but not working, this problem seen in cordless drills, then their might be following causes and their solutions:
1. Battery Issues::
The Lithium-Ion battery within the drills has a limited lifespan. Regular use of the drill tends to accelerate the wear and tear of the battery. Conversely, infrequent use or prolonged periods of inactivity may lead to the battery losing its charge and effectiveness. This issue of the Black and Decker drill not charging can manifest as intermittent drill stops or unexpected starts.
However, to determine if there is indeed a problem, you must first inspect the battery. Begin by examining the battery and its connections. Additionally, ensure that the battery is correctly inserted into the drill, as improper placement can result in sporadic drill stops.
Also, utilize a multimeter to assess the battery voltage. A fully charged battery should display a reading at least 1 volt higher than the specified voltage indicated on the battery label. For example, if you have an 18-volt battery, it should register at 19 volts or higher. If the voltage reading equals or falls below the marked voltage on the battery, it is advisable to consider replacing the battery.
If your drill battery charged but not working then see for other possible causes. See them below. But if you suspect a defective battery, buy a battery replacement.
2. Chuck Problem:
Another possible cause for your drill’s failure to function could be a jammed chuck. It’s important to recognize that if the drill bit doesn’t fit properly, the drill won’t turn, and this issue is often linked to the chuck. To resolve this, employ two pliers to rotate the chuck in opposite directions until it loosens.
If needed, consider replacing the drill chuck. Additionally, examine the chuck key to ensure it is functioning correctly. If the key is not working properly, it may be necessary to purchase a drill chuck key replacement.
3. Charger Problem:
Additionally, consider attempting overnight charging for the drill to see if it resolves the issue. If the drill operates for a while but then stops, there may be two potential problems: one with the battery, as explained earlier, and the other with the charger, specifically a malfunctioning Black and Decker charger. Purchase a replacement charger if necessary.
Two issues could affect the charger: it may be damaged or providing insufficient voltage. If your drill is not charging, take a moment to inspect the charger. Ensure that the charger cable is securely connected and undamaged. If the charging port of the drill is not the issue, consider replacing the charger after confirming that the cable is in good condition.
If the cable appears to be in good shape, the problem may lie with the charging port. Consult a guide or seek professional assistance to replace the charging port.
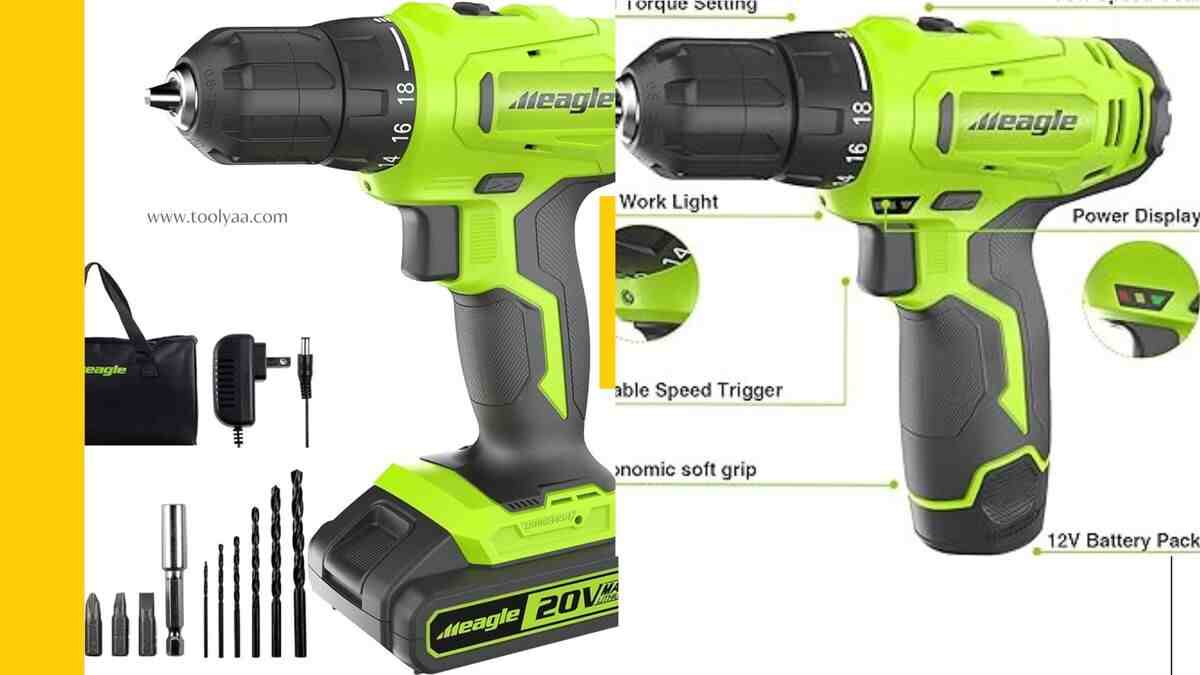
4. Torque Troubles:
If your drill is exhibiting slow spinning or struggles with even lightweight materials, attempt to address the issue by adjusting the torque settings. Rotate the ring located behind the chuck to a higher setting.
If this adjustment does not resolve the problem, inspect the battery to ensure it is fully charged. A low battery level can result in sluggish drill performance.
5. Check Trigger:
The trigger serves as the gateway to your drill’s power. If battery issues have been ruled out, turn your attention to the trigger. If you find that the trigger is pulled, yet the drill remains silent, the trigger may be the culprit.
For a more detailed examination, remove the battery and measure the resistance between its contacts while pressing the trigger. There should be some resistance, not too low or too high. If you obtain a very high reading, scrutinize the trigger by disassembling the drill motor and checking the ohms through the trigger posts. It should read zero when pressed and infinite when not. If you choose not to perform this detailed check, follow these steps:
To troubleshoot a malfunctioning trigger switch in your Black and Decker drill, follow these steps:
- Check the Trigger Lock: Ensure that the trigger lock is not engaged. If activated, unlock it by moving the lock to the open position.
- Inspect the Trigger: Confirm that the trigger is not stuck. If it is, release it by pressing the trigger button.
- Clean the Trigger Switch: Use a contact cleaner to remove any dirt or debris that may be causing the trigger switch issue.
- Test the Trigger Switch: Operate the trigger switch and listen for a distinct clicking sound. If the switch fails to engage or disengage properly, it may need replacement.
If cleaning the trigger switch does not resolve the issue, consider replacing it. You can purchase a replacement switch mechanism and follow the manufacturer’s instructions for installation. Before opting for a new drill switch, make sure you have explored other potential solutions.
6. Loose Connections:
Before jumping to conclusions about a defective armature, it’s crucial to meticulously inspect the connections between the battery, motor, and trigger. Loose or improperly connected wires can disrupt the flow of power, causing the drill to malfunction.
Ensure that all connections are securely fastened and free from corrosion. Sometimes, simply reseating the connections can rectify the issue.

7. Armature:
If your drill machine has stopped working or experiences interruptions during spinning, one potential solution is to investigate the drill armature. The armature consists of a number of coils wound around an iron cylinder with magnets surrounding it (as illustrated in the image above).
Examine the armature to determine if it is loose inside the magnets. Additionally, inspect the condition of the coils around it. This can be assessed by observing any sparks or unusual smells during operation.
If issues with the armature are identified, it is advisable to seek the assistance of a professional who can re-wind the copper coils. Alternatively, if you possess the necessary knowledge, you may choose to undertake the re-winding process yourself, you can buy a new armature according to voltage of your drill.
8. Broken Magnets:
The magnets in the drill’s armature are typically designed to last a lifetime, but there is a possibility that they may break. If your drill not spinning, it could be linked to issues with the magnets or the entire armature.
Inspect the magnets on the drill armature to see if any of them are broken. If broken magnets are identified, it’s recommended to purchase a complete armature replacement. This replacement should address the issue and restore the proper functionality of the drill.
9. Carbon Brushes:
When a drill machine stops functioning, there could be various reasons for the issue. One possible cause is the condition of the carbon brushes.
These brushes, akin to black rods located around the commutator bar, can wear out over time, leading to diminished power or a complete failure of the drill.
If you notice signs of wear or damage in the carbon brushes, it is advisable to replace them with compatible ones to restore the drill’s performance.
10. Rotor Realignment:
When all else fails, and your drill has completely stopped working, attempt to give the chuck a quarter-turn by hand. Sometimes, a single winding on the rotor may have malfunctioned, but there are multiple windings, so this action may help.
11. Reverse Switch:
Some drills come equipped with a reverse switch, allowing you to change the drill’s rotation direction. If this switch is stuck in the middle position, it can impede the drill’s proper operation.
Examine the position of the reverse switch and ensure it is in either the forward or reverse position as needed before attempting to use the drill again.
When to Seek Professional Assistance?
If none of the aforementioned troubleshooting steps resolve the issue, it may be time to seek professional assistance. Attempting to diagnose or repair more complex problems without the necessary expertise can exacerbate the situation.
In such cases, contacting the manufacturer’s customer support or consulting a professional technician experienced in power tool repair is a prudent course of action.
Conclusion:
Encountering issues with your power drill can indeed be frustrating. However, with a systematic approach to troubleshooting, you can often identify and resolve the problem. From inspecting connections and batteries to assessing the motor and switches, the solutions may vary but are typically accessible to DIY enthusiasts.
Remember, safety should always be a top priority when working with power tools, and if you’re uncertain or unable to fix the issue, it’s best to consult a professional for assistance. A well-maintained drill will serve you faithfully for years to come.