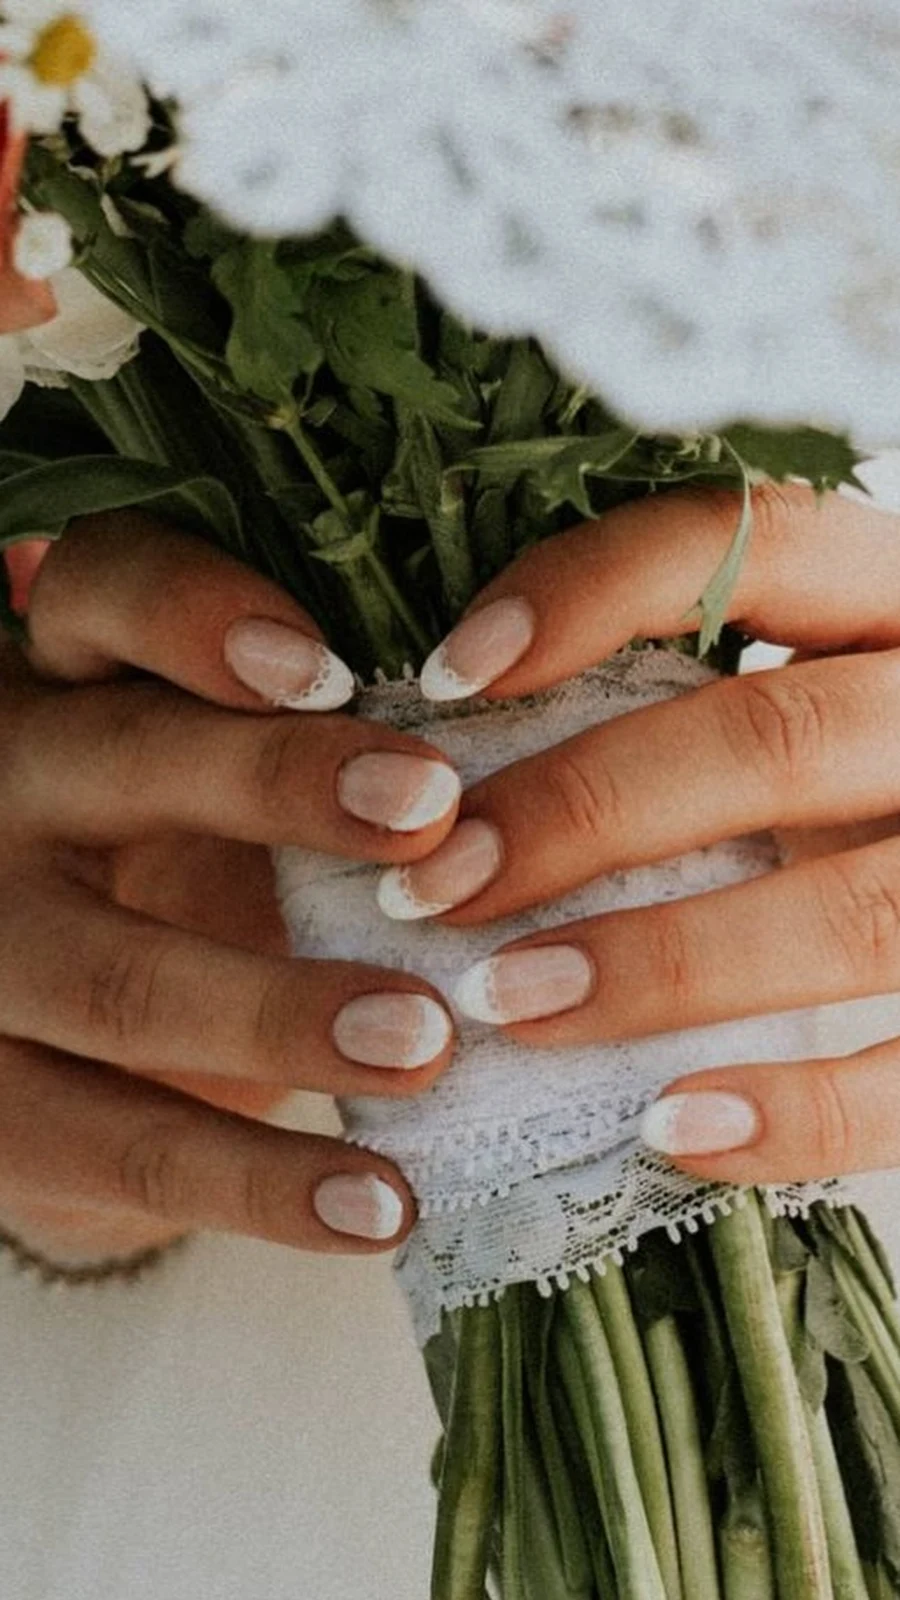
Your hands are in almost every wedding photo. Holding the bouquet, sliding the ring on, cutting the cake, waving at the car as it pulls away — the camera finds your hands again and again, and it finds them up close. That is why white wedding nails are not a small decision, even though they look like one. Get them right and nobody notices your nails at all; they just notice that everything about you looks finished. Get them wrong and the photos tell the story for years: chalky, flat, too bright, or fighting with the dress.
Here is the good news. White is the most forgiving bridal colour there is, once you know which white is yours. A sheer milky white flatters every skin tone. A crisp French suits every dress. A little pearl or lace gives the camera something to catch without ever looking busy. The twenty-two designs in this list are organised the way a wedding actually happens — by where you will be standing when people look at your hands. Five for the ballroom and the church, five for the garden, four for the beach, four for city hall and the small wedding, and four for the reception, when the shoes come off and the real dancing starts. Pick the setting that sounds like your day, and start there.
First, Match the White to Your Dress
Before you fall in love with a design, hold it up against your dress — literally, if you can. Not all whites are the same white, and the wrong match is the one thing that makes white nails look off in photographs.
If your dress is bright white, you can wear a true, cool white on your nails. A crisp French tip or a clean solid white will look intentional rather than stark, because the dress and the nails are speaking the same language. If your dress is ivory or champagne, go warmer: an ivory base, a cream French, a pearl finish with a golden shimmer. Bright white nails next to an ivory dress make the dress look yellowed by comparison, and nobody wants that. If your dress is blush or nude-toned, a sheer milky white is your best friend — it reads as white without competing with the colour of the gown.
Skin tone matters too, and the rule is simple. On fair skin, a sheer or milky white looks softer than an opaque one, which can read as correction fluid. On medium and olive skin, warm ivory and pearl whites glow beautifully, while cool blue-whites can look grey. On deep skin, white nails are genuinely stunning — the contrast is the whole point — and a glossy finish with a warm or pearl undertone looks richer than a flat matte. Whatever your tone, hold the polish bottle against the inside of your wrist in daylight before you commit. If the white looks clean and bright against your skin, it is yours. If it disappears or looks chalky, try the next shade along.
One more thing worth deciding early: gel or regular polish. Gel lasts two to three weeks, survives the honeymoon, and will not chip while you are shaking a hundred hands — but it needs a salon removal. Regular polish is easier to fix and change, and a good top coat will carry it through the day. If you are doing your own nails, regular polish with a fresh top coat on the morning of the wedding is a perfectly good plan. If you are going to a salon, book gel three days before the wedding, not the day before, so there is time to fix anything that bothers you.
When to Book It: A Small Timeline
Nobody tells you this, so here it is. Six weeks out, book your trial — the same appointment where you try your hair and makeup, if you can manage it. Bring a photo of your dress and one of these designs. Three days before the wedding, get the real manicure done. Two days is fine too; one day before is cutting it close if anything needs redoing. The morning of, do nothing to your nails except a thin layer of top coat and a drop of cuticle oil. No filing, no repainting, no experiments. Your hands will thank you, and so will your photographer.
The Ballroom and the Church
Formal weddings ask for formal nails, and formal does not mean boring. It means clean lines, real polish, and details a camera can love from three feet away. These five are the ones to show your grandmother first.
1. The Classic French, Done Properly
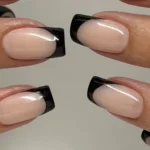
There is a reason the French manicure has survived every trend since your mother got married: on a wedding day, nothing else looks this clean. A sheer pink-nude base, a thin, crisp white tip, a high-gloss top coat. That is the whole design, and it is enough.
What makes it bridal rather than everyday is the precision. Ask your technician to keep the tip thin — a thick white band shortens the nail and looks dated in photos — and to follow the natural curve of your smile line rather than drawing a straight edge. The base should be sheer enough that your natural nail shows through faintly; that translucency is what makes the manicure look like your nails, only better. On almond or oval nails this is perfection. On short square nails it is neat, modern, and very hard to get wrong.
Additional Information: The classic French is the safest choice in this whole list, and that is a compliment. It suits every dress, every venue, every skin tone, and it grows out gracefully if the honeymoon runs long. If you are doing it at home, paint the tips freehand with a thin brush and clean up the edges with a flat brush dipped in remover — it is faster and looks better than any guide sticker.
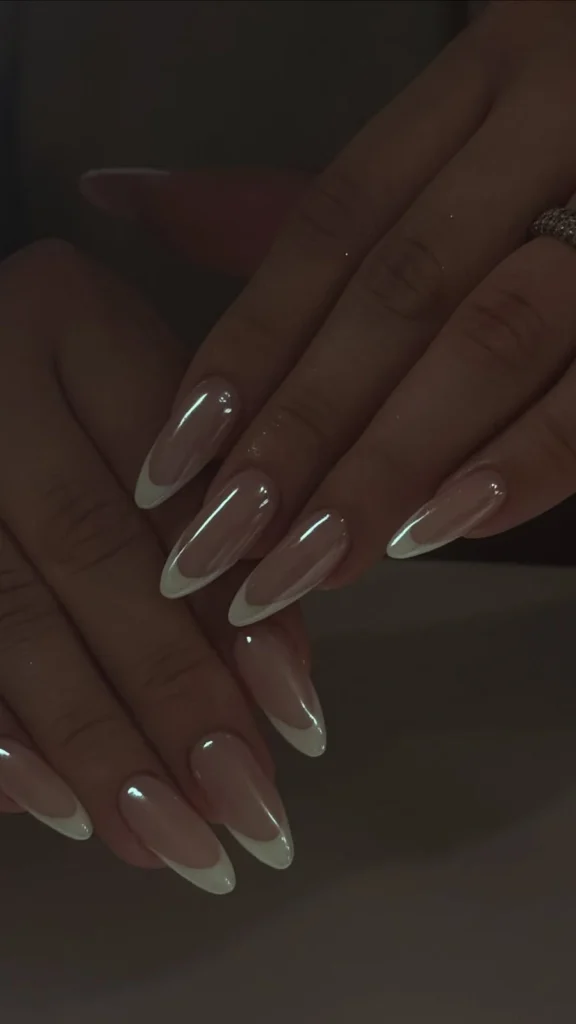
2. Pearl-Tipped French
Take the classic French and give it a little light. The tip stays white, but a fine pearl shimmer is brushed over the whole nail — or just over the tip — so the manicure seems to glow when your hands move. In the church, under warm lights, it reads as quietly luminous. In photographs, it catches the light the way jewellery does.
The trick is restraint. The shimmer should be a whisper, not glitter: a pearl top coat with a fine, almost invisible sparkle, or a chrome powder buffed so lightly it looks like the nail itself is glowing. Keep the base sheer and the tip clean, and let the pearl do the talking. This is a particularly good choice if your dress has beading or sequins, because the nails echo the sparkle without competing with it.
Additional Information: Pearl-tipped French nails photograph beautifully in both daylight and evening light, which matters when the ceremony is at four and the dancing starts at nine. Ask for a pearl or “glazed” top coat rather than a glitter polish — glitter reads as texture in close-up photos, while pearl reads as light.
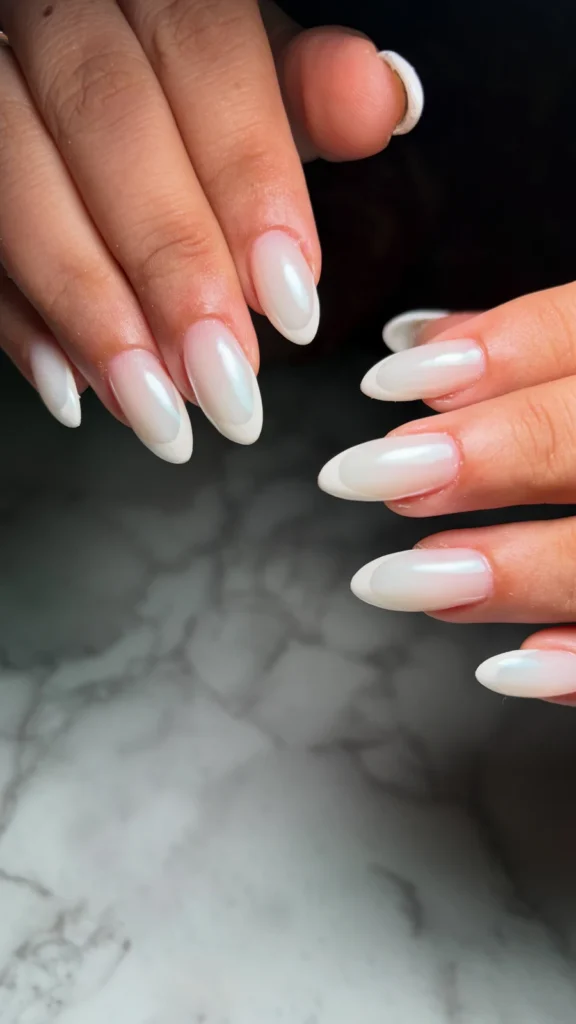
3. Ivory Lace Overlay
Lace on a wedding dress is expected. Lace on your nails is the detail people lean in to look at. A sheer ivory base, then a hand-painted or stamped lace pattern in soft white across each nail — the kind of fine, openwork pattern that looks like the edge of a veil. It is intricate, it is romantic, and it is unmistakably bridal.
This one is worth booking a nail artist for, because good lace work is genuinely hard to do freehand. A skilled artist can paint a different scrap of lace on each nail — a scalloped edge here, a tiny flower there — so the set looks like a real piece of fabric rather than a repeated stamp. If your dress has lace, bring a photo of it to the appointment; a good artist will echo one motif from the gown, and the whole look will feel considered rather than copied.
Additional Information: Lace overlay works best on medium to long nails, where the pattern has room to breathe. On short nails, ask for the lace on just the ring fingers as accents and keep the rest of the nails in a sheer ivory — you get the romance without the clutter. Seal it with two coats of top coat, because fine white line work is the first thing to wear away.
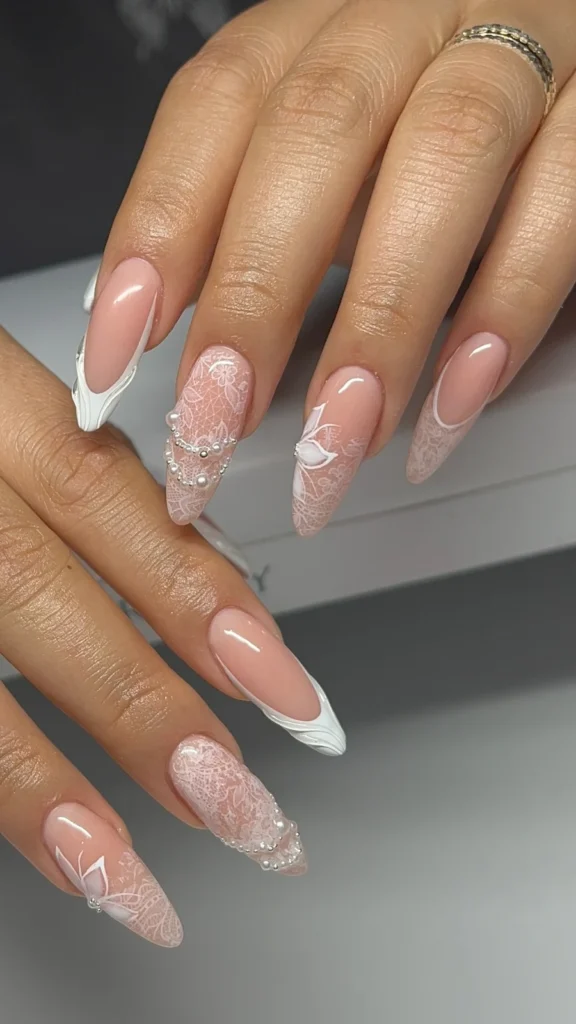
4. White Marble with Gold Veins
If your wedding has gold in it — gold cutlery, gold frames on the tables, a gold thread in your dress — this is your manicure. A milky white base marbled with soft grey-white veins and traced with the thinnest lines of gold. It looks like the marble top of a very expensive cake table, and it has the same effect: quietly luxurious, never loud.
The marbling should be soft, not graphic. The best versions look like the pattern formed on its own, with the white and the pale grey bleeding into each other and the gold sitting on top like jewellery. Ask for the gold to be kept to one or two thin veins per nail, and for the finish to be high gloss — marble without shine looks like stone, and you want it to look like silk. This design suits long nails best, but a shorter version with the marbling on just two accent nails works beautifully too.
Additional Information: Marble is one of the most forgiving designs for a DIY bride, because there are no straight lines to get wrong — the veins are meant to wander. Use a thin brush or a toothpick to drag the grey and gold through the wet white base, and stop before you think you should; overworking marble is what makes it muddy.
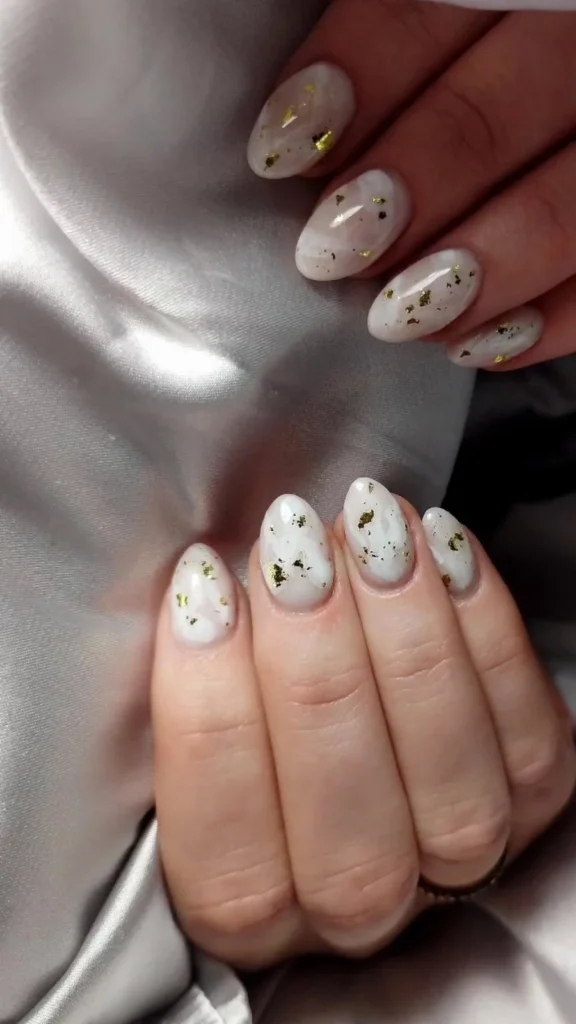
5. Satin Ivory
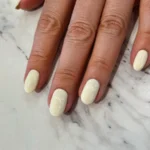
Sometimes the bravest choice is the simplest one. Two coats of a warm ivory polish, a glassy top coat, nothing else. No art, no accent, no shimmer. Just a perfect, satin-smooth ivory that makes your hands look like they belong in a portrait.
Satin ivory works because it does two jobs at once. In person, it reads as understated and expensive. In photographs, the warm tone stops the nails from blowing out to pure white under the flash, which is the problem with stark white polish — the camera turns it into a blank. Ivory holds its colour. This is the design to choose if your dress is ivory, if your jewellery is gold, or if you simply do not want to think about your nails again after the appointment. It is also the easiest to repair: a chipped solid colour can be touched up in thirty seconds with the bottle in your clutch.
Additional Information: The shade is everything here, so test it properly. Paint one nail, live with it for a day, and look at it in daylight, in the bathroom mirror, and in a photograph. If it flatters your hands in all three, it is the one. Bring the bottle to the wedding — a solid colour is the only design in this list you can genuinely fix yourself at the reception.
The Garden and the Vineyard
Outdoor weddings are softer, greener, and a little less formal — and the nails can be too. Florals, lace edges, and sheer finishes that look like they belong among real flowers. These five are for the bride getting married under trees, between vines, or in a garden full of white roses.
6. Pressed White Blossoms
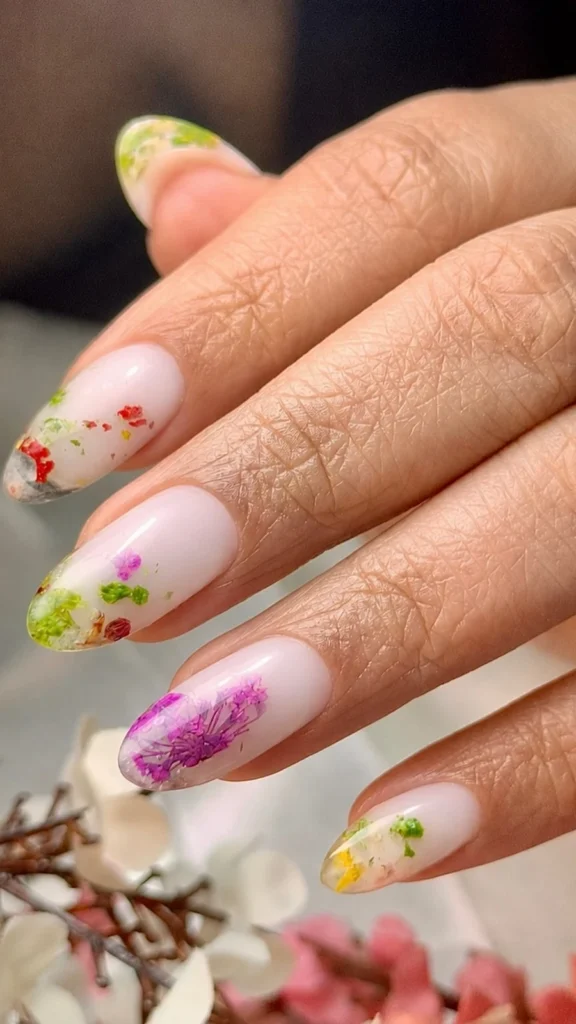
Tiny white flowers, pressed flat onto a sheer nude base like specimens in a book. A small five-petalled blossom on two or three nails, a single bud on the rest, all sealed under a glossy top coat so the flowers look like they are floating just beneath the surface. It is delicate, it is romantic, and it matches a garden bouquet without trying too hard.
The flowers can be hand-painted, or they can be real dried flowers — the tiny pressed kind sold for nail art — sealed under gel. Real pressed flowers have a softness no paint can quite match, and they photograph like actual petals because they are. Keep the base sheer and the flowers white-on-white, with the palest yellow centre if you want a little warmth. Anything brighter and the design stops being bridal and starts being spring.
Additional Information: Pressed blossoms are a wonderful choice for a spring or summer garden wedding, and they are one of the few designs here that actually look better slightly imperfect — a flower placed a little off-centre looks hand-gathered rather than manufactured. Ask your artist to vary the placement from nail to nail; identical flowers on every nail look like wallpaper.
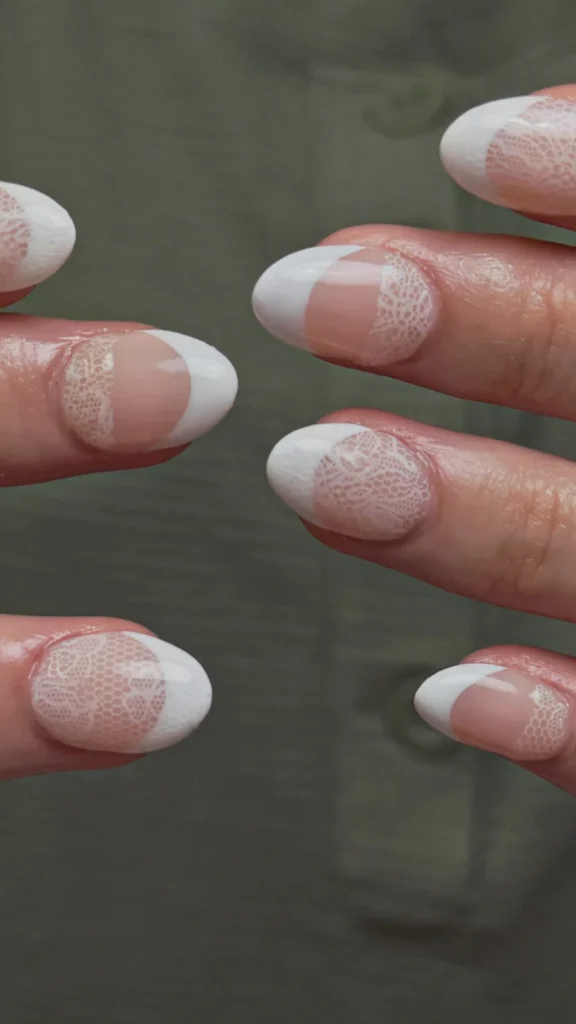
7. Lace-Edge French
A French manicure, but the white tip is not a solid band — it is a scalloped lace edge, as if the hem of your veil had been laid across each nail. The base stays sheer and nude, the tip is white, and the line between them ripples like lace instead of running straight. It is the most romantic version of the French in this list, and the one most likely to make your photographer ask to take a close-up.
The scallops should be small and even, and the white should be soft rather than stark — a milky white, not a correction-fluid white — because the whole point is softness. This design pairs beautifully with a lace dress, but it also works with a plain satin gown, where the nails supply the lace the dress does not have. It suits almond and oval nails best, where the curved tip gives the scallops room to show.
Additional Information: Lace-edge French is a job for a steady hand or a good stamp, and it is worth paying for. If you are trying it at home, a dotting tool makes the scallops far easier than a brush — a row of tiny white dots, joined up, gives you a lace edge with almost no skill required. Practice on one nail first; the rhythm of it comes quickly.
8. White Daisies on Sheer Nude
Daisies are the friendliest flower in the bridal world, and on nails they are pure charm. A sheer nude base, then small white daisies — five tiny petals and a dot of pale yellow in the middle — scattered across the nails like they fell there. Two or three daisies on the accent nails, one small one on the rest, or a single daisy on each ring finger and nothing else. However you place them, the effect is light, fresh, and a little bit joyful.
This is the design for the bride whose wedding is outdoors and a little bit relaxed — the one with wildflowers on the tables and no seating plan. It also works beautifully for bridesmaids, because it is pretty without competing with the bride. Keep the daisies small; a daisy that fills the whole nail looks like a sticker, while a small one looks like a flower. And keep the base sheer, so the whole set stays airy.
Additional Information: White daisies suit short nails especially well, because the small scale of the flower matches the small scale of the nail. If your nails are short, ask for the daisies on just the ring fingers and keep the rest of the nails plain sheer nude with a white micro tip — you get the charm without the clutter.
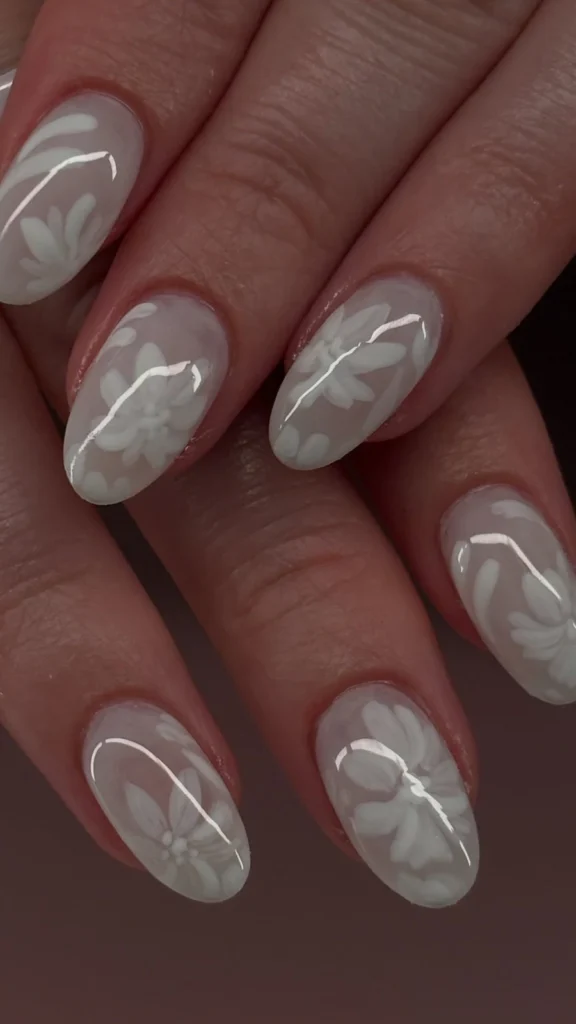
9. White Vine Line Art
For the bride who likes her romance with a little structure. A sheer or milky base, then a single fine white line that winds across each nail like a vine — curving up from the cuticle, looping once, ending in a tiny leaf or a small bud. No colour, no glitter, just one continuous white line per nail, drawn with a steady hand.
The beauty of this design is its restraint. From a distance the nails look almost plain, just a soft white sheen. Up close, each one has its own little drawing. It is the manicure equivalent of whispering. It works on any nail length, but it is especially lovely on long almond nails, where the line has room to travel. And it is one of the few designs in this list that looks just as good in black-and-white photographs as it does in colour, which is worth thinking about if your photographer shoots film.
Additional Information: Vine line art is deceptively simple — the line has to be confident, or it looks wobbly. Ask your artist to draw it in one stroke rather than building it up in short dashes, and to keep the leaf shapes to two or three per hand. If one nail goes wrong, it is the easiest design in this list to wipe clean and redo.
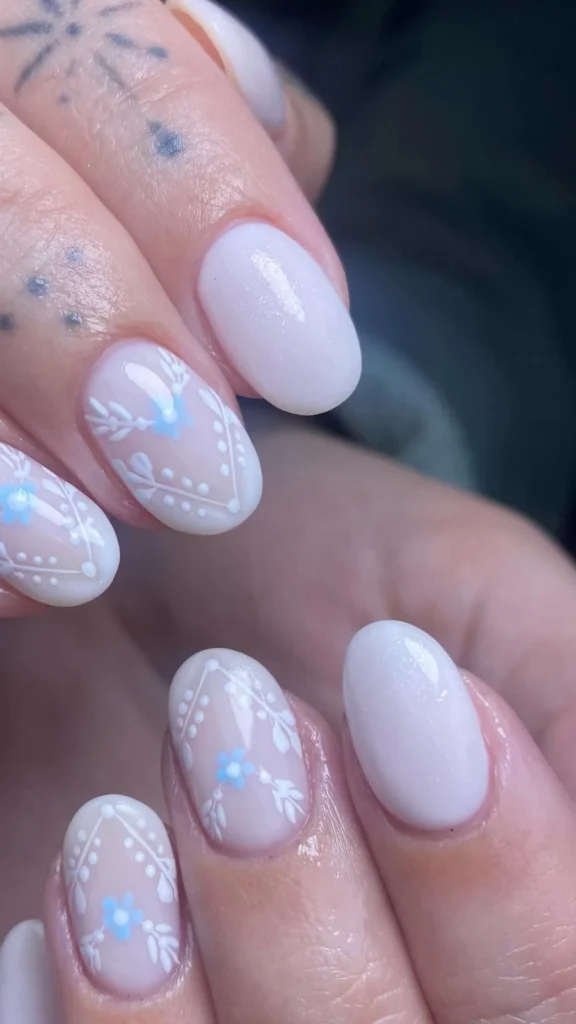
10. Soft Ombré with a Single Pearl
An ombré that starts as a milky white at the tip and fades into a sheer nude at the cuticle — the classic baby-boomer fade, done in bridal white — with one tiny pearl placed at the base of each ring finger. Just one pearl, perfectly round, catching the light every time your hand moves. It is the smallest possible amount of decoration, and somehow it is enough.
The ombré does the heavy lifting here. It elongates the nail, softens the whole hand, and looks like a French manicure that has been blurred at the edges — which is exactly why it photographs so well. The pearl is the punctuation mark: it draws the eye to the ring finger, which, on a wedding day, is exactly where you want the eye to go. Keep the pearl small — two millimetres at most — and set it in a drop of builder gel so it stays put through the cake cutting.
Additional Information: Baby-boomer ombré is best done with an airbrush or a sponge, and it is one of the few designs where a salon really does make a difference — a hand-blended ombré can look streaky, while a sponged one fades seamlessly. If you are doing it at home, a makeup sponge and two thin coats will get you surprisingly far.
The Beach and the Destination
Sand, salt air, sun, and a dress you can actually walk in. Destination weddings call for nails that look effortless — sheer finishes, soft whites, nothing that will chip the moment you touch sand or salt water. These four are made for bare feet and sea air.
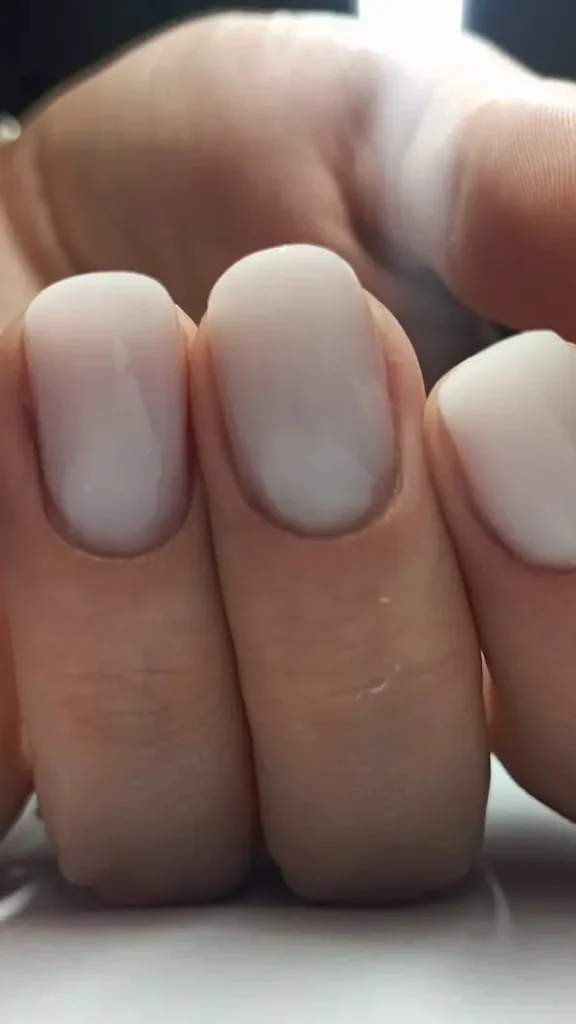
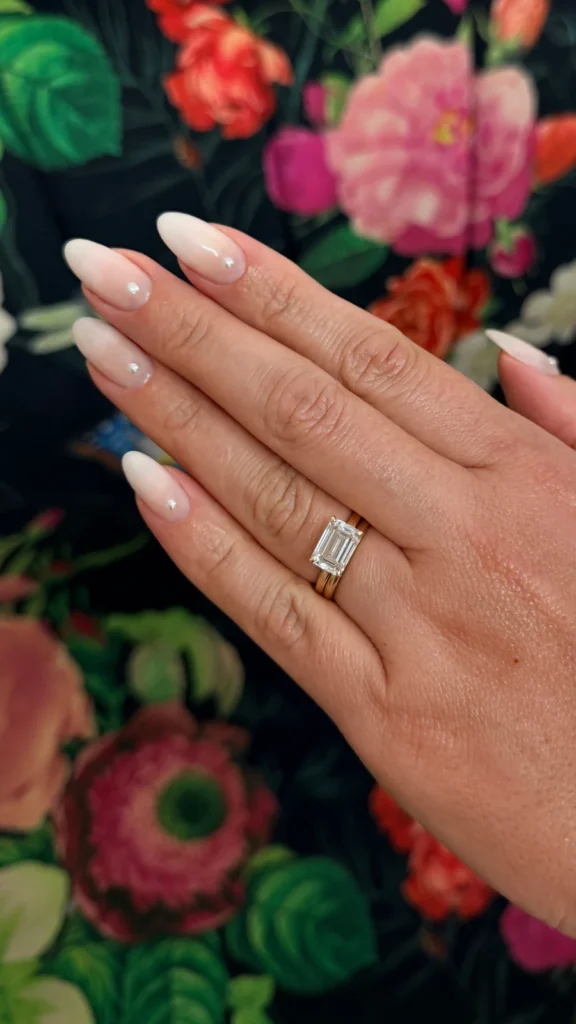
11. Sheer Milky White
One coat, maybe two, of a milky white jelly polish — the kind that lets your natural nail show through like frosted glass. No art, no tips, no decoration. Just a soft, milky veil over the nail that makes your hands look clean, healthy, and sun-kissed. It is the least “done” design in this list, and on a beach that is exactly the point.
Sheer milky white works because it behaves like a tint rather than a colour. It evens out the nail, hides small ridges, and gives the hands a polished look without looking polished. It is also the most forgiving design here: no lines to smudge, no art to chip, and if a nail does chip, a single coat fixes it invisibly. Bring the bottle in your beach bag and you will never worry about your nails again.
Additional Information: The secret to sheer milky white is thin coats. One thick coat goes cloudy and uneven; two thin ones build a smooth, glassy veil. If your nails are stained or uneven in tone, a ridge-filling base coat underneath makes all the difference. This is also the best design in the list for brides who bite their nails or have very short nails — the sheerness flatters short nails beautifully.
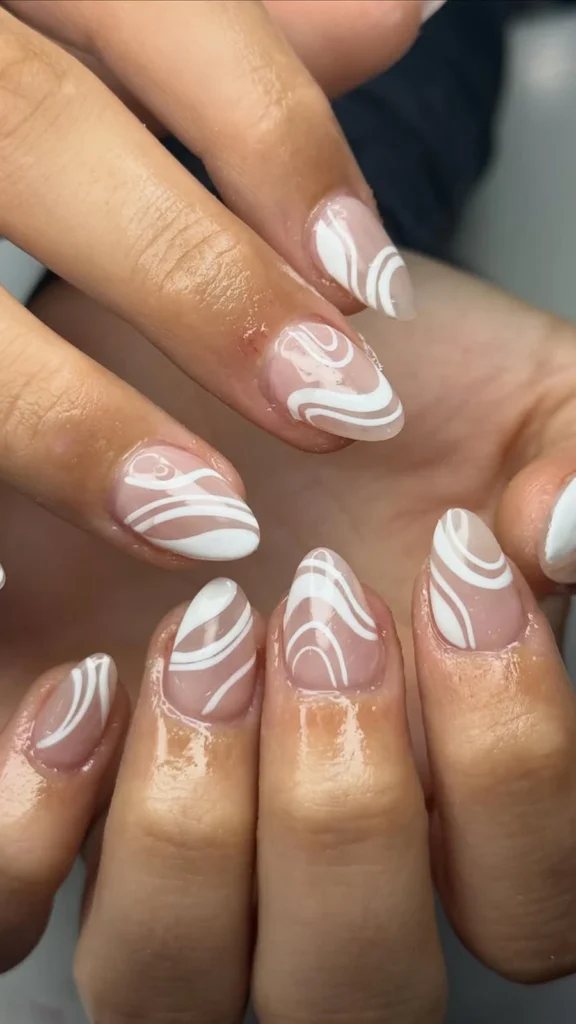
12. White Wave Swirls
White swirls on a sheer nude base, painted like the lines the tide leaves on sand. Each nail gets its own abstract wave — a curve here, a loop there, a line that wanders off the edge — so the set looks like ten small drawings of the sea. It is playful, it is modern, and it is the only design in this list that actually looks better a little bit messy.
The swirls should be painted with a thin brush and a light hand. The white should be opaque enough to read clearly against the nude base, but the lines should be fine — thick swirls look like a child’s drawing, thin ones look like art. Keep the base sheer and the finish glossy, and let the swirls be different on every nail. Symmetry is the enemy here; the sea is not symmetrical, and neither are these.
Additional Information: Wave swirls are a lovely choice for a beach or coastal wedding, and they are one of the most DIY-friendly designs in this list — a wobbly line is not a mistake, it is the style. If you are nervous, practice the swirl on a piece of paper first; three minutes of practice is all it takes to find the rhythm.
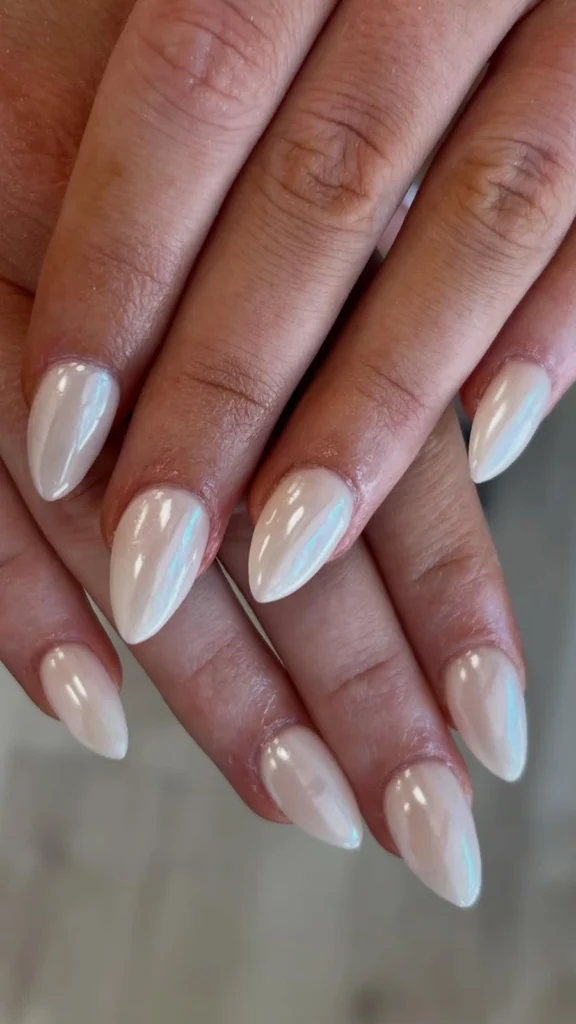
13. Seashell Pearl Chrome
A milky white base with a pearl chrome powder buffed over the top — the glazed, iridescent finish that catches pink, blue, and gold as your hands move, like the inside of a shell. It is the most luminous design in this list, and in beach sunlight it is genuinely magical. Your nails look less painted and more lit from within.
Chrome needs a smooth base to work, so prep matters: buffed nails, a flawless coat of milky white, then the chrome powder, then a top coat to seal it. Done well, the finish is mirror-smooth and the colour shifts as you turn your hands. Done badly — over a lumpy base, or with too much powder — it looks dusty. This is a salon job, and it is worth the appointment. It also photographs beautifully at golden hour, when the low sun makes the iridescence glow.
Additional Information: Pearl chrome is the design to choose if your wedding is outdoors in strong light, because the finish was made for sunlight. It is less suited to a dark church ceremony, where the iridescence can read as grey. If you want the chrome look with more staying power, get it in gel — a regular-polish chrome can dull after a day or two.
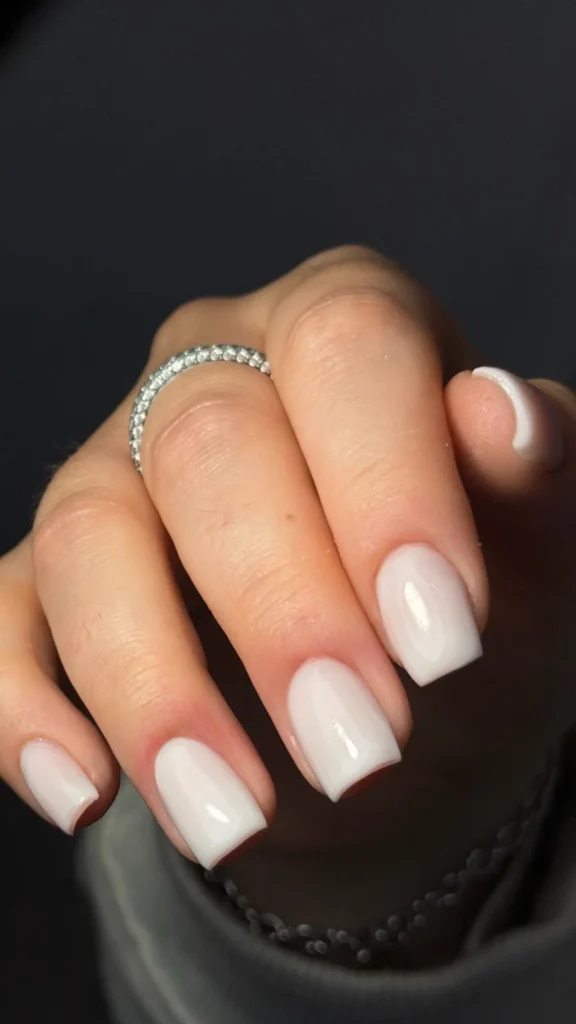
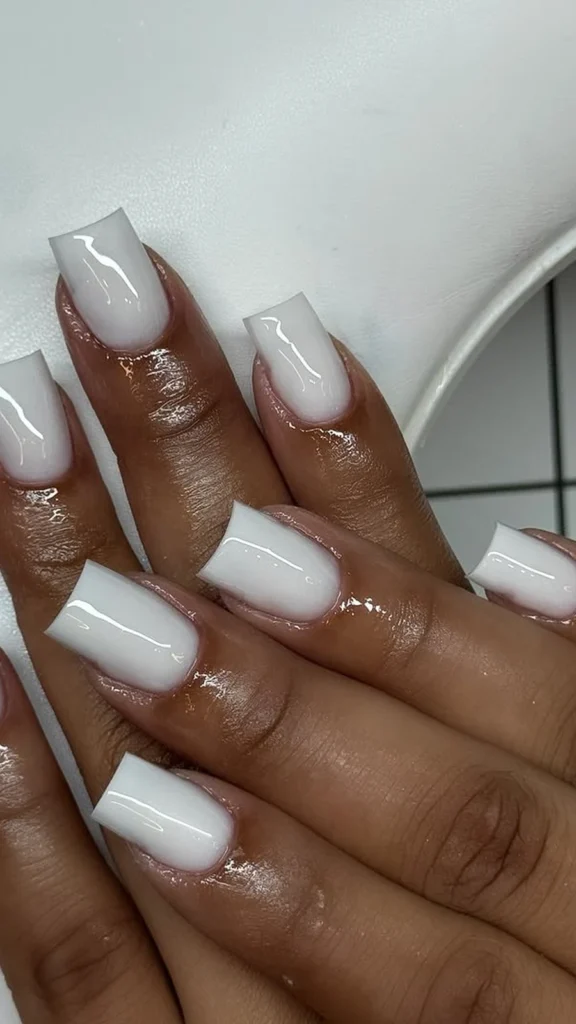
14. Short, Clean and White
Short square nails, solid white, glossy, perfectly shaped. No art, no shimmer, no apology. This is the manicure for the bride who does not want to think about her nails at all — who wants them clean, bright, and out of the way while she dances barefoot on the sand and eats with her hands.
Short white nails work on a beach because they are practical. They do not catch on fabric, they do not chip on shells, and they look just as good on day three of the honeymoon as they did on the wedding day. The key is the shape: file them straight across with softly rounded corners, keep them all the same length, and use a white that is bright but not blue — a clean, true white. Two coats, a glossy top coat, and you are done. It is the shortest appointment in this list and one of the most photogenic.
Additional Information: Solid white on short nails is the best option for brides who work with their hands or who are not used to long nails — there is nothing to break and nothing to get used to. If solid white feels too stark, one coat of a milky white over a white base softens it without losing the brightness.
City Hall and the Intimate Wedding
Small weddings have their own kind of elegance. No ballroom, no three hundred guests — just the people who matter, a beautiful dress, and a morning that feels like yours. The nails should match that feeling: quiet, modern, and a little bit cool. These four are for the bride who eloped, or who kept it to twenty people and a really good lunch.
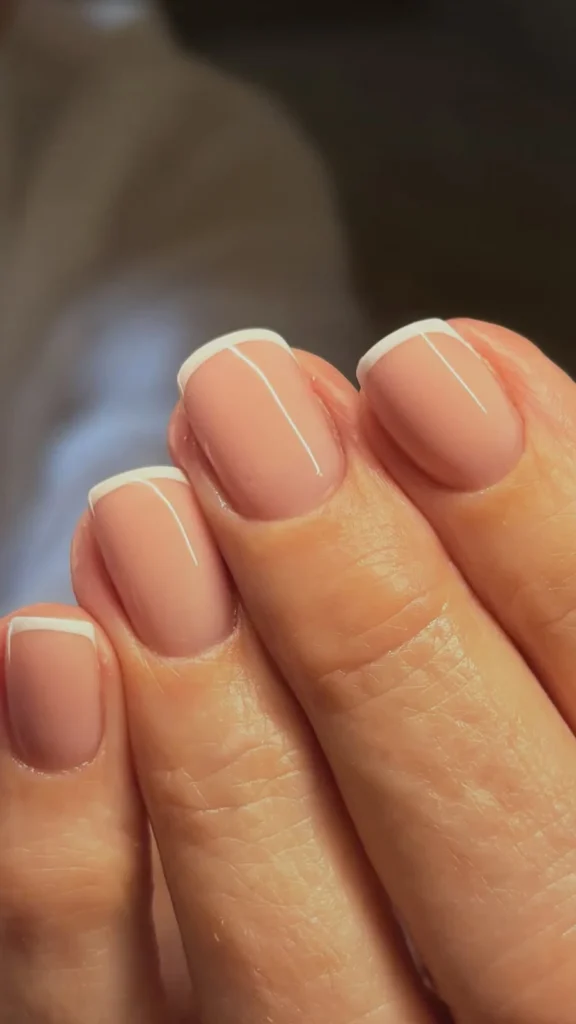
15. The Micro French
The French manicure, shrunk down to its smallest possible self. A sheer nude base and a white tip so thin it is barely a line — a millimetre or two, painted with the finest brush in the kit. From across the room, your nails look bare. Up close, there is a crisp white edge that makes the whole hand look finished. It is the most understated design in this list, and the most modern.
The micro French suits short nails beautifully, because the thin tip does not eat up the nail bed the way a traditional French can. It also suits a bride who does not usually wear nail polish — it feels like nothing, it looks like everything, and it will not clash with a single thing you are wearing. If you are doing your own nails for a city hall wedding, this is the one to attempt: the line is so thin that a small wobble is invisible.
Additional Information: A micro French is all about the brush. Use the thinnest nail art brush you can find, load it with very little polish, and paint the tip in one light stroke. If the line comes out too thick, wipe it off and try again — a micro tip takes seconds to redo, which is why it is so forgiving.
16. White Half-Moons
Negative space, done properly. A sheer nude base, and a clean half-moon of bare nail left at each cuticle, with the rest of the nail painted in a soft white. The unpainted crescent makes the nail look longer, the white looks brighter by contrast, and the whole design feels like something from a 1920s photograph — vintage, graphic, and a little bit clever.
Half-moons are one of the oldest nail designs there is, and they suit an intimate wedding precisely because they feel considered rather than decorated. The trick is the curve: it should follow the natural shape of your cuticle, neat and even, not a perfect semicircle stamped on top. A reinforcement sticker — the kind used for ring binders — makes a surprisingly good guide if you are doing it yourself. Stick it on, paint above it, peel it off, and you have a perfect half-moon.
Additional Information: White half-moons grow out more gracefully than almost any design in this list, because the bare crescent at the cuticle means regrowth is nearly invisible. That makes them a smart choice if the wedding is followed by a long honeymoon and you will not see a salon for two weeks.
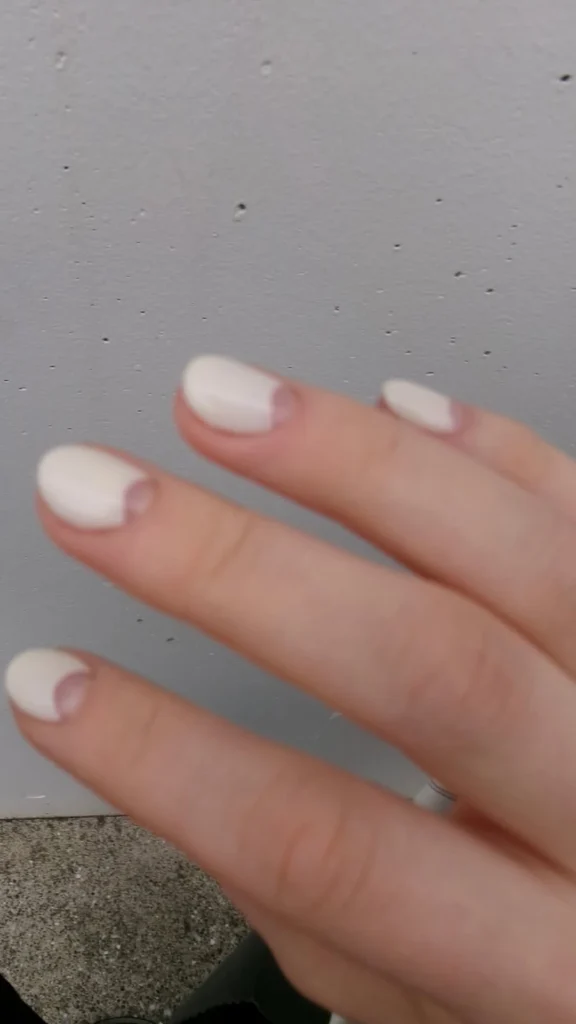
17. Barely-There Milky Sheer
One coat of a milky sheer polish. That is the entire design. Your natural nail, slightly evened out, slightly brightened, with the faintest wash of white — the nail equivalent of a tinted moisturiser. It is for the bride who does not wear nail polish, does not want to start now, and still wants her hands to look their best in the photographs.
This is the quietest manicure in this list, and it is not a compromise. A good sheer milky polish makes the nail bed look healthy and even, hides small imperfections, and gives the hands a finished look without any colour at all. It suits every dress, every venue, and every skin tone, and it is the only design here that a complete beginner can do perfectly on the first try. It is also the kindest option for nails that are short, bitten, or recovering from acrylics.
Additional Information: With a sheer polish, the prep is the manicure. File, buff, push back the cuticles, moisturise — then one thin coat of the milky sheer and a glossy top coat. If your nails are very short, this is the best choice in the list: opaque colours can make short nails look stubby, while a sheer wash makes them look longer.
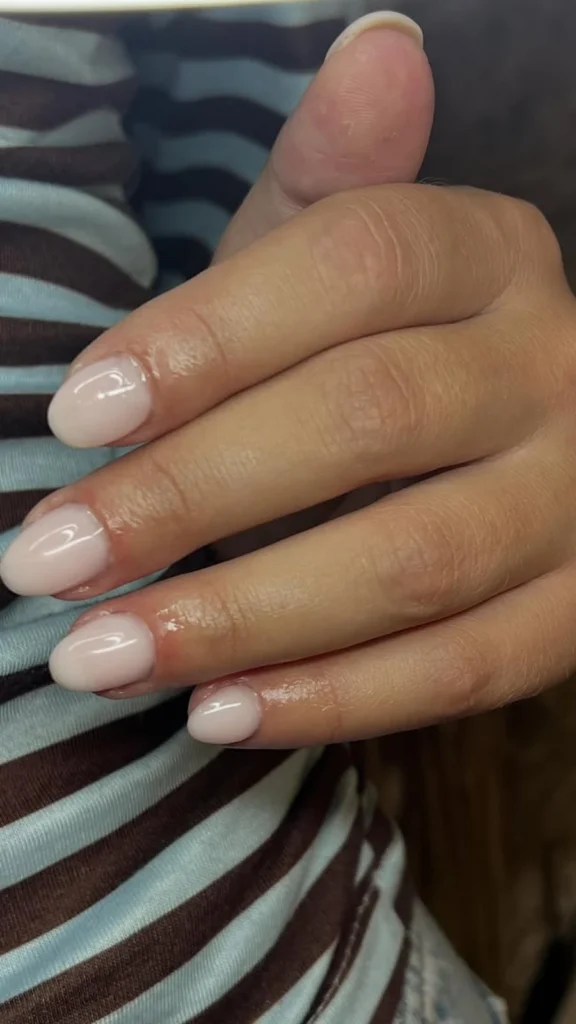
18. One Tiny Dot
A sheer nude base, and a single tiny white dot on each nail — placed just above the cuticle, or dead centre, or at the very tip, wherever your artist likes it. Ten dots, ten nails, nothing else. It is minimalism taken seriously, and it is unexpectedly charming: the dots read as deliberate, like punctuation, and they give the camera something small and perfect to find.
The dot should be small — the head of a pin, not a pea — and it should be white, not cream, so it reads clearly against the sheer base. A dotting tool makes it effortless, and the placement can vary from nail to nail if you like: a dot at the cuticle on some nails, a dot at the tip on others. It is the design for the bride who loves modern art, or who simply likes the idea that her manicure has exactly one idea in it, executed perfectly.
Additional Information: One tiny dot is the easiest design in this list to do at home, and the easiest to fix — a dot that goes wrong wipes off in a second. It is also a lovely choice for bridesmaids, because ten matching dots across five different hands still look like a set without being identical.
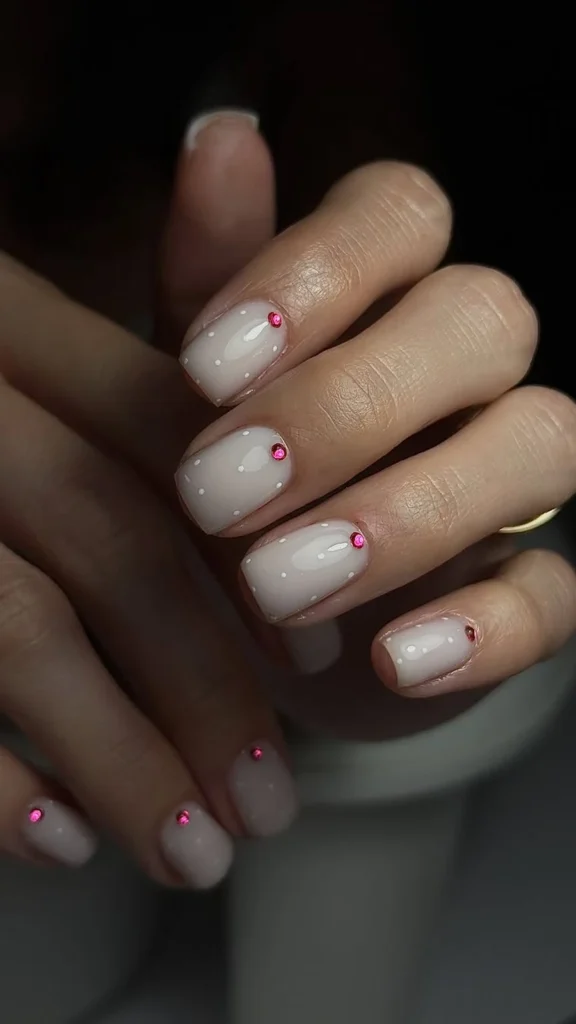
The Reception and the After-Party
The ceremony is over, the shoes are off, and the lights are low. Reception nails can be a little bolder than ceremony nails — a little more sparkle, a little more shine, a little more fun. These four are for the part of the day when nobody is sitting still.
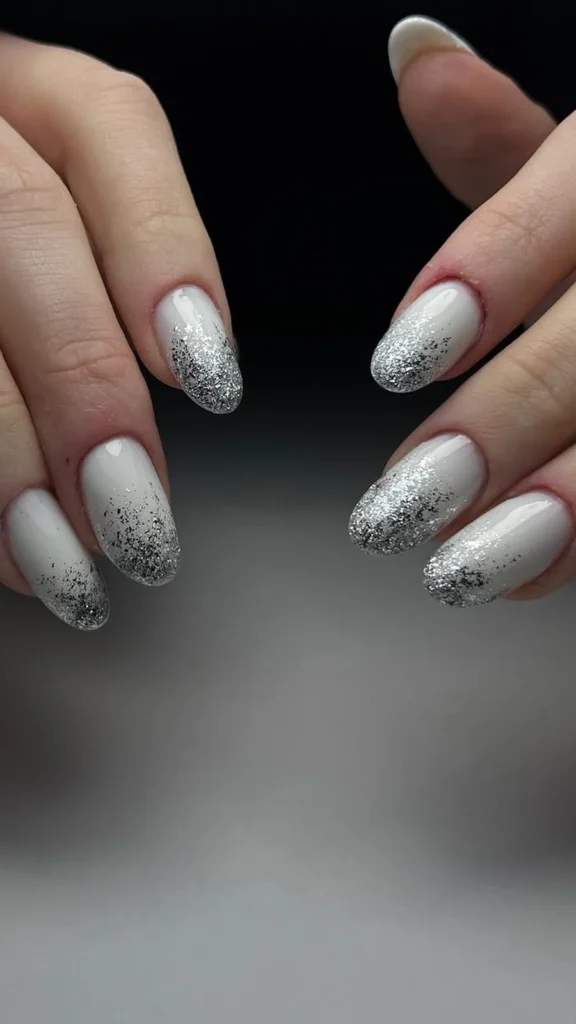
19. Silver Glitter Fade
A milky white base that fades into dense silver glitter at the tips — like the nails caught the light from the disco ball and kept it. The glitter is heaviest at the free edge and thins out as it travels down the nail, so the fade looks soft and deliberate rather than dipped. It is the most glamorous design in this list, and it was made for evening light.
Glitter fades photograph beautifully after dark, which is exactly when the reception happens. The trick is the gradient: the glitter should be packed at the tip and sparse by the middle of the nail, with no hard line where it stops. A sponge is the easiest way to get that fade — dab the glitter on in thin layers, building it up at the tip, and seal it with two coats of top coat so the glitter feels smooth rather than gritty. Keep the base milky rather than sheer, or the glitter will overwhelm the nail.
Additional Information: A glitter fade is the hardest design in this list to remove, so plan for it — soak-off is the way, not peeling. If you are wearing gel, your salon will take it off in ten minutes. If you are wearing regular polish, a foil wrap with remover for five minutes does the job. Do not pick at it on the honeymoon; you will take layers of nail with it.
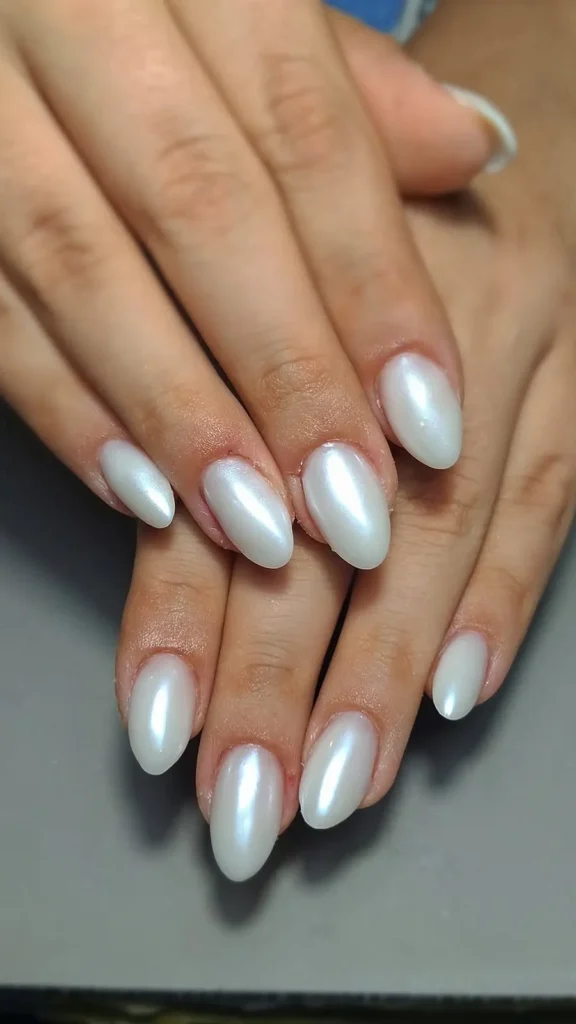
20. Glazed White Chrome
The glazed donut look, in bridal white. A solid white base with a chrome powder buffed over it until the nail looks like glazed ceramic — smooth, reflective, faintly iridescent, catching the light from every angle. It is the most modern design in this list, and the one your younger cousins will ask about first.
Glazed chrome works on white because white is the most reflective base there is. The chrome does not change the colour so much as it changes the light: the nail looks lit from inside, and in photographs it has a soft glow that no flat polish can match. Keep the base a clean, bright white rather than ivory — ivory under chrome reads as cream, while bright white under chrome reads as light itself. This is a salon job, and it is worth every minute of the appointment.
Additional Information: Glazed chrome is the design most likely to chip at the free edge, because the chrome layer sits on top of the polish rather than in it. Ask your technician to cap the free edge carefully with top coat, and carry a small bottle of the white base polish in your clutch — a chip in a chrome manicure shows as a dull spot, and a dab of white underneath it is invisible from any normal distance.
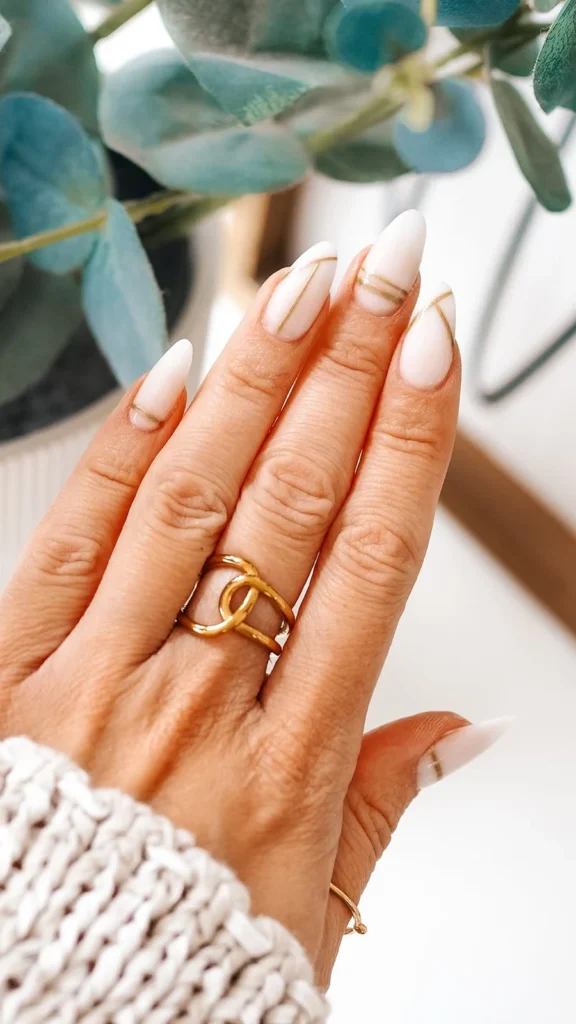
21. White with a Fine Gold Line
A sheer white base, and a single fine line of gold running down the centre of each nail — or along the edge of the tip, or in a thin arc above the cuticle. One line, no more. It is the smallest amount of gold you can wear and still call it gold, and it is exactly enough to make a plain white manicure feel like it belongs at a wedding with gold in the room.
The line should be thin and confident, painted with a striping brush or laid down as gold foil tape. It should be the same on every nail, because this design is about precision rather than playfulness. It works on any length, but it is especially beautiful on long almond nails, where the line has room to run. If your rings are gold, this is your design — the nails and the jewellery will look like they were planned together, which, of course, they were.
Additional Information: A fine gold line is one of the easiest “fancy” designs to do at home, because gold striping tape does the work for you — lay it down, seal it with top coat, and it stays put for days. If you are painting the line freehand, rest your elbow on the table and your painting hand on your other hand; a supported hand draws a steadier line than a floating one.
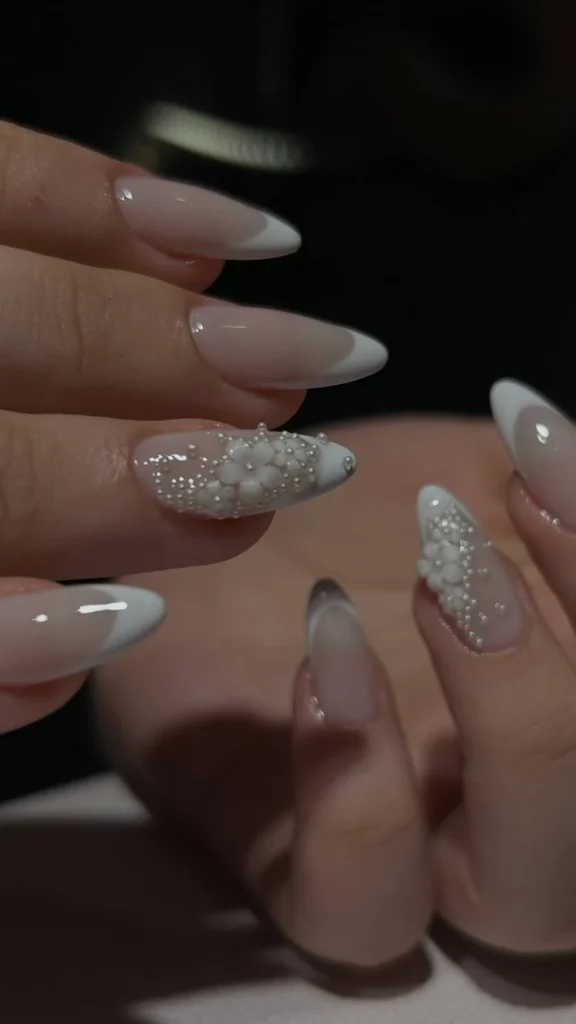
22. The One Statement Nail
Twenty-one of your nails are quiet. One is not. A sheer white base on nine nails, and on each ring finger — or just one — a single ornate accent: a cluster of tiny pearls, a hand-painted white flower, a lace motif, a small crystal. It is the manicure equivalent of a statement earring: one bold thing, everything else stepping back to let it shine.
The statement nail works because of the contrast. The plain nails make the decorated one look intentional rather than busy, and the decorated one makes the plain nails look like a choice rather than a default. Keep the accent to the ring finger, where the wedding ring will sit beside it, and keep the decoration white-on-white — pearls, lace, crystals in clear or white — so it reads as bridal rather than party. This is the design for the bride who wants one moment of drama and twenty-one moments of calm.
Additional Information: A statement nail is the easiest design in this list to personalise. A pearl cluster for a classic bride, a tiny crystal for a glamorous one, a hand-painted flower for a garden wedding — the accent can be anything, as long as it is one thing. Ask your artist to secure any three-dimensional decoration with builder gel rather than top coat, or it will not survive the bouquet toss.
Keeping Them Perfect Until the Last Dance
A wedding manicure has to survive a very long day. A few things that actually help: cuticle oil, twice. Once in the morning, once before the reception — it keeps the skin around the nails from looking dry in close-up photos. Top coat in your clutch, with a small bottle of your base colour if you wore a solid shade. A chip at the reception is a thirty-second fix if you have the bottle, and a disaster if you do not. Gloves for the bouquet, if it has thorns — one scratch across a fresh manicure is all it takes. And no hand sanitiser straight onto the nails; it dulls top coat faster than anything else. Wash with soap and water instead, and reapply top coat after.
If you are wearing gel, do not pick at it on the honeymoon, no matter how tempting it is. Peeling gel takes layers of your natural nail with it, and you will feel it for weeks. Book a removal for the week you get home, and let your nails recover with a week of cuticle oil and no polish at all.
Frequently Asked Questions
How far in advance should I get my wedding nails done?
Three days before the wedding is ideal. It gives the manicure time to settle, gives you time to fix anything that bothers you, and is close enough to the day that the polish still looks fresh. Two days is fine too. The day before is risky — if something goes wrong, there is no time to redo it.
Gel or regular polish for a wedding?
Gel if you want it to last through the honeymoon without chipping, and if you are comfortable with a salon removal afterwards. Regular polish if you want to be able to fix a chip yourself, or if your nails are weak and you would rather not have gel removed. Either one looks beautiful on the day; the difference is what happens after it.
What white nail colour suits my skin tone?
Sheer and milky whites suit everyone. If your skin is fair, avoid stark opaque white, which can look chalky — go milky or sheer instead. If your skin is medium or olive, warm ivory and pearl whites glow beautifully. If your skin is deep, white nails look stunning, and a glossy finish with a warm or pearl undertone looks richer than a flat matte.
Should my nails match my dress exactly?
No — they should harmonise with it, not match it. An ivory dress with ivory nails looks considered; a bright white dress with bright white nails looks considered. But a bright white manicure next to an ivory dress makes the dress look yellow, and an ivory manicure next to a bright white dress makes the nails look dirty. Match the undertone, not the exact shade.
Can bridesmaids wear white nails too?
Yes, and they often do — but keep the bridesmaids’ designs simpler than the bride’s. A sheer milky white, a micro French, or a single dot are all lovely for bridesmaids. Save the pearls, the lace, and the statement nail for the bride. The photographs will thank you.
How do I make white polish last longer?
Start with clean, dry nails and a good base coat. Apply thin coats and let each one dry properly. Cap the free edge — paint a little polish over the very tip of the nail — with every coat, including top coat. Reapply top coat every two days. And wear gloves for washing up; hot water and detergent are the fastest way to kill a manicure.
The Last Word
Here is what nobody tells you about wedding nails: nobody will remember them, and that is the point. Nobody remembers a manicure that worked. They remember the dress, the flowers, the first dance, the way you looked when you walked in. Your nails are there to make all of that look finished — to be the quiet detail that holds the whole picture together without ever asking to be looked at.
So pick the design that sounds like your day. The ballroom bride, the garden bride, the beach bride, the city hall bride, the one who is going to dance until the lights come on — there is a white here for each of you. Show it to your nail artist, book the trial, and then stop worrying about it. Your hands have a wonderful day ahead of them. Let them enjoy it.
Leave a Reply